DIY Pallet Garden Planter: How I Built One and What I’d Do Differently
A DIY pallet garden planter is one of those projects that looks almost too easy. Grab an old pallet, add some soil, plant a few vegetables, and boom, you have a garden. Well… sort of. I learned pretty quick that there are a few things you really need to think about first.
I’ve been messing around with backyard gardening and homesteading for more than 10 years. I’ve built garden beds from old boards, buckets, tires, bricks, and probably a few things my wife wishes I hadn’t dragged home.
The pallet planter was one of my cheaper projects, and I still like it today. It’s great when you don’t have much space, especially for an urban backyard, patio, porch, or small homestead.
But I also made some dumb mistakes with my first one.
So lemme show you exactly how I built mine, what I planted, what went wrong, and how I’d build a DIY pallet garden planter now.
Why I Started Using Pallets for Gardening
My backyard isn’t huge. It never was.
When I first started growing food, I wanted more garden space without digging up every inch of the yard. My first thought was another raised bed. Then I looked at the price of lumber.
Yeah… no.
Here’s the funny part. I was standing outside looking at an empty pallet behind a local store and thinking, “That thing could hold tomatoes.” My wife looked at me like I had completely lost it.
A few months later, she was picking lettuce from it.
That’s what I like about pallet gardening. You can reuse something that might otherwise become trash and turn it into useful growing space.
It also works well for people who rent a home or apartment because you don’t have to permanently change the ground.
First, Make Sure the Pallet Is Safe
This is the part I wouldn’t skip.
Not every old pallet belongs in your vegetable garden.
Before you bring one home, look for markings stamped into the wood. I prefer pallets that are clearly marked HT, meaning heat treated. I avoid pallets with unknown treatment, chemical odors, oil stains, heavy contamination, or questionable history.
If you don’t know where the pallet came from, honestly, I’d leave it there.
Important: Don’t assume every free pallet is safe for growing food. Avoid pallets that are visibly stained, chemically contaminated, painted with unknown products, or marked with treatment codes you don’t understand. When in doubt, use a new untreated planter instead.
I also give the pallet a good inspection for loose nails, broken boards, mold, and sharp edges.
Trust me, stepping on a rusty nail while carrying a bag of compost is not the kind of homesteading adventure you want.
What You Need for a DIY Pallet Garden Planter
You don’t need a fancy workshop for this project.
Here’s what I use:
- One clean, suitable wooden pallet
- Landscape fabric or another suitable garden fabric
- A staple gun and staples
- Potting soil or a quality container mix
- Compost
- Small garden plants or seeds
- Hand saw, drill, or basic tools if modifications are needed
- Gloves
- Watering can or garden hose
You can keep it really simple. I’ve built pallet planters without doing much cutting at all.
How I Built My DIY Pallet Garden Planter
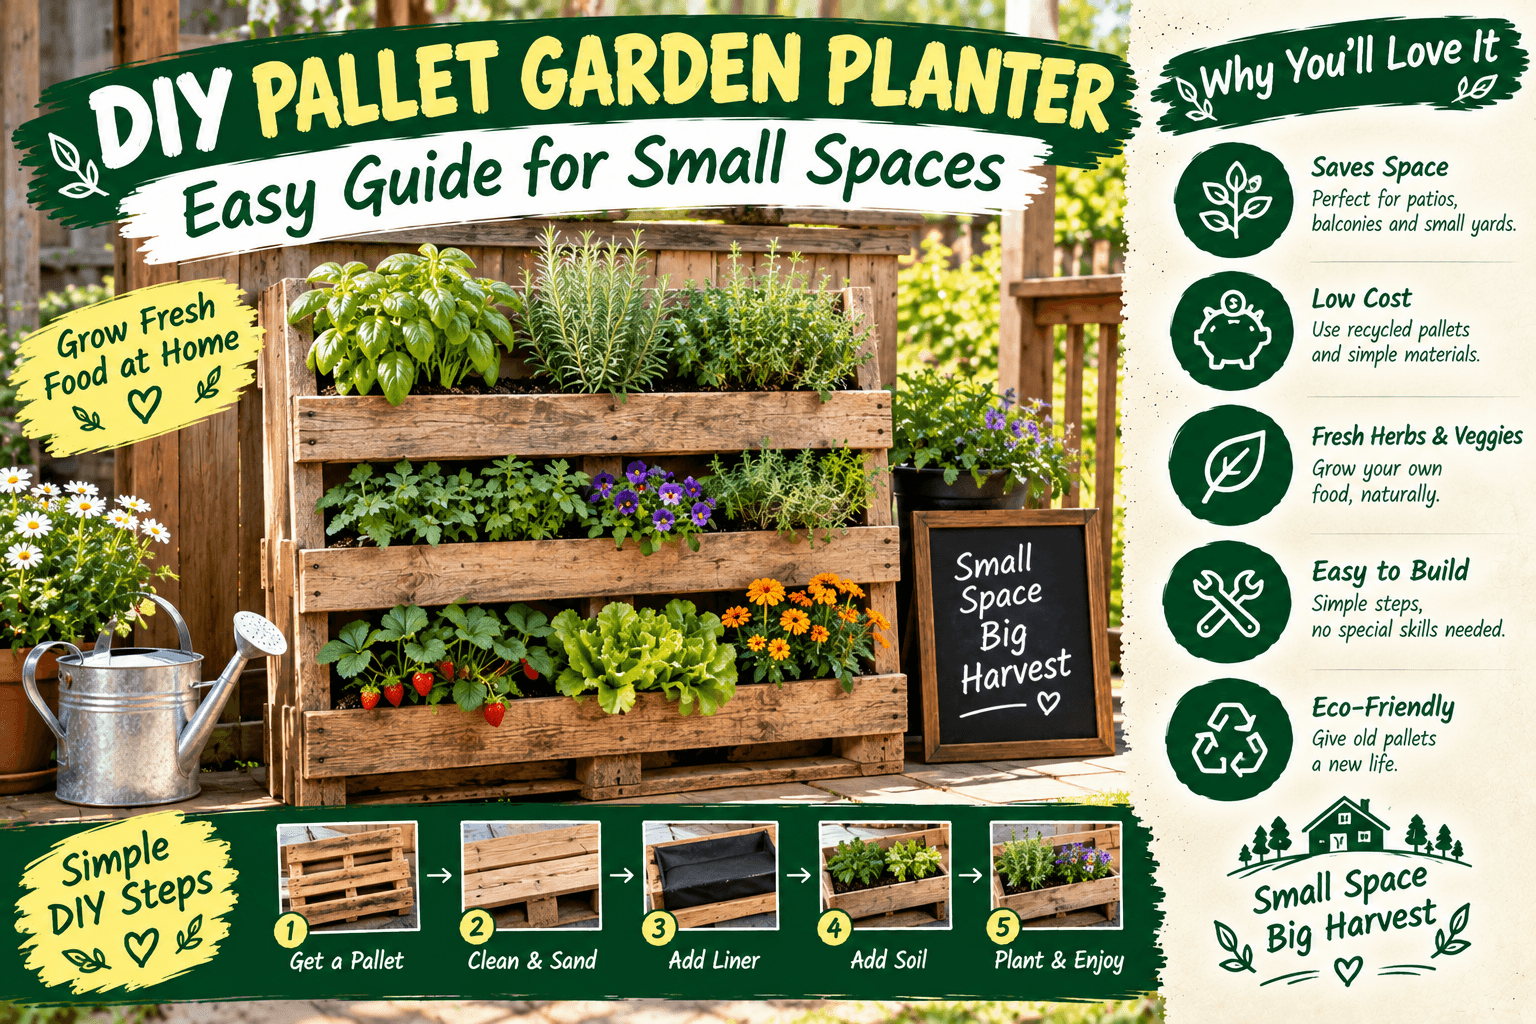
1. Clean and inspect the pallet
Start by brushing off dirt and checking every board.
I use a stiff brush to knock off loose dirt and cobwebs. If the pallet is damaged, cracked badly, or smells strange, I don’t use it.
Give yourself a few minutes here. It saves trouble later.
2. Decide which side will face up
Lay the pallet flat and look at the gaps between the boards.
Those gaps are actually useful. They help divide your planting areas, but you need to stop your soil from falling straight through.
3. Attach garden fabric
This is where my first pallet planter got a little ugly.
I originally used a thin piece of fabric that I found in my shed. Big mistake. After watering it several times, soil started spilling out everywhere.
Now I use a stronger garden fabric and staple it securely to the back and sides of the planting sections.
Pull the fabric reasonably tight, but don’t stretch it so much that it tears.
4. Fill it with soil
I like using a container-style soil mix rather than heavy garden soil.
My basic mix is quality potting soil combined with compost. The goal is a loose mix that drains well but still holds enough moisture for vegetables and herbs.
Don’t fill the pallet completely to the top. Leave a little room so watering doesn’t send soil washing over the edge.
5. Let the soil settle
Here’s a little trick I learned after making a mess.
Water the soil before planting.
The mix will settle, and you can add a little more if needed. If you plant first and then water heavily, some pockets can sink and leave your plants sitting lower than you expected.
What Can You Grow in a Pallet Planter?
This is where pallet gardening gets fun.
I wouldn’t try to grow a giant pumpkin in one. That’s asking for trouble.
Instead, I use pallet planters for plants that don’t need huge root systems.
- Lettuce
- Spinach
- Radishes
- Green onions
- Parsley
- Cilantro
- Thyme
- Oregano
- Strawberries
- Small flowers that attract pollinators
Herbs are especially nice because you can keep the planter close to your kitchen.
I’ve also used pallet planters for salad greens. That’s probably my favorite use because you can pick a few leaves for lunch without walking out to the big vegetable garden.
My Favorite Pallet Garden Combination
If you’re just starting, don’t try to grow 15 different things in one planter.
I learned that lesson the hard way.
For one pallet, I’d rather grow a simple combination like lettuce, radishes, parsley, and green onions.
My simple rule: Put plants with similar watering and sunlight needs together. It makes your life much easier.
For example, if one plant wants dry soil while another wants constant moisture, they probably don’t belong in the same small planter.
Where Should You Put a Pallet Planter?
Before filling it with soil, figure out where it’s going.
I know that sounds obvious, but once you add wet soil, the thing gets heavy.
Very heavy.
My first pallet planter was sitting in the wrong place, and moving it after filling it was a workout I didn’t ask for.
Look for a location with enough sunlight for the plants you want to grow. Many vegetables need several hours of direct sunlight, while some leafy greens can handle less.
A balcony, patio, fence area, porch, or sunny backyard corner can work.
Just make sure the surface can handle the weight and that excess water can drain away.
Do You Need to Stand the Pallet Upright?
You can, but you don’t have to.
A horizontal pallet is easier for beginners. It behaves more like a shallow raised garden bed.
An upright pallet garden saves floor space, but watering can become more annoying. Gravity pulls water down, so the plants at the bottom may stay wetter than the ones at the top.
If you go vertical, pay attention to watering and choose plants that don’t mind the arrangement.
One Mistake I Made With Watering
You’re gonna laugh at this.
I used to water my pallet planter like I was trying to put out a fire.
The water came flying out the other side, carrying soil with it. I ended up with a little muddy pile underneath the pallet.
Now I water slowly.
I let the water soak in instead of blasting the plants with the hose.
If the soil is very dry, I water once, wait a few minutes, and water again. That works much better.
How I Keep a Pallet Planter Healthy
A small planter can dry out faster than a garden bed, especially during hot weather.
So I check mine more often.
Stick your finger into the soil. If the top inch or so feels dry, check the plant and decide if it needs water.
Don’t just water because it’s Tuesday.
Plants don’t care what day it is.
I also watch for weeds, pests, yellow leaves, and plants that look crowded.
Because the growing space is limited, harvesting regularly helps keep the planter productive.
Can You Use a Pallet Planter for Strawberries?
Yes, strawberries can work nicely in a pallet planter.
The gaps give the plants room to spread, and the fruit can stay above the ground.
Just remember that strawberries are perennial plants in many climates, so think about how you’ll protect them through winter if you want them to keep producing.
Also, don’t let the pallet dry out completely during hot weather. Strawberries have shallow roots and can suffer when moisture disappears quickly.
What I Would Do Differently Today
If I built my first DIY pallet garden planter again, I’d change a few things.
- I’d choose the location first. Moving a full pallet is no fun.
- I’d use stronger fabric. Cheap fabric caused me a mess.
- I’d start with herbs and greens. They’re easier for beginners.
- I’d inspect the pallet more carefully. Free doesn’t always mean useful.
- I’d add compost every season. Container soil needs regular attention.
- I’d avoid overcrowding. More plants doesn’t always mean more food.
That last one took me a while to understand.
I used to think every empty inch needed a plant. Nope. Sometimes giving five plants enough room produces more food than squeezing 15 plants into the same space.
Is a DIY Pallet Garden Planter Worth It?
For me, yes.
It’s cheap, simple, and useful. More importantly, it gives you another place to grow food without building a whole new garden.
It’s also a good beginner project. You don’t need a giant backyard or expensive raised beds to start growing something.
Just remember that pallets aren’t magic. They still need good soil, sunlight, water, drainage, and regular care.
DIY Pallet Garden Planter FAQ
Can I grow vegetables in a pallet planter?
Yes. Leafy greens, radishes, herbs, green onions, and strawberries are some of the easier choices. Pick plants that fit the shallow growing space.
How long does a pallet garden planter last?
It depends on the wood, weather, moisture, and how it’s built. An outdoor pallet will eventually break down. I look at mine regularly and replace it when the wood becomes weak or unsafe.
Can I put a pallet planter on concrete?
Yes, but make sure excess water can drain away. Also remember that a pallet filled with wet soil gets heavy, so check that the surface is suitable for the weight.
Is every wooden pallet safe for growing food?
No. I’m careful about this. Use pallets with a known history and appropriate markings, and avoid damaged, stained, chemically contaminated, or unknown pallets. If you’re unsure, a new untreated planter is the safer choice.
My Final Tip Before You Build One
Don’t overthink this project.
My first garden was far from perfect. The boards weren’t pretty, the soil spilled out, and I planted way too much stuff in a small space. But I learned from it, and that planter still helped me grow food.
That’s really what I like about homesteading. You don’t need everything perfect before you start.
Find a suitable pallet, check that it’s appropriate for gardening, build it safely, add good soil, and plant a few things you actually like eating.
Got a weird pallet gardening question? Leave a comment and tell me what you’re thinking about building. I’ve probably messed something up before, so there’s a decent chance I can help.
And if you’re looking for a cheap way to grow more food in a small backyard, patio, or urban space, give a DIY pallet garden planter a try. Start small, keep it simple, and learn as you go. That’s how I’ve done most of my homesteading projects anyway.