
The first time I tried DIY rainwater harvesting, I thought it was going to be one of those easy weekend projects.
Put a barrel under the gutter.
Catch some rain.
Water the garden.
Done.
Well… not exactly.
The first rainstorm filled my barrel faster than I expected, and the overflow ran straight into the garden bed. I thought I’d done a great job until I realized the soil around the barrel was basically turning into a little swamp.
Then I made another mistake.
I didn’t clean the gutter before collecting the water.
Let’s just say the first batch contained leaves, dirt, bugs, and something that looked suspiciously like a small twig.
That’s when I started learning how rainwater harvesting really works.
You don’t need an expensive system or a huge tank to get started. Even a small backyard garden can benefit from collecting rainwater, especially during dry periods.
But there are a few things I wish I’d known before putting my first barrel under the downspout.
So let me show you how I approach DIY rainwater harvesting now, what I’d do differently, and how you can build a simple system without making the same mistakes I did.
Why I Started Collecting Rainwater
Watering a garden can use more water than you realize.
During summer, I can stand outside with a hose and think I’m only watering for a few minutes.
Do that every day for weeks and it adds up.
I started looking at the roof differently.
Every time it rained, thousands of gallons of water were running off the roof, through the gutters, and away from the property.
I thought, “Why am I letting all that water leave when I could use some of it in the garden?”
That was really the beginning.
Rainwater harvesting fit nicely with the way I was already trying to garden.
Less waste.
More self-sufficiency.
Better use of what I already had.
And honestly, watching a rain barrel fill up during a storm is strangely satisfying.
What Is DIY Rainwater Harvesting?
The idea is pretty simple.
You collect rainwater from a surface, usually a roof, and direct it into a container for later use.
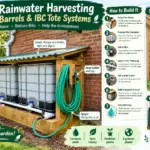
A basic system looks something like this:
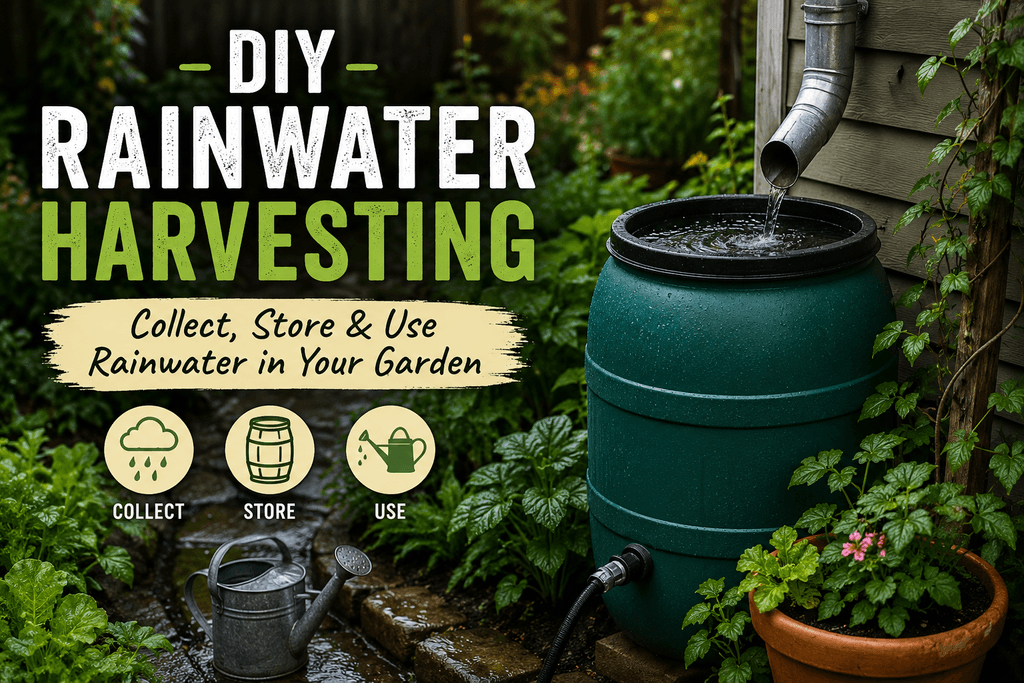
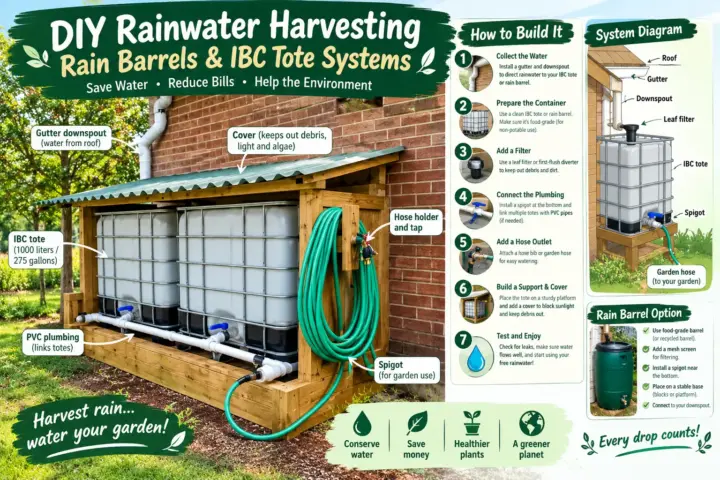
Roof → Gutter → Downspout → Filter/Screen → Storage Barrel → Garden
That’s it.
You can make the system very simple or build something much larger with multiple tanks, pumps, filters, and irrigation lines.
For a backyard garden, I prefer starting small.
You can always expand later.
I learned that with several homesteading projects.
Start too big and you end up spending money before you even know whether you actually like the system.
Start small.
Learn.
Then improve it.
How Much Rainwater Can You Collect?
This surprised me.
Even a relatively small amount of rainfall can produce a lot of water from a roof.
A rough way to estimate potential collection is:
Rainfall × roof catchment area × collection efficiency
For example, 1 inch of rain falling on 1,000 square feet of roof represents roughly 623 gallons of water before accounting for losses.
That’s a lot of water from one storm.
Of course, you won’t collect every drop.
Some water is lost through splashing, evaporation, overflow, leaks, and the way your gutters are designed.
Still, the amount can be impressive.
That’s why I stopped thinking of rainwater as just “free water.”
It’s actually a resource that needs to be managed.
Start With Your Gutters
If you’re collecting rainwater from your roof, the gutters are where everything begins.
And if your gutters are full of leaves, you’re going to collect those leaves too.
Ask me how I know.
Before the rainy season, I like checking:
- Gutters
- Downspouts
- Connections
- Leaks
- Screens
- Debris
- Overflow areas
A clogged gutter doesn’t just reduce your collection.
It can also send water where you don’t want it.
That’s especially important around foundations, garden beds, walkways, and patios.
Add a Screen Before the Barrel
You don’t need to let every leaf and bug go into your storage container.
A simple mesh screen can catch larger debris before it reaches the barrel.
This makes maintenance much easier.
I’ve found that preventing debris from entering the barrel is much better than trying to clean a disgusting barrel later.
Keep the screen clean too.
A blocked screen can slow or stop the water from entering the storage tank.
What About a First-Flush Diverter?
This is one of the upgrades I recommend if you’re collecting from a roof.
The first water coming off a roof can carry dust, dirt, bird droppings, leaves, and other debris that have accumulated between rainstorms.
A first-flush system is designed to divert some of that initial runoff away from the storage tank.
You don’t necessarily need an expensive setup.
There are DIY versions that use PVC pipe and basic plumbing parts.
But make sure whatever system you build is appropriate for your local conditions and installed securely.
I think of the first flush as giving the roof a little rinse before I start collecting the water I actually want.
Choosing a Rain Barrel
You don’t need anything fancy.
A good rain barrel should be:
- Durable
- Opaque or protected from sunlight
- Designed for water storage
- Covered securely
- Easy to clean
- Stable when full
- Equipped with a suitable outlet or spigot
And here’s something important.
Don’t use an old barrel that previously held chemicals.
I know people love finding free containers.
I’m cheap too.
But if you don’t know what was stored inside a container, don’t use it for collecting water.
Especially not for anything that could contact food crops.
Food-grade or purpose-built water containers are a much safer choice.
Put the Barrel on a Strong Base
This was another lesson I learned.
Water is heavy.
A lot heavier than that cute little rain barrel makes you think.
One gallon of water weighs about 8.34 pounds.
So a 50-gallon barrel can weigh more than 400 pounds when full, before you even count the barrel itself.
Don’t put that on a flimsy wooden platform.
Make sure the base is level, stable, and capable of supporting the full weight.
I prefer a solid, stable surface rather than trying to balance a full barrel on something questionable.
The last thing you want is hundreds of pounds of water tipping over.
Where Should You Put the Rain Barrel?
Put it close to a downspout whenever possible.
That keeps the plumbing simple.
I also think about where the overflow will go.
This is something I completely ignored during my first setup.
When the barrel fills, the water has to go somewhere.
Don’t let overflow pour directly against your house foundation.
Instead, direct it toward an appropriate drainage area, garden bed, rain garden, or other location where the extra water can safely soak into the ground.
That’s where rainwater harvesting starts becoming part of a bigger water management system.
Connect the Downspout to the Barrel
There are several ways to do this.
You can use a commercial rain barrel diverter, modify the downspout, or build a suitable connection with plumbing components.
Whatever method you choose, make sure the connection is secure.
You don’t want water spraying everywhere during the first big storm.
And don’t forget that your system needs an overflow route.
A barrel without proper overflow management is just a future backyard flood.
Keep Mosquitoes Out
Standing water can become a mosquito breeding site.
So your rain barrel should be properly covered and screened.
I don’t leave open buckets of rainwater sitting around the property.
That’s asking for trouble.
Keep openings covered with fine mesh where appropriate, and inspect the system regularly.
If you notice standing water around the outside of the barrel, figure out why.
Maybe the barrel is overflowing.
Maybe the base isn’t level.
Maybe a connection is leaking.
Fix the problem instead of ignoring it.
How I Use Harvested Rainwater
For me, the main use is the garden.
Vegetable beds.
Container plants.
Trees and shrubs.
Flower beds.
Newly planted plants that need extra water.
A simple watering can works perfectly.
You can also connect a hose to a rain barrel if the barrel is elevated enough to provide some pressure, although the pressure from a basic barrel isn’t going to be anything like your household water system.
For larger gardens, you can use a pump to move stored rainwater into an irrigation system.
That’s a project for later.
I like starting with gravity and a watering can.
Sometimes simple is better.
Can You Use Rainwater on Vegetable Gardens?
This depends on the collection surface, local rules, and how the water is being used.
For garden irrigation, harvested rainwater can be useful, but roof surfaces can collect contaminants from dust, animals, roofing materials, and other sources.
That’s why I don’t treat collected rainwater as automatically clean.
For edible crops, especially crops eaten raw, I take the water source and collection system seriously.
I also avoid using questionable water on leafy vegetables right before harvest.
If you’re considering using rainwater for anything involving drinking or household water, that’s a completely different situation.
Don’t assume water that looks clean is safe to drink.
Can You Drink Harvested Rainwater?
This is where I draw a hard line.
I don’t drink untreated rainwater collected from my roof.
Rain may start relatively clean in the atmosphere, but once it hits a roof, gutter, storage tank, or other surface, it can pick up contaminants.
If you’re considering rainwater for drinking, cooking, brushing teeth, or other potable uses, you need a properly designed treatment system and should follow local public-health guidance.
A simple rain barrel is not a drinking-water purification system.
That’s an important distinction.
I’m all for self-sufficiency.
I’m not interested in getting sick to prove a point.
How I Keep My Rain Barrel Clean
I don’t wait until the barrel becomes disgusting.
Every so often, I check:
The screen
Is it blocked with leaves?
The lid
Is it secure?
The inside
Any buildup or sludge?
The outlet
Is water flowing properly?
The overflow
Is it directing water where I want it?
If the barrel needs cleaning, I empty it and clean it according to the manufacturer’s instructions.
Keeping the system maintained is much easier than trying to rescue it after months of neglect.
My Biggest Rainwater Harvesting Mistakes
I’ve made enough mistakes with this that I could probably write a whole second article.
Mistake #1: No Overflow Plan
Big mistake.
The first heavy storm taught me quickly.
Mistake #2: Putting the Barrel on a Weak Base
Water weighs a lot.
Build the base properly.
Mistake #3: Ignoring the Gutter
A dirty gutter makes a dirty collection system.
Mistake #4: Leaving the System Uncovered
Open water is an invitation for mosquitoes and debris.
Mistake #5: Trying to Collect Everything
You don’t need to turn your entire property into a giant water-storage project on day one.
Start with one downspout.
See how much water you actually use.
Then expand.
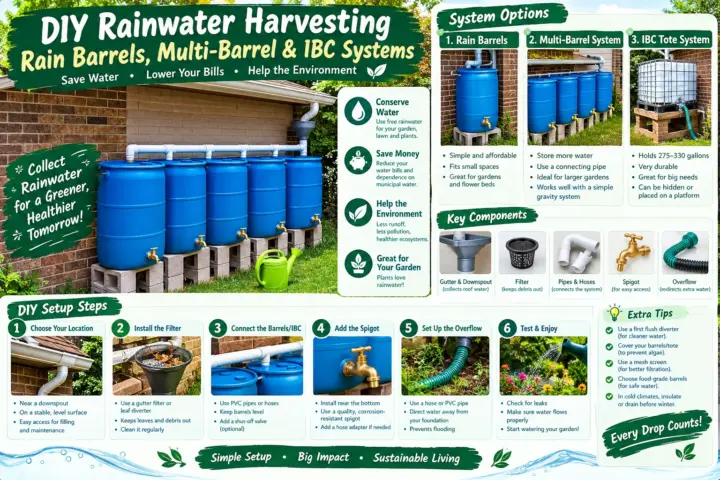
A Simple DIY Rainwater Harvesting Setup
If you’re just getting started, here’s what I’d do.
Step 1: Pick one downspout.
Step 2: Clean the gutter.
Step 3: Choose a suitable water-storage barrel.
Step 4: Build a strong, level base.
Step 5: Add a screen or suitable debris filter.
Step 6: Consider a first-flush diverter.
Step 7: Connect the downspout.
Step 8: Install a secure overflow route.
Step 9: Keep the barrel covered.
Step 10: Test the system during the next rain.
Don’t worry if it isn’t perfect.
Your first storm will show you what needs changing.
Mine certainly did.
Rainwater Harvesting for a Small Urban Backyard
You don’t need acres of land.
This works surprisingly well in a small backyard.
A single rain barrel under a downspout can provide useful water for container gardens and flower beds.
If you’re gardening on a patio, you can also use smaller storage containers where appropriate.
The key is to think about where the water comes from and where it needs to go.
That’s especially important in cities where paved surfaces don’t allow much water to soak into the ground.
Combine Rainwater Harvesting With a Rain Garden
This is one of my favorite ideas.
Instead of trying to store every drop, you can also design your landscape so some runoff gets absorbed into the soil.
A rain garden is a planted area designed to receive and temporarily hold runoff.
You can combine:
Roof → rain barrel → overflow → planted area
Now you’re not just storing water.
You’re managing it.
That’s where I think permaculture ideas can be really useful.
Instead of constantly fighting water, you’re designing the garden around how water naturally moves.
What I’d Do Differently If I Started Again
I’d start smaller.
One barrel.
One downspout.
One garden area.
I’d install an overflow before the first storm.
I’d clean the roof drainage system first.
I’d use a proper screen.
And I’d think about winter too.
In areas where freezing temperatures are common, rain barrels and connected plumbing may need to be drained or protected before hard freezes.
That’s another thing I didn’t think about the first year.
I learned when winter arrived.
The hard way, as usual.
FAQ About DIY Rainwater Harvesting
Is DIY rainwater harvesting worth it?
For many gardeners, yes. A simple system can provide useful water for gardens and landscaping while reducing reliance on treated tap water. The amount you can collect depends on rainfall, roof area, and storage capacity.
How big should my rain barrel be?
Start with a size that fits your available space and how much water you can realistically use. A smaller barrel is often enough for a container garden, while larger gardens may benefit from multiple barrels or tanks.
Can I use rainwater for my vegetable garden?
Harvested rainwater can be used for irrigation in many situations, but the collection surface and local regulations matter. Roof runoff can pick up contaminants, so don’t assume all collected rainwater is suitable for every edible-crop situation.
Can I drink water from a rain barrel?
I wouldn’t drink untreated water from a basic rain barrel. If you want potable rainwater, you’ll need a properly designed collection and treatment system that meets applicable health and local requirements.
Final Thoughts
When I look back at my first DIY rainwater harvesting setup, it was pretty rough.
But it taught me something I still use today.
You don’t have to build the perfect system.
You just need to start paying attention to the resources already around you.
Rain falls on your roof.
Instead of immediately sending all of it down the driveway and into the storm drain, you can capture some of it and put it to work in your garden.
Start with one barrel.
Watch what happens during a storm.
Fix the overflow.
Keep the system clean.
Use a proper screen.
And don’t make the mistake of assuming clear rainwater is automatically drinking water.
For me, DIY rainwater harvesting became more than just a way to save water.
It became part of how I think about my backyard.
Water comes in.
Water gets stored.
Plants use it.
Excess water goes back into the soil.
Nothing needs to be perfect.
That’s the kind of self-sufficient gardening I enjoy most.
And if you build your first rain barrel and the next storm sends water everywhere except inside the barrel…
Don’t worry.





1 thought on “DIY Rainwater Harvesting: How I Collect Rainwater for My Backyard Garden”