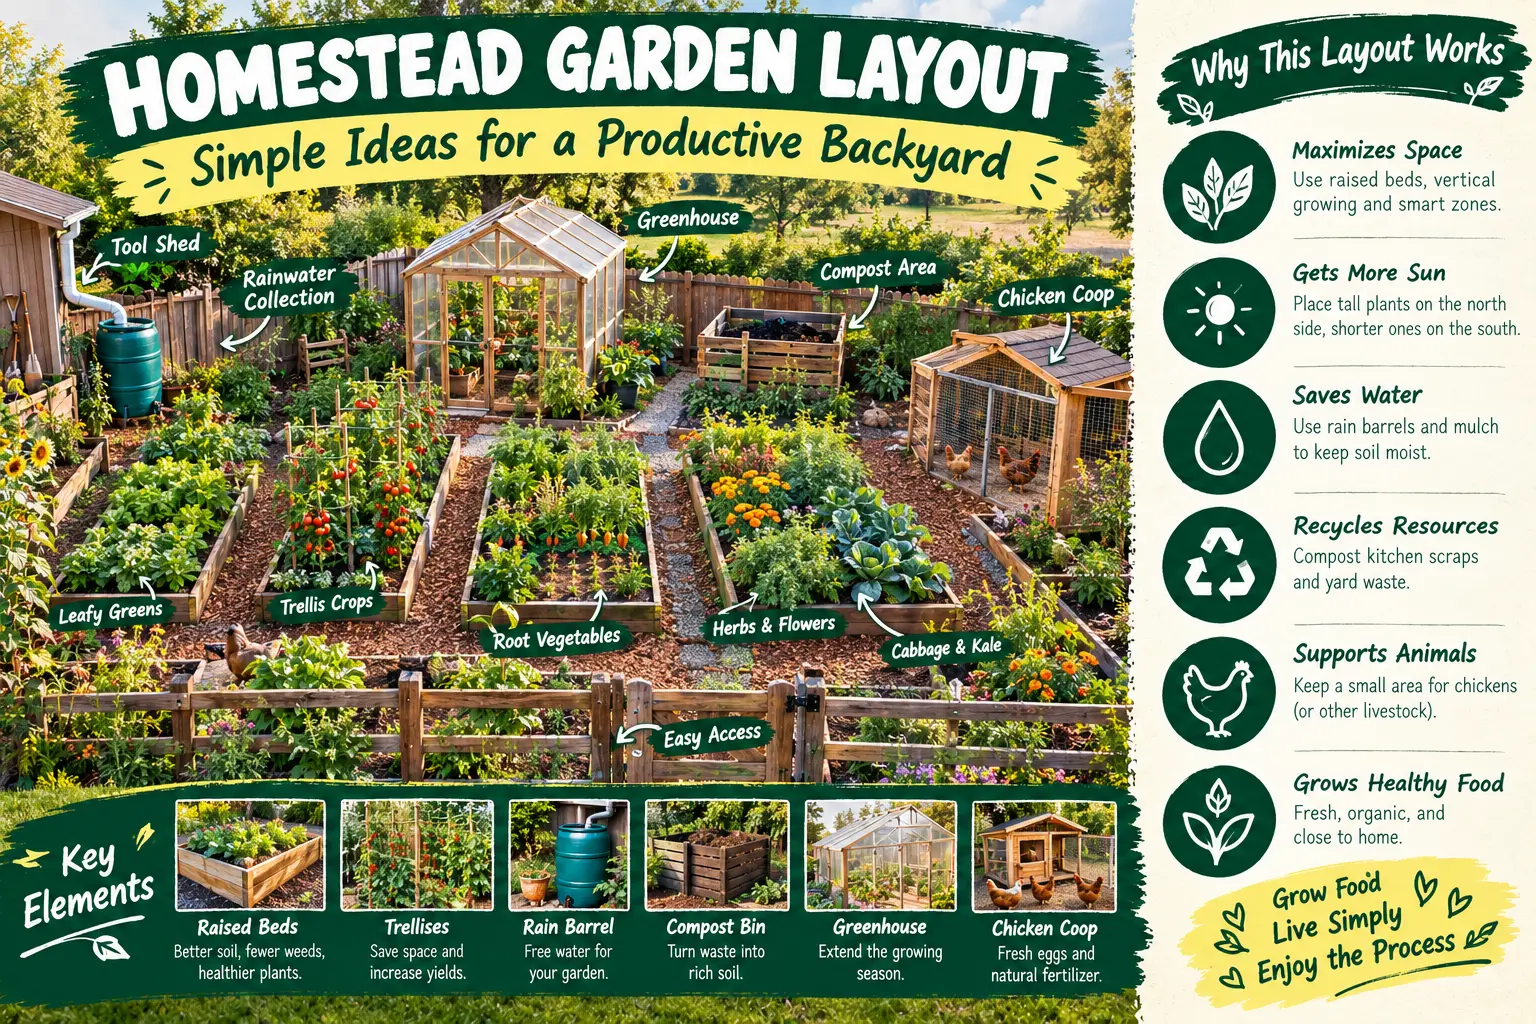
Homestead Garden Layout: How I Finally Stopped Making My Garden So Complicated
The first homestead garden layout I made looked fantastic on paper.
Seriously. I had neat little rows, tomatoes in one section, beans in another, herbs over here, potatoes over there. I even had a little pathway drawn between everything.
Then I actually planted it.
About three weeks later, I was standing in the middle of the garden wondering why I had made my own life so difficult.
The tomatoes were too far from the water. The zucchini had taken over one whole corner. I had planted herbs in a spot that got way too much afternoon sun, and somehow the compost pile was in the one place I had to walk past every single time I carried vegetables into the house.
You’re gonna laugh, but the garden looked better on the piece of paper.
After more than ten years of growing food, making mistakes, moving garden beds and trying different ways of doing things, I’ve learned something pretty simple.
A good homestead garden layout isn’t about making the garden look perfect. It’s about making your daily work easier.
That’s what I want to show you here.
What Makes a Good Homestead Garden Layout?
Before you start digging, forget about those beautiful garden photos for a minute.
Think about how you actually live.
Where do you enter the garden?
Where is the water?
Where do you store your tools?
Where will the compost go?
Where will you walk when you’re carrying a basket full of tomatoes?
These little things matter more than fancy garden design.
For me, the best garden layout has a few basic things close together:
- The vegetables I check every day.
- The herbs I use often.
- Water access.
- Compost and soil amendments.
- Garden tools.
- An easy path to the house.
If I have to walk across the entire property just to grab a handful of parsley, I’m probably not going to do it as often as I should.
I’m lazy like that sometimes.
Start With the Sun, Not the Seeds
This is probably the biggest lesson I learned from messing up gardens.
Don’t start with where you want the tomatoes.
Start with where the sun goes.
Spend a day watching your backyard if you can. Notice which areas get morning sun, afternoon sun and shade.
Remember that the sun changes throughout the year too.
A spot that looks sunny in summer may be shaded by a fence, tree or building during another season.
Once you understand the light, then you can decide where your vegetables belong.
Tall crops can cast shadows over shorter crops, so I try not to put my tallest plants where they’ll block everything else.
That sounds obvious.
I still mess it up sometimes.
My Simple Homestead Garden Layout Method
When I’m planning a new garden now, I don’t try to draw every single plant.
That’s too much work.
I divide the space into zones.
One area is for vegetables we harvest constantly. Another is for crops that take longer. Then I have herbs, perennial plants, composting and areas that can be left a little wild.
This makes the garden easier to manage because I know what each area is supposed to do.
You can think of it something like this:
- Zone 1: herbs and vegetables you visit every day.
- Zone 2: main vegetable beds.
- Zone 3: larger crops and seasonal plants.
- Zone 4: fruit, perennial plants or larger food crops.
- Utility area: compost, tools, water and storage.
You don’t need all five zones. It’s just a way to think about how often you need to visit different parts of the garden.
Put Your Most-Used Plants Close to the House
This little change made a bigger difference than I expected.
I moved my herbs closer to the kitchen.
Now when I’m cooking and realize I need rosemary or parsley, I don’t have to put on boots and walk halfway across the yard.
I just step outside.
That’s the kind of convenience that makes a garden actually become part of your daily life.
If you use lettuce, green onions, herbs, cherry tomatoes or other quick harvests regularly, put them somewhere easy to reach.
Your future self will thank you.
Where Should You Put the Compost?
Here’s another mistake from my early gardening days.
I put the compost pile in a corner because I thought, “Nobody wants to see that.”
Fair enough.
But the corner was about as far away from the vegetable beds as it could possibly be.
Every time I needed compost, I had to haul it across the yard.
Eventually I moved it.
Now I keep compost somewhere that’s practical to reach but not directly beside the house or food preparation area.
You want it close enough that adding kitchen scraps isn’t a chore and close enough to the garden that moving finished compost isn’t a workout.
Also think about drainage, pests and local rules when choosing a composting location.
Don’t Make Your Garden Paths Too Narrow
I know.
Wide paths can feel like wasted growing space.
But here’s what happens when paths are too narrow.
You’re carrying a bucket of compost, your shoulder hits a tomato cage, the bucket tips over, and now you’re standing there looking at a pile of compost on your shoes.
Ask me how I know.
Make paths wide enough for the tools and equipment you actually use.
If you’re using a wheelbarrow, make sure it can pass.
If you only use hand tools and baskets, you may not need huge pathways.
The important thing is to design for real life.
Raised Beds or In-Ground Garden?
I’ve used both, and honestly, I don’t think one method wins for everybody.
Raised beds can be excellent if you have poor soil, drainage problems or a small urban backyard.
They can also make certain gardening jobs easier on your back.
But they cost money and require materials.
An in-ground garden can be much cheaper if you already have workable soil.
You can also combine the two.
That’s what I like doing when possible.
Use raised beds for crops that benefit from carefully controlled soil and use open ground for crops that need more room.
Put Crops Together That Make Sense
I don’t follow companion planting rules like they’re written in stone, but I do think about how plants grow.
Some crops are tall.
Some spread everywhere.
Some need trellises.
Some are finished quickly and leave space for another crop.
That’s what I pay attention to.
For example, I don’t want sprawling squash planted where it can crawl through my walking path.
And I like growing climbing cucumbers vertically when I can because it saves valuable garden space.
This is especially useful in an urban homestead where every square foot matters.
Leave Room for Trellises
Here’s something I wish I’d planned earlier.
Vertical growing needs space too.
If you’re growing cucumbers, peas, pole beans or other climbing plants, decide where the trellis will go before planting.
Don’t plant first and then try to squeeze a six-foot structure into the middle of everything.
Yep.
I’ve done that.
It wasn’t pretty.
Also make sure the trellis won’t shade crops that need full sun.
Think About Water When Planning Your Garden
Watering is one of those jobs that seems easy in April.
Then July arrives.
Suddenly you’re carrying hoses and watering cans around like you’re training for a very strange garden Olympics.
Put your main vegetable beds as close to a practical water source as possible.
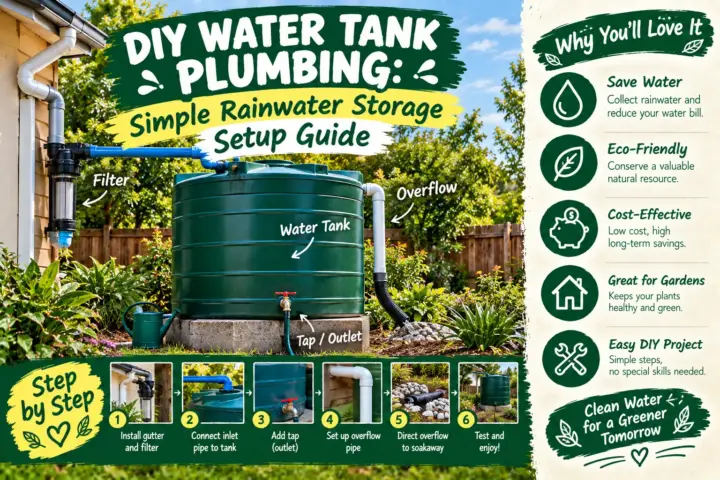
If you’re using rainwater collection, think about where your tanks or barrels will sit and how water will get from them to the garden.
If you use irrigation, plan the routes before planting.
Don’t bury hoses or install complicated systems without understanding how you’ll maintain them.
Simple is often better on a homestead.
Where Should Chickens Go?
If you keep chickens, don’t put their run directly in the middle of your vegetable garden unless you’ve got a very good reason.
Because chickens are basically tiny feathered excavators.
They scratch.
They dig.
They eat things.
They destroy things.
Then they look at you like they did absolutely nothing.
I like keeping chickens close enough to benefit the garden with manure and compost materials, but protected from growing beds.
You can build a system where chicken manure becomes part of your composting routine, while keeping fresh manure away from crops in a way that follows safe composting and food-growing practices.
A Homestead Garden Doesn’t Need to Be Perfectly Straight
This took me a while to accept.
When you look at garden magazines, everything is straight.
Perfect rows.
Perfect edges.
Perfect plants.
My garden doesn’t look like that.
And I’m okay with it.
A curved path can be nice. A few flowers mixed around the vegetables can be useful. A messy corner for beneficial insects can be helpful too.
Permaculture taught me to think about relationships between different parts of the garden rather than trying to make every section look identical.
The garden is a living system.
It’s supposed to change.
Don’t Forget Flowers
I know we’re talking about food production, but I always leave room for flowers now.
They make the garden nicer to spend time in, and flowering plants can support pollinators and other beneficial insects.
Plus, let’s be honest, a garden with nothing but vegetables can look a little boring.
Mix in flowers where they make sense.
Just make sure you’re choosing plants that fit your climate and aren’t going to become a maintenance nightmare.
Leave One Area for Experiments
This is one of my favorite ideas.
Don’t use every square foot for something you’ve already decided will work.
Leave a little space for experiments.
Try a new tomato variety.
Test a different mulch.
Grow something you’ve never eaten.
Try a new trellis design.
That’s how I’ve learned some of my favorite gardening tricks.
Not everything works.
Actually, plenty of things don’t work.
But that’s gardening.
My Biggest Homestead Garden Layout Mistake
If I had to choose one mistake, it would be making the garden too complicated.
Too many crops.
Too many little beds.
Too many different paths.
Too many things that needed attention at the same time.
It looked productive, but it was exhausting.
Now I would rather grow fewer crops really well and have enough time to enjoy the garden.
There’s no prize for having 37 different vegetables growing if you’re miserable trying to keep them alive.
How I Would Plan a Homestead Garden From Scratch
If I had an empty backyard tomorrow, here’s what I’d do.
Step 1: Watch the sun for several days.
Step 2: Mark water sources and drainage.
Step 3: Decide where the main garden entrance should be.
Step 4: Put herbs and frequently harvested crops closest to the house.
Step 5: Build the main vegetable beds.
Step 6: Leave room for paths and a wheelbarrow.
Step 7: Add compost and tool storage somewhere practical.
Step 8: Plan trellises before planting climbing crops.
Step 9: Keep chickens and other animals separated from growing beds.
Step 10: Leave a little room for flowers and experiments.
That’s it.
I don’t need a twenty-page master plan.
Small Backyard Homestead Garden Layout
If you’re working with a tiny yard, don’t get discouraged.
I’ve grown food in surprisingly small spaces.
Use vertical space.
Use containers.
Grow herbs near the kitchen.
Use trellises.
Grow compact varieties where they make sense.
And don’t forget that a few productive containers can be more useful than a giant garden you don’t have time to maintain.
Even a small urban homestead can produce herbs, greens, tomatoes, peppers and other useful crops.
Homestead Garden Layout FAQ
What should I put first in a homestead garden?
Start with the things that affect everything else: sunlight, water, drainage, access and available space. Once those are clear, decide where your main vegetable beds, herbs, compost and paths will go.
How do I layout a small homestead garden?
Keep frequently used crops close to the house, use vertical growing where possible, avoid wasting space on oversized paths, and choose crops based on the amount of time you actually have for maintenance.
Should I use raised beds for a homestead garden?
Raised beds can work very well, especially in small yards or areas with poor soil. But they’re not required. An in-ground garden can be cheaper and may make more sense when you already have good soil.
Your Garden Doesn’t Have to Look Like Anybody Else’s
That’s probably the most important thing I can tell you.
Don’t copy somebody else’s garden layout just because it looks good in a picture.
Your backyard has different sunlight.
Your soil is different.
Your family eats different vegetables.
You have different tools.
Maybe you work all day and only have an hour in the evening.
Maybe you have chickens.
Maybe you’re trying to become more self-sufficient.
Maybe you’re just trying to grow enough tomatoes that you don’t have to buy them every week.
Build the garden around your real life.
That’s what finally made gardening easier for me.
A good homestead garden layout isn’t the one that looks perfect from above. It’s the one where you can walk outside, grab what you need, water the plants without fighting the hose, dump the compost without walking half a mile, and still have enough energy left to sit down and enjoy what you’ve grown.
Trust me, after ten years of doing this, I’ve learned that an easy garden beats a pretty complicated garden every time.
So start simple.
Grow what you actually eat.
Leave room to make mistakes.
And don’t be afraid to move things next season.
That’s not failure.
That’s just gardening.
Got a weird garden layout problem? Leave a comment. I’ve probably made the same mistake already.