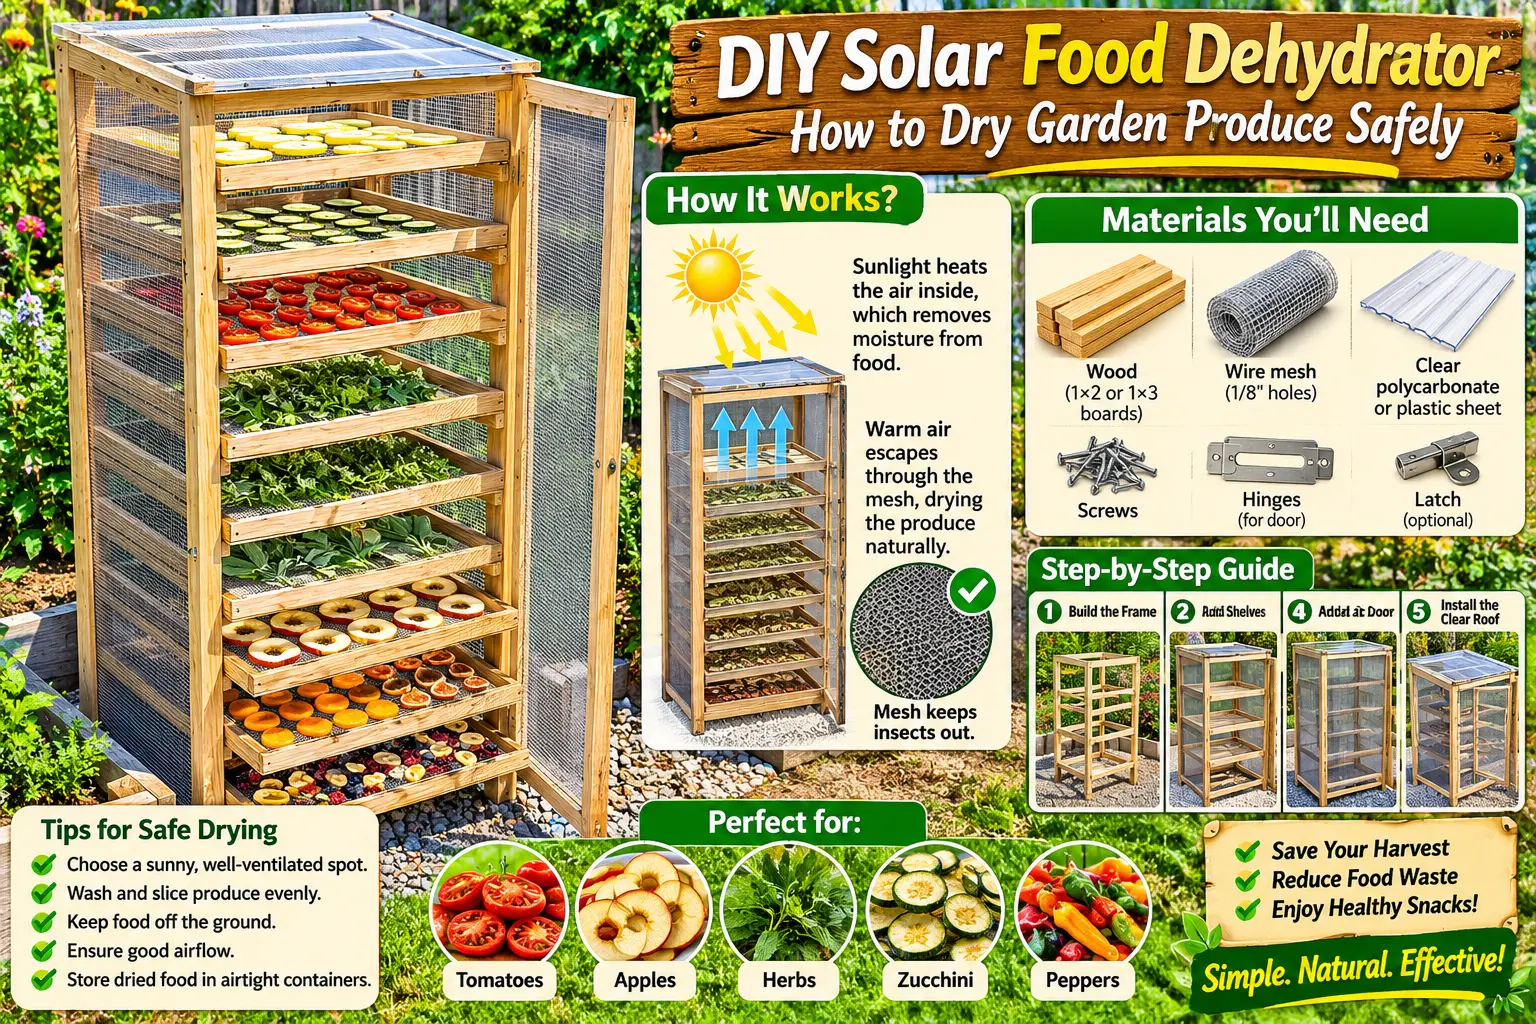
A solar food dehydrator can turn sunlight, warm air, and ventilation into a low-energy way to preserve part of the garden harvest—but it is not a universal drying method for every food.
The Pinterest design shows a tall screened wooden cabinet with multiple removable trays for sliced fruit, vegetables, herbs, and other produce. The rack-and-screen concept is useful, but food safety depends on what you dry, the weather, airflow, humidity, and whether the dryer actually reaches suitable temperatures.
Important: outdoor solar drying is best suited to selected fruits when conditions are hot, dry, and breezy. For most vegetables and for meat, a controlled electric dehydrator or oven is the safer choice.
What Is a Solar Food Dehydrator?
A solar dehydrator uses heat from the sun plus moving air to remove moisture from food.
It works better than simply setting food on an open tray because a purpose-built cabinet can:
- Protect food from insects and birds
- Increase airflow around trays
- Concentrate solar heat
- Keep food cleaner
- Reduce direct exposure to dust and debris
How Solar Drying Preserves Food
Drying preserves food by removing enough moisture that molds, yeasts, and bacteria can no longer grow easily.
University of Minnesota Extension emphasizes three conditions for successful drying:
- Low humidity
- Moderate heat
- Good air circulation
What Foods Are Best for Solar Drying?
Good Candidates: Fruits
NCHFP says high-sugar, acidic fruits are the safest foods for outdoor drying when conditions are favorable.
Examples may include:
- Apples
- Pears
- Peaches
- Apricots
- Plums
- Grapes
Herbs
Herbs can be air-dried or dehydrated, but direct sun can reduce color and flavor in many herbs.
For delicate herbs, a shaded, ventilated drying area or controlled dehydrator may give better quality than strong direct solar heat.
Vegetables Need More Caution
NCHFP does not generally recommend outdoor sun drying for vegetables because they are lower in sugar and acid and can spoil before drying safely.
For most vegetables, use a controlled dehydrator or oven instead.
Do Not Use This for Meat
Meat is especially risky because it is high in protein and can support rapid microbial growth if temperature and humidity are not tightly controlled.
Do not use a simple outdoor cabinet like the Pinterest rack for jerky or other meat products.
Weather Conditions Matter
Outdoor drying only works reliably under suitable weather conditions.
NCHFP recommends hot, dry, breezy weather, with outdoor temperatures of at least about 85°F for fruit and relative humidity below about 60%.
University of Minnesota gives an even more conservative practical target for solar drying: around 86°F or warmer, with hotter conditions working better.
If the weather is humid, cloudy, cool, or rainy, move the food into a controlled dehydrator rather than letting partially dried produce sit for days.
Why a Screened Cabinet Is Better Than Open Trays
The mesh sides in the inspiration image are one of its strongest features.
A good screened cabinet can:
- Keep flies off food
- Reduce bird access
- Keep leaves and debris away
- Allow moisture to escape
- Improve airflow between trays
Use Food-Safe Screen Material
This is one detail the Pinterest photo does not explain.
NCHFP recommends food-safe screening such as stainless steel, plastic, or suitable coated fiberglass.
Avoid using galvanized hardware cloth directly as a food-contact surface because zinc or other coatings can oxidize and leave residues.
Also avoid copper or reactive aluminum screening in direct contact with food.
How to Build a Simple Solar Drying Cabinet
1. Build a Tall Wooden Frame
Build a sturdy rectangular frame tall enough to hold multiple trays with space between them.
Do not pack shelves tightly together. Air needs to move above and below each tray.
2. Add a Screened Door
A full-height hinged door makes it easy to load and remove trays while keeping insects out.
Use a simple latch so the door cannot blow open in wind.
3. Add Mesh to the Sides
Screened side panels provide cross-ventilation.
For a stronger solar dryer, some designs use a clear solar collector or enclosed heated-air section instead of only open mesh.
4. Use Removable Trays
Removable trays make loading, rotating, washing, and inspecting food much easier.
Make every tray shallow enough that food stays in a single layer.
5. Keep Food in a Single Layer
Do not overlap slices.
Penn State and USU both emphasize that air needs to circulate around individual pieces for even drying.
6. Cut Food Evenly
Slices of similar thickness dry at similar rates.
If one tomato slice is paper-thin and another is half an inch thick, the thinner piece can become overly dry while the thicker piece remains moist inside.
Do Vegetables Need Blanching First?
Many vegetables benefit from blanching before dehydration because blanching helps stop enzyme activity and can improve storage quality.
This is another reason controlled dehydration is generally preferable for vegetables.
Follow a research-based drying guide for the specific vegetable rather than applying one method to everything on the trays.
Do Fruits Need Pretreatment?
Some fruits darken quickly after cutting.
Apples, pears, peaches, and similar fruits may benefit from an appropriate pretreatment before drying to reduce browning and improve appearance.
Follow tested instructions for the specific fruit instead of improvising chemical concentrations.
Bring Outdoor-Dried Food In at Night
Food should not simply remain outdoors through cool, damp nights.
NCHFP notes that nighttime condensation can add moisture back into partially dried food.
Move trays into a protected dry area when nighttime humidity rises or weather changes.
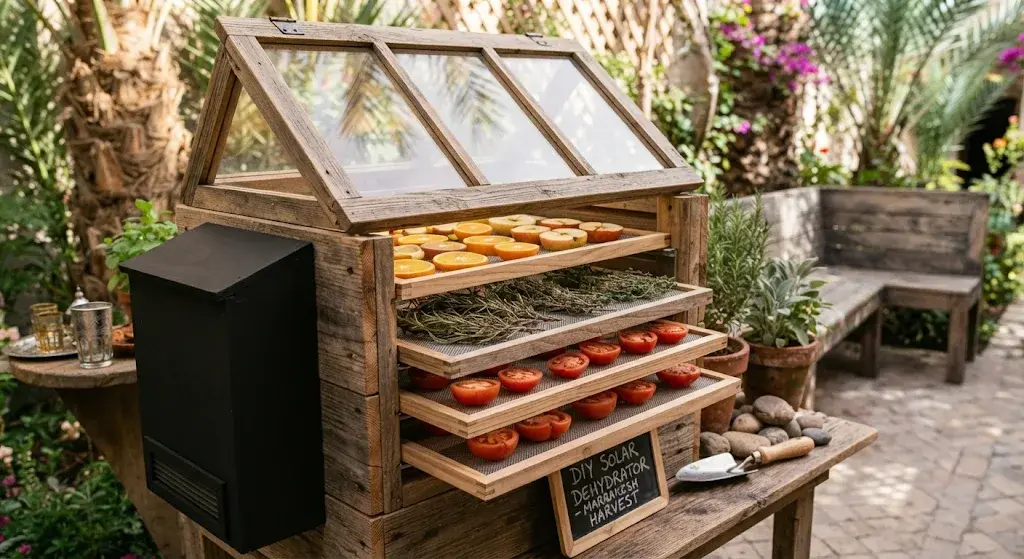
Rotate the Trays
The top and bottom of a tall cabinet may not dry at the same rate.
Rotate trays periodically so food receives more even heat and airflow.
How Do You Know Food Is Dry Enough?
Fruit
Properly dried fruit is generally pliable or leathery rather than wet or sticky inside.
Herbs
Herbs should be crisp enough that leaves crumble easily between your fingers.
Vegetables
Many properly dried vegetables become brittle or very hard rather than flexible.
Outdoor-Dried Produce Should Be Pasteurized
University of Minnesota recommends pasteurizing produce dried outdoors to kill insects or eggs that may have contaminated the food during drying.
Two options given by UMN include:
- Oven: heat dried produce at 160°F for 30 minutes.
- Freezer: freeze the packaged dried produce at 0°F or below for 48 hours.
This is a useful step the Pinterest photo does not show. Outdoor drying exposes food to insects in ways an enclosed electric dehydrator generally does not.
Condition Dried Fruit Before Storage
Fruit slices from the same batch may not contain exactly the same amount of moisture.
Conditioning allows moisture to equalize before long-term storage and helps reveal food that is still too moist.
If condensation appears inside a storage container, return the food to the dehydrator and dry it further.
Store Dried Food Correctly
Drying is only half of preservation.
Once food is fully dried and cooled, store it in:
- Clean airtight containers
- A cool location
- A dry location
- A dark cupboard or pantry
- Containers protected from insects and moisture
Simple Outdoor Drying Safety Table
| Food | Outdoor Solar Drying? | Better Method |
|---|---|---|
| Fruit | Yes, in suitable hot/dry weather | Solar dryer or controlled dehydrator |
| Herbs | Can work, but direct sun may reduce quality | Air drying or low-temp dehydrator |
| Vegetables | Generally not recommended outdoors | Controlled dehydrator or oven |
| Meat | No for a simple solar cabinet | Tested jerky method with controlled heat |
What This Pinterest Drying Cabinet Gets Right
- Uses removable trays.
- Keeps food separated in a single layer.
- Provides insect protection.
- Allows airflow through the cabinet.
- Uses vertical space efficiently.
- Keeps drying food organized and easy to inspect.
What I Would Change
- Do not use the same outdoor method for fruit, vegetables, herbs, and meat.
- Use only food-safe tray screening.
- Add a thermometer inside the cabinet.
- Consider a proper solar heat collector rather than relying only on ambient outdoor air.
- Rotate trays during drying.
- Bring partially dried foods under shelter at night.
- Pasteurize outdoor-dried produce before storage.
- Switch to an electric dehydrator when weather is too cool or humid.
Solar Food Dehydrator FAQ
Can I dry tomatoes in a solar dehydrator?
Tomatoes are commonly dehydrated, but outdoor drying is more difficult to control than using a thermostatically controlled dehydrator. For consistent safety and quality, especially in humid weather, a controlled dehydrator is the better choice.
Can I dry herbs outdoors?
Yes, some herbs can be air-dried, but strong sun may reduce color, aroma, and essential oils. A shaded, warm, well-ventilated location is often better.
Can I dry zucchini outside?
For vegetables such as zucchini, use a controlled dehydrator or oven rather than relying on outdoor solar drying.
Can I make jerky in this cabinet?
No. A simple outdoor mesh cabinet cannot reliably control the temperatures needed for safe jerky production.
How hot should solar drying weather be?
For outdoor fruit drying, research-based guidance generally calls for hot weather of at least about 85–86°F, low humidity, and good airflow. Hotter and drier conditions improve reliability.
Does dried food need refrigeration?
Properly dried food can generally be stored in airtight containers in a cool, dry, dark location. If it still contains too much moisture, however, it may mold or spoil.
The Bottom Line
The tall screened drying cabinet in the Pinterest image is a clever homestead idea because it combines insect protection, removable trays, and vertical airflow in a compact footprint.
But the foods on those trays should not all be treated the same way.
Use solar drying mainly for suitable fruits in hot, dry conditions, dry herbs carefully to protect flavor, and use controlled dehydrators for most vegetables and meats. Build the cabinet with food-safe screens, keep air moving around every tray, protect the food from nighttime moisture, and pasteurize outdoor-dried produce before storage.
Sources
- National Center for Home Food Preservation — Sun Drying
- University of Minnesota Extension — Preserving Food at Home: Drying
- Utah State University Extension — Home Drying Foods
- Utah State University Extension — Community Solar Dehydrator Plans
- Penn State Extension — Drying Fruits and Vegetables