
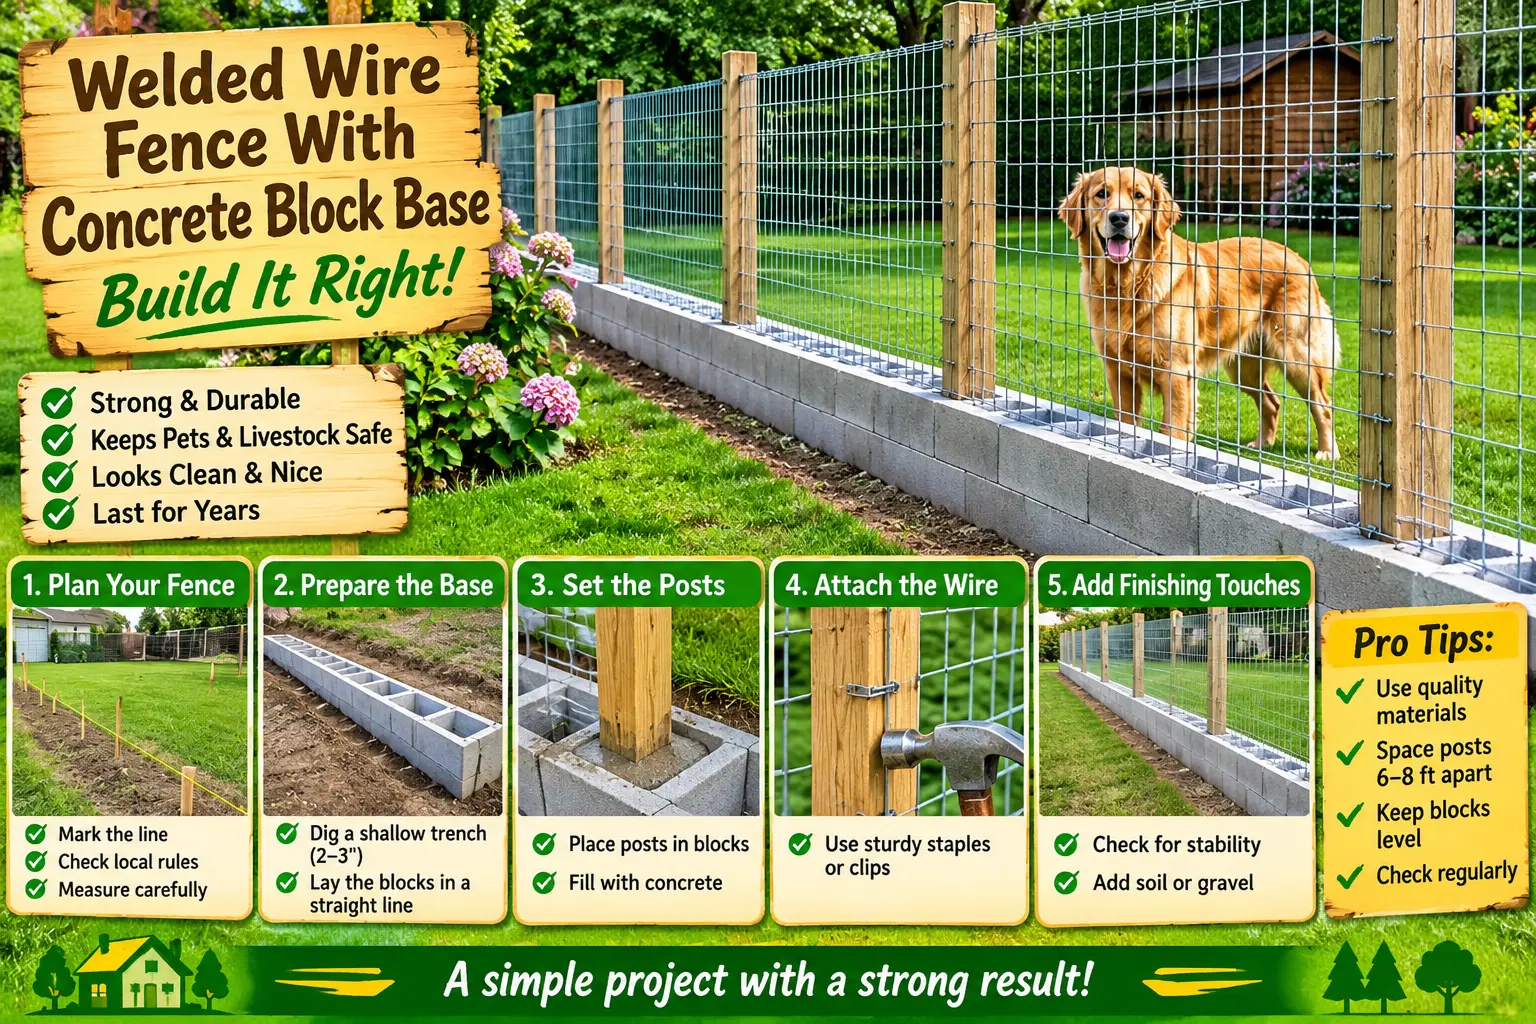
A welded wire fence with a concrete block base can create a strong, clean garden boundary while helping reduce digging, soil contact, and damage along the bottom edge of the fence. The design works especially well around vegetable gardens, backyard spaces, dog runs, and areas where you want visibility without using a solid privacy fence.
The Pinterest design combines three simple materials: a low concrete block curb, vertical wooden posts, and welded wire fencing. The finished result looks straightforward, but long-term performance depends on what happens below the visible blocks—drainage, soil preparation, post anchoring, and keeping the wall level.
Best approach: treat the wooden posts as the structural support for the fence and treat the concrete blocks as a low protective curb. Do not rely on loose hollow blocks alone to hold the fence upright.
Why Add a Concrete Block Base to a Wire Fence?
A normal welded wire fence can work perfectly well without masonry, but adding a low block base has several potential advantages.
- Keeps the bottom of the wire above wet soil.
- Creates a cleaner mowing and trimming edge.
- Reduces small gaps under the fence.
- Makes casual digging more difficult for some pets.
- Helps keep mulch and garden soil inside planting areas.
- Provides a more finished appearance than wire alone.
The masonry base should still be built on stable material. If blocks are simply placed on soft topsoil, they can settle unevenly and create gaps or cracks.
1. Decide What the Fence Needs to Stop
Fence design should start with the animal or problem you are trying to control.
A fence intended mainly to define a garden boundary can be much lighter than one intended to contain a large dog or exclude wildlife.
Before buying materials, decide whether your main goal is:
- Keeping dogs inside a yard
- Keeping rabbits out of vegetables
- Protecting beds from deer
- Creating a general garden boundary
- Supporting climbing plants
- Separating chickens or other small livestock areas
2. Choose the Right Welded Wire
Welded wire is made where horizontal and vertical wires are welded together into a rigid grid.
A common general-purpose option uses openings around 2 by 4 inches. This size works well for many garden and dog-fence applications because it stays visually open while providing a relatively rigid barrier.
Smaller animals need smaller openings.
If rabbits are your main problem: use smaller mesh near ground level. Large openings that stop a dog may still allow a young rabbit through.
3. Understand Wire Gauge
Wire gauge can be confusing because a lower gauge number generally means a thicker wire.
For a simple decorative garden fence, lightweight wire may be enough. For pets or animals pushing against the fence, use a heavier welded wire product designed for fencing rather than very thin garden mesh.
4. Mark the Fence Line Before Digging
Use stakes and string to mark the full fence route.
Check:
- Property boundaries
- Gate locations
- Changes in grade
- Drainage paths
- Trees and major roots
- Underground utilities
Do not place a fence exactly where runoff naturally concentrates unless the drainage is addressed first.
5. Remove Soft Topsoil Under the Block Base
The Pinterest image makes the blocks look as if they sit directly on ordinary soil.
For a permanent installation, that is not the best approach.
Organic topsoil compresses and moves. Remove the soft upper material along the block line until you reach firmer subsoil.
6. Build a Compacted Gravel Base
A compacted crushed-stone base helps distribute the weight of the blocks and allows water to drain away.
The exact depth depends on your soil, climate, block size, and whether frost movement is a concern.
The important point is that the first course should rest on compacted, level material rather than loose garden soil.
7. Set the First Course Carefully
The first row determines how the rest of the fence looks.
Check each block for:
- Level from side to side
- Level along the fence line
- Alignment with the string line
- Full support underneath
Trying to correct a crooked base after the fence is attached is much harder.
8. Do Not Depend on Hollow Blocks to Hold Wood Posts
This is one of the most important improvements I would make to the Pinterest design.
Simply dropping a wooden post into the hollow core of a concrete block does not automatically create a strong fence foundation.
The fence post must resist:
- Wind
- Wire tension
- Animals pushing against the fence
- Gate loads
- Soil movement
Set the posts independently into suitable footings or use a properly engineered masonry/post connection.
9. Keep Wood Away From Constant Moisture
Wood lasts longer when water can drain away rather than becoming trapped around it.
Use lumber suitable for exterior ground-contact conditions where necessary and avoid designs that create a permanent wet pocket around the base of a post.
10. Space Posts for the Fence You Are Using
Post spacing depends on the height and stiffness of the wire, site exposure, animal pressure, and whether the fence follows slopes.
Closer posts create a stiffer fence but increase cost and labor.
Do not copy the spacing in a photo without checking the specifications for the fencing product you purchased.
11. Brace Corners and Gate Posts
Straight-line posts do not carry the same loads as corners and gates.
Gate posts especially need strong foundations because the weight of the gate pulls sideways on the post every time it opens.
Use heavier posts and stronger anchoring at these high-load locations.
12. Attach Welded Wire Without Over-Tensioning It
Welded wire should be straight and reasonably tight, but it is not installed exactly like high-tensile livestock fencing.
Pull it tight enough to remove obvious waves, then fasten it securely to the wooden posts using appropriate exterior fencing staples, screws with washers, or another approved attachment.
Avoid crushing or cutting the galvanized coating unnecessarily.
13. Put the Smoothest Side Toward Pets and People
Trim wire carefully at corners and ends.
Sharp wire tails can injure dogs, children, wildlife, or anyone working near the fence.
Fold, cap, or position cut edges where they cannot snag skin or clothing.
14. A Block Base Helps With Digging—but It Is Not Dig-Proof
A low masonry curb makes casual digging more difficult because animals cannot start directly under the vertical wire.
Determined dogs, foxes, coyotes, rabbits, and other animals may still dig below or beside the blocks.
For serious digging pressure, combine the fence with a buried wire section or an outward-facing apron.
15. Use an L-Shaped Wire Apron for Digging Animals
Instead of digging a very deep trench, you can extend welded wire horizontally outward from the bottom of the fence and cover it with soil, mulch, or turf.
An animal begins digging next to the fence, reaches the buried horizontal wire, and has difficulty moving directly underneath the barrier.
16. Small Animals Need Smaller Mesh Near the Bottom
If your goal is protecting vegetables from rabbits, young animals may fit through openings that appear surprisingly small.
You can use smaller mesh for the lower portion of the fence while keeping larger welded wire above it.
This gives better small-animal protection without making the entire fence visually heavy.
17. Deer Need Height More Than a Block Base
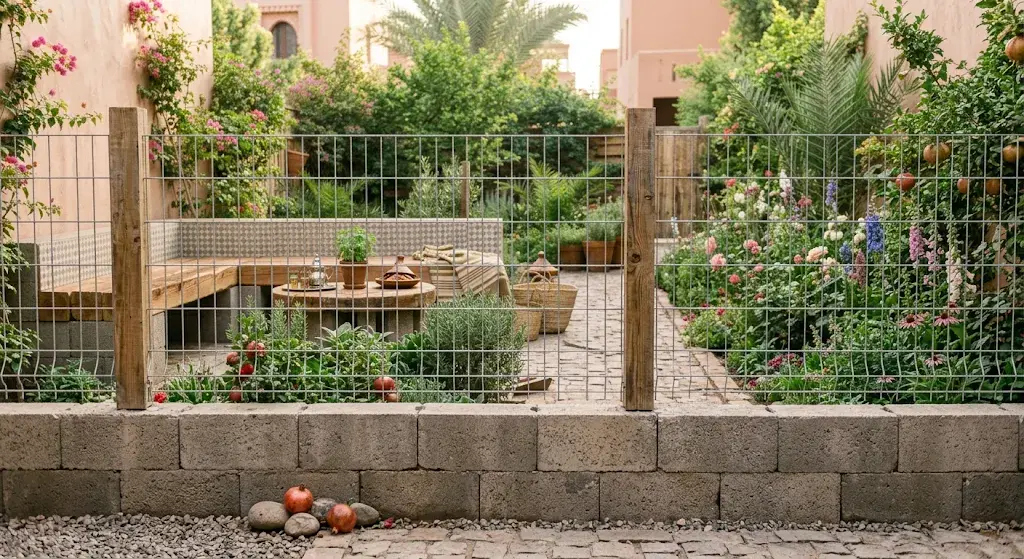
The concrete curb shown in the image does very little against deer.
Deer fencing works mainly by using adequate height, visibility, depth, or other exclusion strategies.
If deer are your primary problem, design the fence around deer behavior instead of focusing on the masonry base.
18. Plan Drainage Through and Around the Block Base
A continuous masonry edge can unintentionally act like a tiny retaining wall.
If the garden side is higher than the lawn side, water may collect behind the blocks after heavy rain.
Plan where that water will go.
Possible solutions include:
- Gravel behind the blocks
- Drainage gaps where appropriate
- Perforated drainage pipe for true retaining situations
- Grading that moves water away from the fence
19. Do Not Build Across Major Tree Roots
The Pinterest fence appears near mature trees.
Digging trenches or post holes through large structural roots can injure trees and may destabilize them.
Route the fence around major root zones where possible rather than cutting significant roots just to keep the fence perfectly straight.
20. Make the Gate Match the Fence
A strong fence with a weak gate still fails.
The gate should have:
- A rigid frame
- Heavy hinges
- Strong latch hardware
- Small enough gaps around the sides and bottom
- A threshold that does not create a tripping hazard
Simple Build Order
- Decide which animals the fence must contain or exclude.
- Mark property boundaries and fence line.
- Locate gates and corners.
- Check underground utilities.
- Remove soft topsoil under the block curb.
- Install and compact the gravel base.
- Set the first course of blocks level.
- Install structural wooden posts independently.
- Brace corners and gate posts.
- Complete the block curb.
- Add drainage where needed.
- Roll out welded wire.
- Pull it straight and attach it securely.
- Trim and protect sharp wire edges.
- Add smaller lower mesh if needed.
- Add a buried or horizontal apron for digging animals.
- Install the gate and test the latch.
- Inspect the entire bottom edge for gaps.
What This Pinterest Fence Gets Right
- Uses welded wire rather than flimsy decorative netting.
- Uses substantial wooden posts.
- Keeps fencing away from direct soil contact.
- Creates an open visual boundary.
- Provides a hard lower edge that discourages casual digging.
- Looks appropriate around both lawns and gardens.
What I Would Change
- Add a compacted gravel foundation below the concrete blocks.
- Anchor posts independently instead of relying on hollow blocks.
- Add an L-shaped wire apron if digging animals are a serious problem.
- Use smaller mesh near ground level for rabbits and similar animals.
- Add drainage if soil is retained behind the block curb.
- Use stronger gate posts and secure latches.
- Protect all cut wire edges.
Welded Wire Fence FAQ
Is welded wire good for a garden fence?
Yes. Welded wire provides a relatively rigid, open fence that works well for gardens, pets, and many small-animal exclusion projects when the mesh size and height match the problem.
Does a concrete block base stop dogs from digging?
It can discourage casual digging directly under the fence, but determined dogs may dig beside or beneath the blocks. A buried or horizontal wire apron provides more reliable protection.
Can I place concrete blocks directly on soil?
For a temporary edge, perhaps. For a permanent straight fence, preparing a compacted aggregate base helps reduce uneven settlement and improves drainage.
Can wooden posts sit inside hollow concrete blocks?
The block alone should not be assumed to provide enough structural support. Posts should be properly anchored for wind, wire tension, gates, and animal loads.
What size welded wire is best?
It depends on the animal. Approximately 2-by-4-inch mesh is common for general fencing, while rabbits and smaller animals often require smaller openings near the ground.
Will welded wire keep deer out?
Only if the overall fence is designed with enough height and coverage for deer exclusion. The concrete block base itself does little to prevent deer from jumping.
Can the block base act as a retaining wall?
A very low curb may retain a small amount of soil, but once significant soil height or pressure is involved, treat it as a retaining-wall project with appropriate foundation, drainage, and structural design.
The Bottom Line
The Pinterest fence is a practical idea and can create a cleaner, stronger-looking boundary than welded wire alone.
The most important improvement is below ground level.
Build the block curb on compacted material, anchor the wooden posts independently, choose mesh for the animals you actually need to control, and add a digging apron where necessary.
Do that, and the concrete base becomes a useful addition instead of a row of blocks that slowly settles and pulls the fence out of alignment.