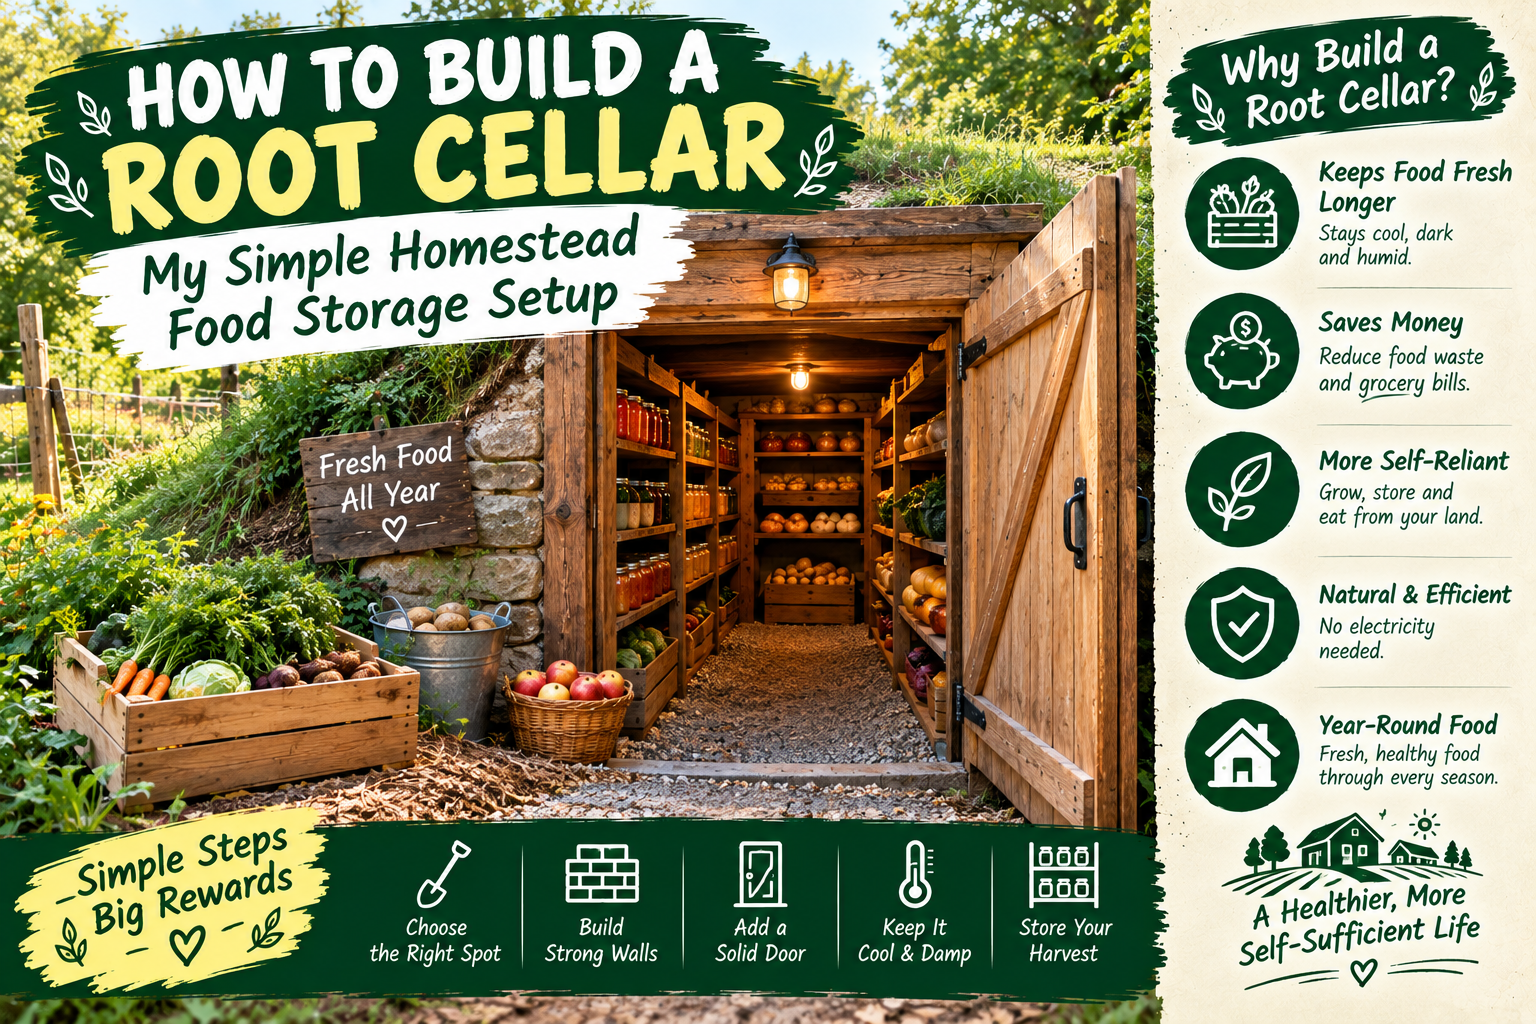
How to Build a Root Cellar: My Simple Homestead Food Storage Setup
If you’re wondering how to build a root cellar, you’re probably thinking about one thing: keeping garden food fresh without filling every inch of your refrigerator.
I’ve been there.
After years of growing vegetables, preserving food, and trying to waste less from the garden, I started paying more attention to old-fashioned food storage. A root cellar is one of those simple ideas that sounds almost too basic these days. But when it’s done right, it can be incredibly useful.
And no, you don’t need a giant underground room with stone walls and a fancy wooden door. A small root cellar can work just fine for many homes.
Lemme show you what I’d think about before digging a single hole.
So, What Exactly Is a Root Cellar?
A root cellar is basically a cool, dark, humid storage space for certain fruits and vegetables.
The goal isn’t to freeze your food. It’s also not to make the room as cold as your refrigerator.
You want a stable environment that slows down spoilage.
Root vegetables like carrots, beets, potatoes, and turnips can be good candidates. Depending on your conditions, you can also store things like winter squash, apples, and other crops using the right storage methods.
The trick is matching the crop to the conditions it likes.
Here’s something I learned the annoying way: I used to think “cool and dark” was enough.
It isn’t.
Humidity matters. Air movement matters. Temperature matters. Even keeping apples away from some vegetables can matter because of the gases they release as they ripen.
So don’t just dig a hole and throw everything inside. That’s how you end up with a pile of expensive compost.
Before You Build a Root Cellar, Check Your Land
This is probably the most important part.
Don’t start digging just because you found a cool DIY root cellar idea online.
First, look at your property.
Does the area flood? Is the soil mostly clay? Is the ground stable? Does groundwater sit close to the surface?
Also check for underground utility lines before digging. That’s not the exciting part of homesteading, but it’s one of those boring jobs that can save you from a very bad afternoon.
Safety first: A large underground space can collapse or collect dangerous gases. Don’t enter an unsupported excavation. For a larger underground cellar, get proper structural advice and follow local building requirements. Also consider drainage, ventilation, electrical safety, and local rules before construction.
If your property is wet or prone to flooding, an underground root cellar may not be your best option. A basement corner, insulated storage room, or above-ground cellar can sometimes be much easier.
Choose the Right Type of Root Cellar
When people talk about root cellars, they often picture a traditional underground room.
That’s only one option.
For a small backyard homestead, I’d look at three basic choices.
- Basement root cellar: Use a cool section of an existing basement.
- Buried or underground cellar: Build a dedicated space below ground.
- Small outdoor cellar: Create a simple insulated storage area using the ground to help control temperature.
If you already have a basement, start there.
Why make a giant construction project when you’ve already got a useful space sitting under your house?
How to Build a Root Cellar in a Simple Way
For this example, let’s talk about a small outdoor root cellar.
The basic idea is pretty simple: you create an insulated, protected storage space, add ventilation, control moisture, and use the surrounding earth to help keep the temperature more stable.
1. Pick a Suitable Location
Choose a spot that’s shaded and protected from direct sun.
Good drainage is very important. You don’t want rainwater running toward your cellar.
If possible, choose naturally cooler ground and avoid an area that gets waterlogged.
Also think about convenience.
If your root cellar is a ten-minute walk from the house, you might stop using it when the weather gets ugly.
Mine would need to be close enough that I could grab potatoes without putting on a winter expedition.
2. Plan the Size Before You Dig
You don’t need a huge cellar when you’re starting out.
Think about how much food you actually grow.
A small family garden might only need enough room for several crates or shelves of vegetables.
Measure your storage bins, crates, shelves, and containers first. Then design the space around them.
My tip: Don’t build a giant empty room just because you have the space. A smaller cellar is easier to build, easier to keep cool, and easier to manage.
3. Think About Drainage
Water is one of the biggest enemies of a root cellar.
You want humidity for many stored vegetables, but you don’t want standing water or soaked walls.
That means drainage needs to be part of the plan from the start.
Depending on the site, that could mean gravel, a drainage system, a properly designed floor, exterior drainage, or another solution suited to your soil.
This is one place where spending a little more time planning can save you a huge headache later.
4. Insulate Where Needed
The earth does a lot of the temperature control for an underground space, but that doesn’t mean insulation isn’t useful.
The exact design depends on your climate and the type of cellar you’re building.
You want to slow down temperature changes rather than constantly fighting them with heaters or cooling equipment.
That’s the beauty of a root cellar when it works properly.
Ventilation Is More Important Than I Thought
This is one of those things I didn’t take seriously enough at first.
Fresh air needs a way to move through the storage space.
Vegetables are still living plant material after harvest. They give off moisture and gases, and poor airflow can encourage mold and rot.
A basic root cellar often uses separate intake and exhaust vents to help move air through the space.
The exact setup depends on the cellar design and climate.
I once stored vegetables in a little enclosed space thinking, “Hey, it’s dark and cool. Perfect.”
A few weeks later I opened the door and got hit with that smell.
You know the one.
Let’s just say I learned that “dark and cool” does not mean “good ventilation.”
What Should You Store in a Root Cellar?
This is where a root cellar gets really useful for a backyard garden.
Some crops can stay fresh for weeks or months when stored under the right conditions.
- Potatoes
- Carrots
- Beets
- Turnips
- Parsnips
- Winter squash
- Cabbage
- Some varieties of apples
But each crop has different needs.
Potatoes like dark storage. Winter squash generally wants a drier environment than root vegetables. Carrots and beets can prefer higher humidity.
So don’t throw every harvest into one giant pile.
How I Prepare Vegetables for Storage
Preparation starts in the garden.
Try to harvest healthy vegetables that aren’t badly damaged.
A cut, bruised, or diseased vegetable can spoil much faster and may spread problems to nearby produce.
With root vegetables, I don’t scrub every bit of soil off before storage. Depending on the crop, letting the surface dry and handling it gently can help.
Just don’t store vegetables that are obviously rotten or damaged.
And here’s my simple rule:
Eat the damaged vegetables first.
Save the best ones for long-term storage.
That sounds obvious, but it’s easy to grab the perfect carrots and leave the bruised ones sitting in the kitchen until they become science experiments.
Use Crates Instead of One Giant Pile
I like crates because they make checking your food much easier.
If one potato starts rotting, you want to find it before it ruins 40 other potatoes.
Wooden crates, bins, shelves, and other breathable storage containers can work depending on the crop.
Don’t pack everything so tightly that air can’t move.
My habit: I check stored food regularly. It takes a few minutes, but those few minutes can save a whole box of vegetables.
Keep Apples Away From Some Vegetables
Here’s another little storage lesson that surprised me.
Apples produce ethylene gas as they ripen. That gas can affect other stored produce and may cause some vegetables to age faster.
For that reason, I prefer keeping apples separated from vegetables when possible.
Separate shelves or containers can make this much easier.
Again, you don’t need some fancy commercial storage room.
A little organization goes a long way.
What Temperature Should a Root Cellar Be?
There isn’t one perfect temperature for every crop.
That’s important.
Different vegetables have different storage needs, and your local climate also changes the design.
Generally, a root cellar works by keeping the space cool and stable rather than allowing big temperature swings.
Use a thermometer to see what your cellar actually does instead of guessing.
I’d also use a humidity gauge if possible.
These inexpensive tools can tell you much more than your hand can.
Don’t Forget a Door You Can Actually Use
This sounds silly, but think about the door.
It needs to seal well enough to help maintain the conditions inside, but you also need easy access.
You’ll be carrying boxes of potatoes, carrots, apples, and other food through it.
A tiny doorway might look cute in a DIY plan.
Trust me, carrying a heavy box through it is not cute.
My Root Cellar Mistakes You Can Avoid
After messing around with food storage for years, these are some of the things I’d watch closely.
- Don’t build where water collects.
- Don’t ignore ventilation.
- Don’t store damaged vegetables with healthy ones.
- Don’t assume every crop wants the same humidity.
- Don’t make the cellar larger than you need.
- Don’t forget easy access.
- Don’t skip regular inspections.
- Don’t enter an unsafe excavation or underground space.
The last one matters most. A root cellar isn’t worth getting hurt over.
Can You Build a Root Cellar in a Small Backyard?
Yes, but you may need to think smaller.
A traditional underground cellar might not make sense in an urban backyard, especially if you have drainage issues, shallow soil, utilities, or local rules that make excavation difficult.
In that case, look at alternatives.
A cool basement corner can work. So can a properly designed insulated storage room, depending on your climate.
Even a small storage cabinet in the right location can help with short-term storage.
Self-sufficiency isn’t about copying somebody else’s homestead.
It’s about using what you’ve got.
Is Building a Root Cellar Worth It?
For me, yes, when the design fits the property and the food I’m growing.
The biggest benefit isn’t just saving electricity.
It’s having another way to store food from the garden.
When potatoes, carrots, beets, squash, or other crops are ready at the same time, I don’t have to preserve every single thing immediately.
That takes some pressure off.
And there’s something pretty satisfying about walking into a cool storage room in winter and finding vegetables you grew months earlier.
How to Build a Root Cellar: My Simple Beginner Plan
If I were starting from zero today, I’d keep it simple.
- Study the property. Check drainage, soil, shade, and groundwater.
- Choose the smallest useful size. Don’t build more than you need.
- Plan drainage first. Water problems are much harder to fix later.
- Plan ventilation. Don’t make a sealed underground box.
- Use shelves or crates. Keep different crops organized.
- Buy a thermometer and humidity gauge. Measure the space.
- Start with a small harvest. Learn how your storage behaves.
- Check your food regularly. Remove anything that’s starting to spoil.
That’s really it.
You can always improve the system later.
Root Cellar FAQ
Can I build a root cellar without a basement?
Yes. An outdoor or partially underground cellar is one option. However, your soil, drainage, groundwater, climate, and local building rules all matter. If excavation isn’t practical, a cool basement or properly designed storage room may be easier.
What vegetables last the longest in a root cellar?
Potatoes, carrots, beets, turnips, parsnips, cabbage, and some winter squash can store well under suitable conditions. Storage life depends on the crop, variety, harvest condition, temperature, humidity, and airflow.
Does a root cellar need electricity?
Not necessarily. The whole idea is to use natural temperature stability, insulation, shade, and ventilation. You may still choose to use a small light or monitoring equipment, but the storage system itself doesn’t have to work like a refrigerator.
Start Small and Learn Your Property
The biggest thing I want you to remember about how to build a root cellar is that you don’t have to build the perfect one on your first try.
Start by understanding your land. Watch where water goes. Pay attention to temperature. Learn which vegetables your family actually eats. Then build a storage system around those needs.
That’s how I’ve learned most things in homesteading. Not from getting everything right the first time, but from making a mistake, fixing it, and trying again.
A root cellar can become a really useful part of your backyard food system. It can help you store garden vegetables, reduce waste, and keep more of your harvest available during the colder months.
And if you’re wondering how to build a root cellar, my advice is simple: don’t start with the shovel. Start with a piece of paper, look at your land, and make a plan first.
Got a Root Cellar Idea?
Have you built one already, or are you thinking about digging your first one? Tell me what your property is like and what vegetables you want to store. I love hearing about these little homestead projects, especially the ones that didn’t go exactly according to plan. Lemme know what you’re working on.