Zeer Pot Evaporative Cooler: The Simple Off-Grid Fridge That Doesn’t Need Electricity
A zeer pot evaporative cooler sounds almost too simple the first time you hear about it. Two clay pots, some damp sand, a little water and a shaded spot. That’s basically the whole idea. No compressor humming all day. No electrical cord. No fancy solar battery setup.
And honestly, that’s exactly why I like it.
For backyard homesteading, emergency food storage, off-grid living, or just trying to waste less electricity, a zeer pot can be a pretty clever little tool. It won’t replace your refrigerator, and anybody telling you that is selling the idea a little too hard. But for certain foods, especially fresh vegetables, it can make a real difference.
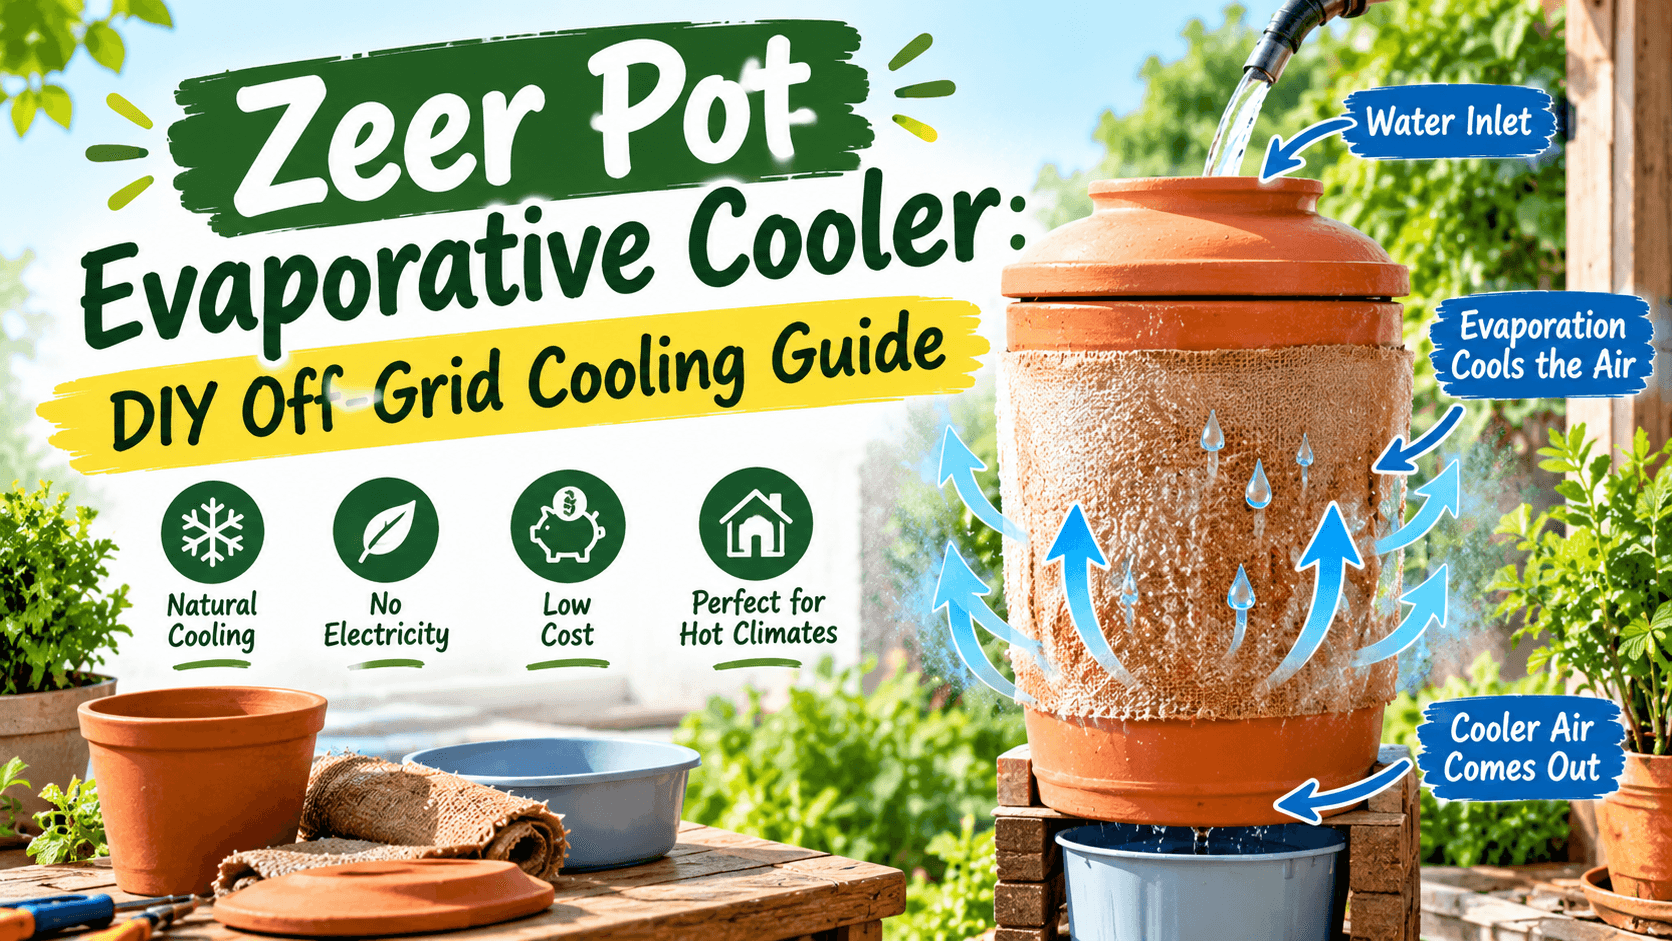
The basic idea is called evaporative cooling. Water slowly evaporates from the outside of a porous clay pot. As that water changes from liquid to vapor, it carries heat away from the pot. The inside becomes cooler than the surrounding air.
Simple stuff. But there are a few tricks that make the difference between a useful cooler and two wet flower pots sitting in your yard.
So, What Exactly Is a Zeer Pot?
A zeer pot, sometimes called a pot-in-pot cooler, uses two unglazed clay pots. One fits inside the other, leaving a space between them.
That empty space gets filled with wet sand. The smaller pot holds your food. A damp cloth or clay lid goes over the top.
Here’s the basic setup:
- One larger unglazed clay pot
- One smaller unglazed clay pot
- Clean sand
- Clean water
- A breathable cloth or suitable lid
- A cool, shaded, well-ventilated location
The smaller pot should sit inside the larger one without touching the bottom too tightly. You want room for wet sand all around it.
That’s your cooler.
How Does a Zeer Pot Evaporative Cooler Actually Get Cold?
This is the neat part.
You add water to the sand between the pots. The sand stays damp, and moisture slowly moves toward the outside surface of the outer clay pot.
As that moisture evaporates into the surrounding air, it removes heat. The clay pot cools down, and that cooling effect reaches the inner pot where your food is stored.
But here’s the catch: evaporation needs suitable conditions.
If the air is dry and moving, water evaporates more easily. If the air is already very humid, evaporation slows down, so the cooler won’t work nearly as well.
That’s why a zeer pot can perform beautifully in a dry climate but be much less impressive during a muggy stretch of summer.
Where Should You Put a Zeer Pot?
This is one of those things that seems obvious until you get it wrong.
Don’t put your cooler in full afternoon sun.
You’d think the wet clay would handle it, but you’re fighting against yourself. The whole point is to remove heat through evaporation. Baking the outside of the pot in direct sunlight adds heat right back.
A shady location with good airflow is much better.
A covered porch can work. A shaded backyard area can work. An airy shed may work if it isn’t too hot and stuffy.
I’d avoid a sealed cabinet or enclosed box. The air needs somewhere to go because evaporation works better when the surrounding air isn’t already saturated with moisture.
How I Would Build a Zeer Pot Step by Step
You don’t need complicated equipment for this. The hardest part is actually finding two clay pots that fit together properly.
1. Find two unglazed clay pots
The smaller pot needs to fit inside the larger one with enough space around it for a layer of sand.
Don’t force the inner pot down inside the larger pot. If they’re wedged together, you won’t have enough room for the cooling layer.
2. Clean the pots
Give both pots a good cleaning before using them for food storage.
You don’t want old dirt, fertilizer residue, or anything questionable from a garden center getting anywhere near your food.
3. Add a layer of sand
Put some clean sand in the bottom of the large pot.
Set the smaller pot inside and check the height. You want the inner pot sitting securely while leaving a gap around the sides.
4. Fill the gap
Slowly add clean sand around the inner pot.
Don’t dump a giant pile in all at once. Add it gradually and make sure the inner pot stays centered.
Fill the space nearly to the top, but don’t let sand fall into the food compartment.
5. Wet the sand
Add clean water to the sand.
Do it slowly. You want the sand damp, not a swimming pool.
The sand should hold moisture without becoming completely flooded.
6. Add the food
Once the inside is clean and the cooler has started working, put suitable produce into the inner pot.
Don’t pack it so tightly that air can’t move around the food.
7. Cover the top
A breathable cloth or appropriate lid can help keep dust and insects away while still allowing moisture to evaporate around the cooler.
What Can You Store in a Zeer Pot?
This is where a little common sense goes a long way.
A zeer pot is useful for foods that benefit from being kept cooler than the surrounding environment but don’t necessarily require refrigerator-level cold temperatures.
Fresh vegetables can be good candidates. Depending on the climate and the particular food, people use evaporative coolers for things such as:
- Tomatoes
- Carrots
- Leafy greens
- Cucumbers
- Eggplant
- Peppers
- Other fresh garden produce
However, I would not treat a zeer pot as a replacement for a refrigerator when food safety depends on maintaining a specific cold temperature.
My Biggest Zeer Pot Mistake: Too Much Water
This is an easy mistake to make because your brain says, “More water means more cooling.”
Not really.
The goal is steady evaporation. If you completely flood the sand, you’re not automatically making the cooler colder. You’re mostly making a muddy mess.
Check the sand regularly and add water when it starts drying out.
How often? That depends heavily on your weather. A hot, dry, breezy day can use water quickly. A humid day may use much less.
Instead of following some exact internet schedule, look at the sand. If it’s drying out, add water. If it’s already very wet, leave it alone.
Why Airflow Matters More Than People Think
Here’s a little science that actually helps you use the thing.
When water evaporates, it needs somewhere to go. If the air around your zeer pot is already holding lots of moisture, evaporation slows down.
That’s why a breeze can be your friend.
You don’t need to put the pot in a hurricane, obviously. Just give it a location where air can move naturally around the outside.
A shady, breezy porch is usually a much better location than a dark corner against a wall.
Can You Use a Zeer Pot in a Humid Climate?
Yes, but don’t expect miracles.
Evaporative cooling works best when the air is relatively dry. In a humid climate, the air doesn’t have as much capacity to accept additional moisture, so evaporation becomes less effective.
This is one of those situations where you need to test it yourself.
Put a simple thermometer inside the inner pot and another one nearby. Check them at different times of day.
That will tell you far more about your particular backyard than somebody else’s results online.
Three Little Things That Make a Big Difference
Keep it clean
Wash the inner pot regularly and don’t let spoiled vegetables sit inside. A cooler isn’t useful if the food starts going bad because you forgot about it.
Keep it shaded
This one is worth repeating. Shade helps your evaporative cooler do its job.
Don’t let the sand dry completely
If the sand becomes bone dry, evaporative cooling stops until you add water again.
But again, don’t flood it. You’re looking for damp, not swamp.
Could a Zeer Pot Help During a Power Outage?
It can help with certain foods, especially produce that doesn’t need refrigerator temperatures for safety.
But don’t think of it as an emergency replacement for a refrigerator full of meat and milk.
During a power outage, food safety becomes more important than saving every last item. A zeer pot can be one part of a broader off-grid food-storage setup, but it shouldn’t be your only plan.
For homesteaders, I think it’s more useful as a daily low-energy cooling method for appropriate produce rather than as a substitute refrigerator.
What I Like About This Old-School Cooling Method
The best thing about a zeer pot is that there’s not much to break.
No compressor.
No batteries.
No complicated wiring.
No solar panels required.
If you already have suitable clay pots and clean sand, the basic setup is incredibly simple.
It’s also a nice fit for permaculture thinking because you’re using a basic physical process instead of throwing more electricity at the problem.
And there’s something satisfying about that.
What I Don’t Like About a Zeer Pot
Let’s not pretend it’s perfect.
First, it needs water. In a place where water is scarce, using drinking water for evaporative cooling may not make sense.
Second, it takes up some room and can be heavy once the pots and wet sand are in place.
Third, performance changes with the weather. A refrigerator gives you much more predictable cooling.
And finally, clay pots can crack. Handle them carefully and don’t assume they’re indestructible just because they’re simple.
Mini FAQ: Zeer Pot Evaporative Cooler
How cold does a zeer pot get?
There’s no single temperature because performance depends on humidity, airflow, shade, pot design, water availability and air temperature. In good dry conditions, evaporative cooling can make the inside noticeably cooler than the surrounding air, but it isn’t designed to behave like a modern refrigerator.
Does a zeer pot need electricity?
No. That’s one of the main reasons people use this type of evaporative cooler. It relies on water evaporation and airflow rather than electricity.
Can I use a plastic pot instead of clay?
Not for the same evaporative-cooling effect. Porous unglazed clay is important because moisture can move through the material and evaporate from the surface. Plastic doesn’t work the same way.
Is a Zeer Pot Worth Trying?
If you like simple DIY projects, backyard gardening, off-grid ideas, or old-school food storage methods, I’d say it’s a pretty interesting experiment.
Just don’t expect it to replace your refrigerator.
Build it small. Test it with a thermometer. Keep it shaded. Watch the water level. And pay attention to how it performs in your own climate.
That’s really the homesteading lesson here: you don’t need to believe every claim you hear. Try things yourself, measure what happens, keep what works and ditch what doesn’t.
A zeer pot evaporative cooler is about as simple as DIY cooling gets, and sometimes those simple ideas are the ones worth keeping around.
If you’ve built one yourself, I’d love to hear how it worked in your climate. Got a weird question about it? Leave a comment. Sometimes the odd questions are the most useful ones.