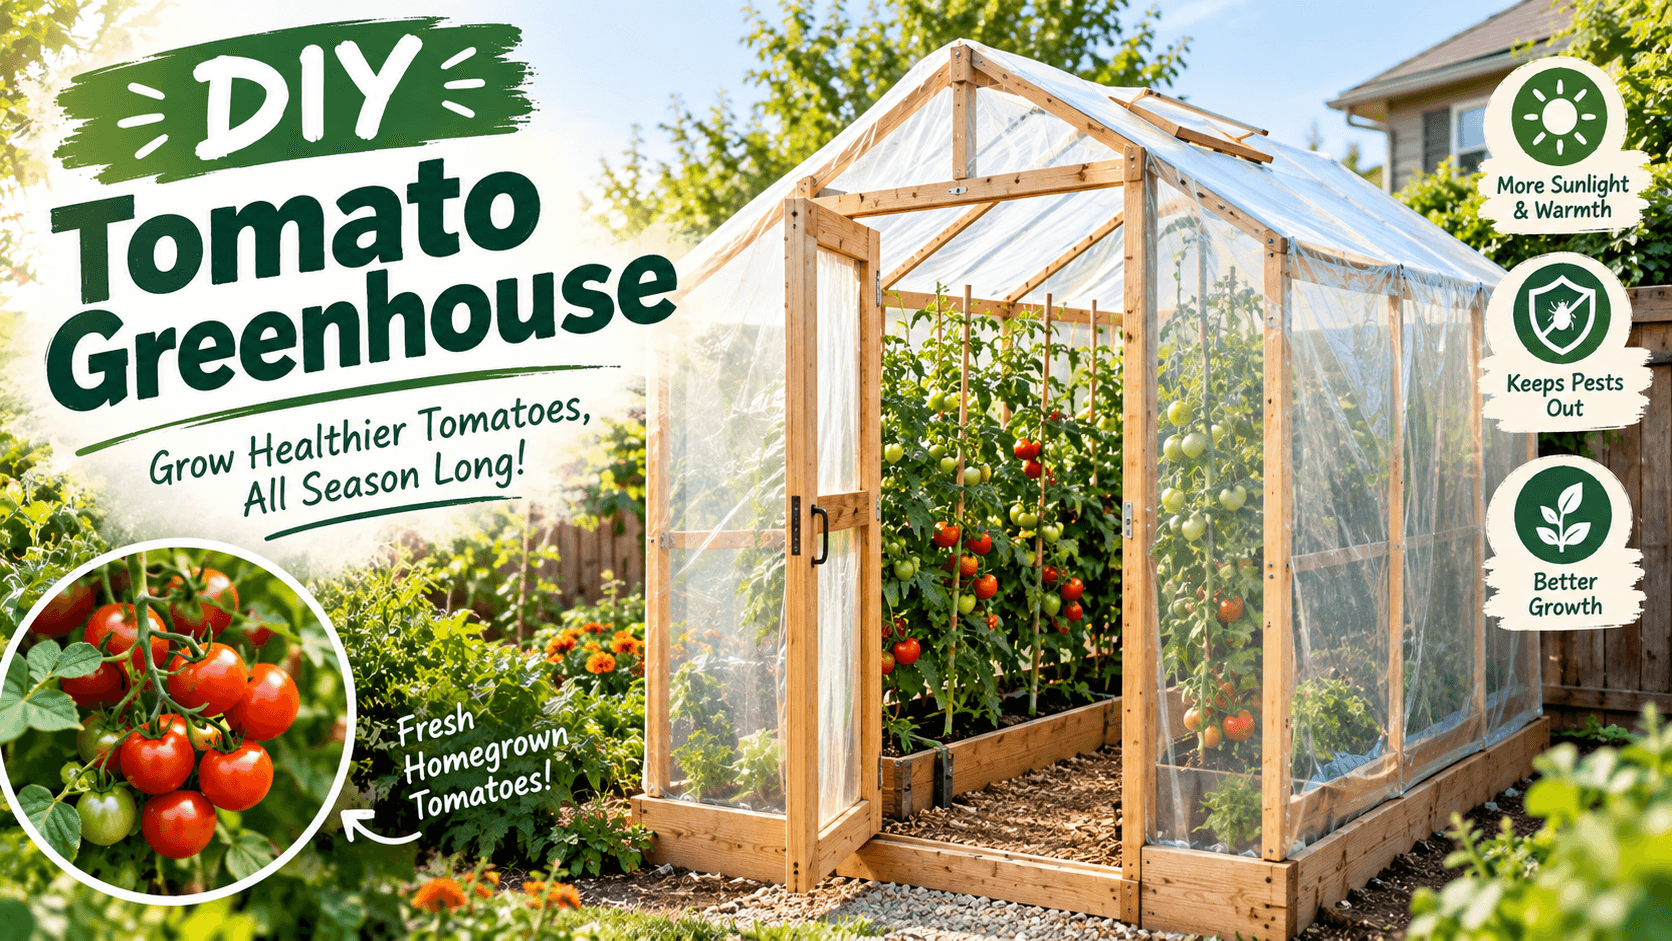
The first DIY tomato greenhouse I built looked pretty rough. I’m not gonna lie. One side leaned a little, the plastic was flapping in the wind, and I used more zip ties than I care to admit. My neighbor walked over, looked at it for a few seconds and said, “You sure that thing is gonna stay up?”
Well… it did.
Mostly.
I built it because I was tired of watching my tomato plants struggle when the weather turned cold. I’d spend weeks growing healthy plants, then one cold night or a week of ugly weather would come along and slow everything down.
So I decided to try building a small greenhouse myself.
I didn’t want some fancy greenhouse that cost a fortune. I wanted something simple for a backyard garden, something I could repair myself, and something that would give my tomatoes a little protection.
After a few seasons of messing with different setups, I’ve learned that a DIY tomato greenhouse doesn’t need to be complicated. It just needs to do a few important jobs: protect the plants from cold, give them plenty of light, handle some wind, and let you control the airflow.
And believe me, airflow matters more than I thought.
Why I Decided to Build a DIY Tomato Greenhouse
My tomato plants always seemed to have terrible timing.
When the weather was perfect, they grew like crazy. Then the temperature would drop at night and suddenly they looked miserable.
One spring I planted tomatoes a little too early because we had several warm days in a row. I got excited.
Bad idea.
A cold night came along and my poor tomatoes looked like they had personally been insulted.
That was when I started thinking about a small greenhouse.
A greenhouse gives tomatoes a more protected growing environment. It can help you get plants started earlier, extend the growing season, and protect plants from some cold weather and harsh conditions.
But here’s the thing: a greenhouse isn’t magic.
If you close it up on a warm sunny day, the inside temperature can climb very quickly.
I learned that one the hard way too.
How Big Does a DIY Tomato Greenhouse Need to Be?
Not very big.
For a backyard homestead, I actually recommend starting smaller than you think.
My first one was basically a little walk-in tunnel. It held several tomato plants with enough room for me to get inside and work.
If you only have a few plants, you could build something much smaller.
A simple structure might be:
- 4 to 6 feet wide
- 6 to 10 feet long
- Around 6 feet tall in the center
You can make it bigger later.
That’s one reason I like DIY projects. You don’t have to get everything perfect the first time.
If you have a small urban backyard, even a mini greenhouse can be useful. Just make sure you aren’t blocking your neighbor’s access, breaking local rules, or putting it somewhere that causes water to run toward another property.
What I Used for My Greenhouse
I wanted cheap materials.
I also wanted materials I could find locally without ordering some strange greenhouse part from three states away.
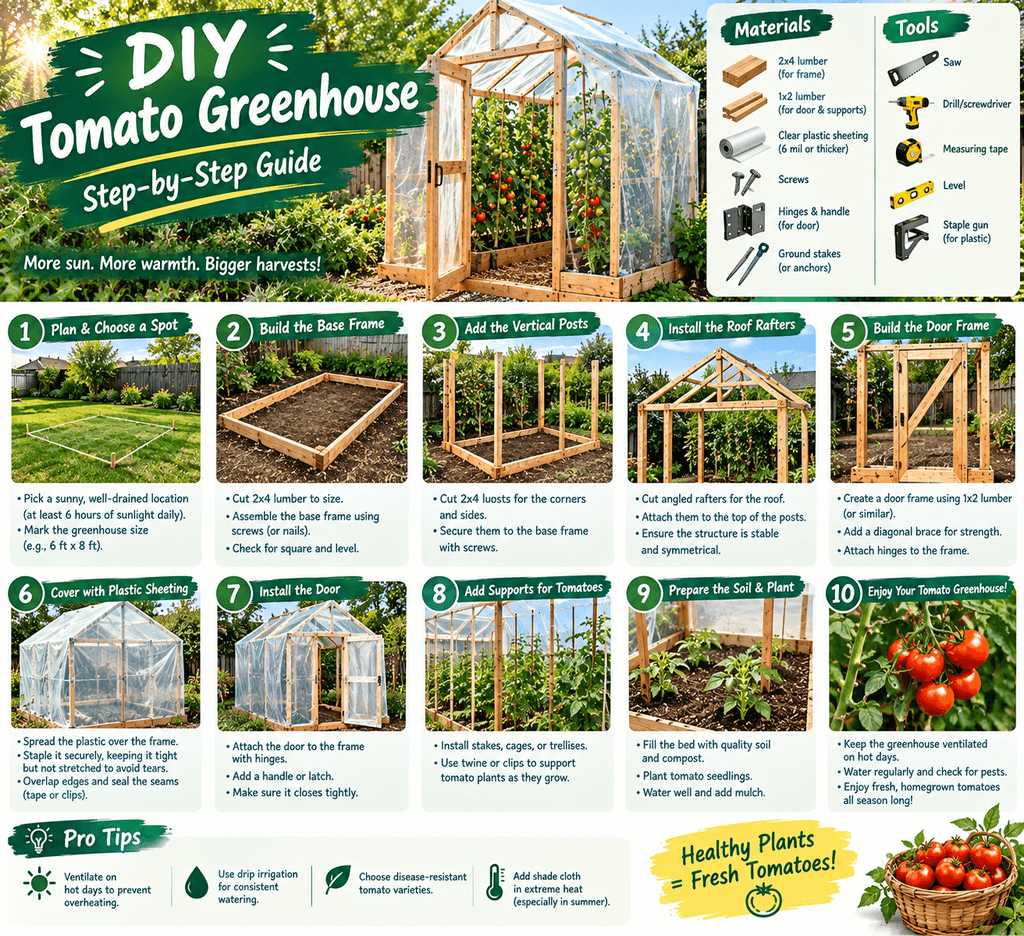
For a basic backyard greenhouse, you can use materials such as:
- PVC hoops or other suitable framing
- Greenhouse plastic
- Wooden boards for the base
- Screws
- Zip ties or greenhouse clips
- Hinges for a simple door
- Stakes or anchors
- A thermometer
The exact materials depend on the size and weather where you live.
If you get strong winds, don’t build a lightweight greenhouse and assume a few garden stakes will hold it down.
That’s asking for trouble.
One windy night can turn your greenhouse into a very expensive plastic kite.
Building the Frame
I started with a simple rectangular wooden base.
Nothing fancy.
The base gives the structure something solid to attach to, and it also makes the whole thing easier to square up.
Then I added hoops across the width of the greenhouse.
If you’re using PVC, make sure it’s appropriate for the structure you’re building and secure it properly. PVC is convenient, but it can flex a lot.
For larger structures or areas with heavy snow or strong winds, I’d use a stronger framing system rather than depending on lightweight PVC.
The goal isn’t to build the cheapest greenhouse possible.
The goal is to build the cheapest greenhouse that won’t collapse on your tomatoes.
There’s a difference.
The Plastic Cover Is More Important Than You Think
This is where I made one of my dumbest mistakes.
I used cheap clear plastic because I thought, “Plastic is plastic.”
Nope.
The first sheet tore much faster than I expected.
Now I prefer greenhouse-grade plastic or another covering designed for outdoor growing. It costs more than a random plastic sheet, but it can save you from replacing the covering over and over.
Pull the plastic tight, but don’t stretch it so aggressively that you’re creating weak points.
And secure the edges really well.
Wind loves loose plastic.
It finds that loose corner and starts pulling.
Then you hear that horrible flap-flap-flap sound at 2 in the morning.
I’ve been there.
Don’t Forget the Door
A door sounds obvious, but when you’re building your first DIY tomato greenhouse, it’s easy to think mostly about the frame and plastic.
You need a way to get inside.
My first entrance was basically a piece of plastic I rolled up.
It worked.
It also looked terrible.
Eventually I made a simple framed door.
If your greenhouse is small, you don’t need anything fancy. Just make sure the entrance is wide enough for you, your watering can, a bucket of compost, and eventually a basket full of tomatoes.
You’ll thank yourself later.
Ventilation Is Absolutely Necessary
If I could give somebody only one greenhouse tip, this might be it.
Ventilation.
A greenhouse can get surprisingly hot.
The sun comes out, the temperature rises, and suddenly your tomato plants are sitting inside what feels like a plastic oven.
I like having openings on opposite sides when possible so I can create cross ventilation.
On warm days, I’ll open the doors or vents.
On cooler days, I close things back up.
This little routine becomes part of checking the garden.
Feed the chickens.
Check the compost.
Look at the tomato plants.
Open the greenhouse.
Make coffee.
Very important step.
Watering Tomatoes in a Greenhouse
Tomatoes still need consistent watering inside a greenhouse.
But don’t assume more water is better.
That’s another mistake I made.
I used to walk in, see the dry-looking soil on top, and immediately grab the hose.
Sometimes the soil underneath was still plenty damp.
Now I stick my finger into the soil and actually check.
For container-grown tomatoes, I pay even more attention because containers can dry out faster.
Water the soil rather than constantly wetting the leaves.
And water early enough that the growing area doesn’t stay damp all night.
Remember, your greenhouse is a different little climate from the backyard outside.
What About Humidity?
Humidity can become a problem in an enclosed greenhouse.
This is another reason ventilation matters.
If you’re growing tomatoes in a damp, poorly ventilated structure, you’re creating conditions where disease problems can become harder to manage.
I don’t try to create a perfect climate.
I just try to keep things reasonably dry, give the plants air movement, and avoid turning the greenhouse into a sealed box.
Some gardeners also use fans in larger greenhouses.
For my smaller setup, natural ventilation has usually been enough when I stay on top of opening and closing the vents.
How I Arrange My Tomato Plants
I used to pack plants into every available inch.
More plants means more tomatoes, right?
Well… not exactly.
Crowded tomato plants are harder to work around, harder to inspect, and can have poor airflow.
Now I leave enough room between plants so I can walk around them and reach the leaves.
I also use stakes, cages, or trellising to keep plants growing upward.
Vertical growing is especially useful if you have a small backyard.
You get more production from the space without turning the whole greenhouse into a jungle.
And trust me, tomato jungle sounds fun until you’re trying to find a ripe tomato buried behind six pounds of leaves.
What Temperature Is Too Hot for Tomatoes?
This is one of those questions where I don’t like giving one magic number and pretending gardening works like a machine.
Tomatoes generally like warm conditions, but excessive heat can interfere with flowering and fruit set.
That’s why I watch the temperature inside my greenhouse instead of guessing.
I keep a simple thermometer inside.
If I see the temperature climbing too high, I open the vents and doors.
The thermometer is cheap.
Replacing a bunch of stressed tomato plants isn’t.
Can You Use a DIY Tomato Greenhouse in Winter?
It depends heavily on your climate and how the greenhouse is built.
A basic plastic greenhouse isn’t the same thing as a heated commercial greenhouse.
My little structure can extend the growing season, protect plants from some cold weather, and give me a head start.
But when the weather gets seriously cold, I don’t pretend a thin plastic cover is going to turn winter into July.
If you’re in an area with freezing temperatures, you’ll need to think about insulation, stronger construction, possibly supplemental heat, and—most importantly—fire and electrical safety.
Don’t put a questionable space heater next to plastic and walk away.
That’s not homesteading.
That’s asking for a visit from the fire department.
My Favorite Greenhouse Tomatoes
I like growing varieties that give me lots of fruit over the season.
Cherry tomatoes are especially fun because they can produce heavily and they’re easy to grab while you’re working.
I also like larger slicing tomatoes for sandwiches.
But honestly, the best tomato is the one that grows well in your particular conditions.
Try a few varieties.
Keep notes.
If one variety performs great in your greenhouse, save that information for next season.
That’s how I improved my garden over the years—not by knowing everything, but by remembering what went wrong last year.
A Few Things I Would Do Differently
If I were building my first DIY tomato greenhouse again, I’d spend more time on the foundation and ventilation.
I’d also buy better greenhouse plastic from the beginning.
And I’d build the door properly.
Those three things would’ve saved me a lot of messing around.
I’d also put the greenhouse somewhere with good sunlight instead of trying to squeeze it behind a shed.
Tomatoes want light.
A greenhouse can’t fix a terrible location.
Before building, watch your backyard for a full day if you can. Notice where shadows fall in the morning, afternoon, and evening.
That little bit of planning can make a big difference.
Quick FAQ
Can I build a DIY tomato greenhouse with PVC?
Yes. PVC can work well for small, lightweight greenhouse structures, especially in sheltered locations. Just secure it properly and consider stronger materials if your area gets serious wind, snow, or other heavy weather.
Is a greenhouse worth it for a small backyard?
For me, absolutely.
You don’t need a huge greenhouse. Even a small structure can help protect seedlings and extend your tomato-growing season. If you’re growing only a few plants, start small and see how you like it.
Do tomatoes need ventilation in a greenhouse?
Yes. Good ventilation helps control heat and humidity and keeps air moving around the plants. I wouldn’t build a greenhouse without planning how I’m going to open it up on warm days.
Would I Build Another One?
Yep.
Even with all the mistakes.
There’s something pretty satisfying about walking into that little greenhouse early in the morning and seeing tomato plants covered in green fruit.
You’re growing food.
Not just buying it.
And when those first tomatoes finally turn red, you know exactly where they came from.
That’s one of the reasons I got into homesteading in the first place. It’s not about doing everything perfectly or becoming completely self-sufficient overnight.
It’s about learning little things.
Building something.
Growing something.
Messing it up.
Trying again.
If you’re thinking about building a DIY tomato greenhouse, don’t get stuck waiting until you have the perfect tools, perfect backyard, or perfect plan. Start with something manageable, build it strong, give your tomatoes plenty of light and airflow, and learn as you go.
And if your first greenhouse looks a little crooked?
Don’t worry.
Mine did too.