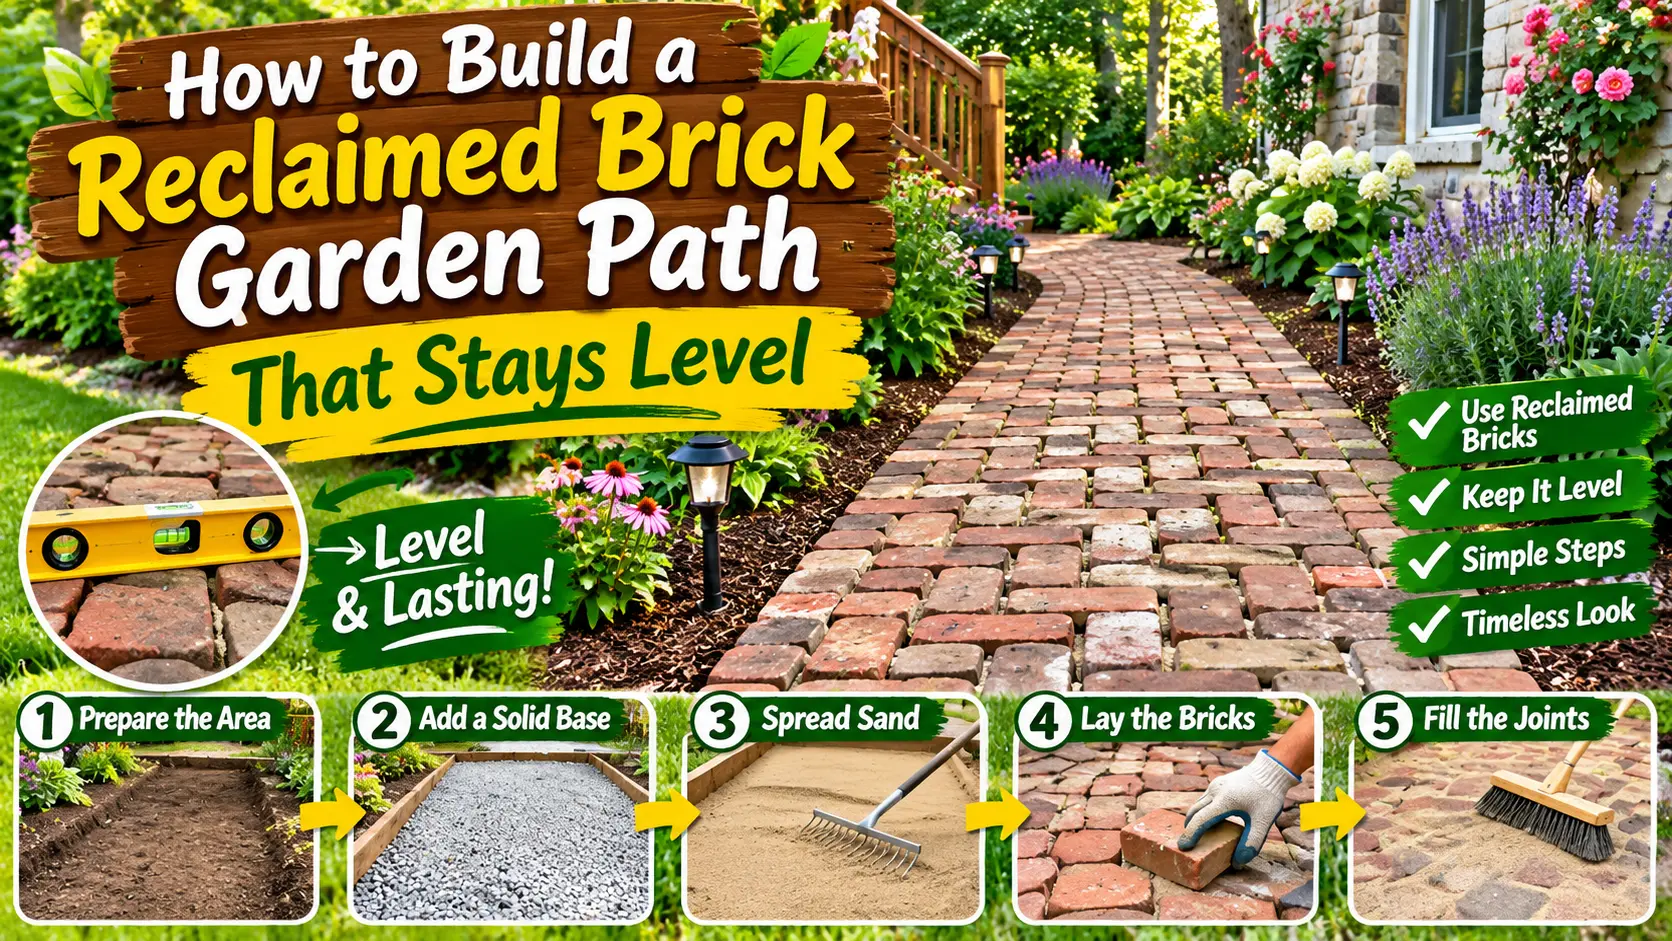
A reclaimed brick garden path can make a new landscape look established from day one, but the bricks you see are only the top layer of the project. A walkway that stays flat needs firm soil, a compacted base, a consistent bedding layer, stable edges, filled joints, and a way for rainwater to move away instead of collecting underneath.
The Pinterest image captures the look beautifully: irregular old brick tones, a wide cottage-garden path, and lush planting on both sides. What it does not show clearly is the foundation that keeps those bricks from rocking and spreading after rain, frost, and foot traffic.
Quick answer
Excavate the path, compact the subgrade, install a suitable compacted aggregate base, screed a thin bedding-sand layer, set outdoor-rated bricks or pavers, install edge restraints, compact the surface, and sweep joint sand into the gaps. Give the finished path a slight drainage slope and do not rely on loose sand alone as the foundation.
Why Reclaimed Brick Works So Well in a Garden
Old brick has color variation and softened edges that are difficult to reproduce with perfectly uniform new paving.
It works especially well with:
- Cottage gardens
- Hosta and fern borders
- Rose gardens
- Older homes
- Wood decks and porches
- Stone walls
- Informal backyard paths
The variation between individual bricks is part of the appeal, but those differences also make preparation more important because reclaimed units may not all have identical thickness.
1. Make Sure the Old Brick Is Suitable for a Walkway
Not every old brick should go back into the ground as paving.
Sort reclaimed pieces before installation and remove bricks that are:
- Severely cracked
- Soft or crumbling
- Breaking apart at the faces
- Contaminated with unknown oils or chemicals
- Covered with loose unstable mortar
In freeze-thaw climates, outdoor-rated paving brick is preferable to softer masonry brick that may absorb water and deteriorate through repeated freezing.
2. Lay Out the Entire Path Before Excavating
Use a garden hose, rope, marking paint, or stakes to establish the route.
Walk through the proposed path several times before digging.
Check whether:
- The path is wide enough for comfortable walking
- The curves feel natural
- Plants will spill too far into the walkway
- Downspouts or drainage cross the route
- The final elevation will meet steps and patios cleanly
3. Do Not Set the Bricks Directly on Garden Soil
This is the biggest difference between a temporary decorative path and a long-lasting walkway.
Loose topsoil changes volume as it becomes wet and dry. Clay soils can move even more, especially where freeze-thaw cycles occur.
A properly prepared aggregate base spreads loads and reduces localized settling.
The bedding sand is not the structural base. It is a thin leveling layer over a compacted aggregate foundation.
4. Excavate for All the Layers
The excavation depth needs to account for:
- The compacted base
- The bedding sand
- The brick thickness
- The desired finished elevation
Do not copy an excavation depth from a Pinterest photograph. Local soil strength, freeze-thaw conditions, drainage, brick thickness, and expected traffic all influence the correct section.
How Much Base Does a Garden Walkway Need?
There is no single number for every site, but pedestrian paving generally uses a compacted aggregate base below the bedding layer.
CMHA guidance for pedestrian paving systems shows substantial compacted aggregate beneath the surface and notes that thicker bases may be necessary in freezing climates or weak soils.
For a residential garden path, use locally appropriate paver-base guidance rather than assuming a shallow layer of sand is enough.
5. Compact the Subgrade
After excavation, remove loose organic material and compact the exposed ground.
Soft pockets should be corrected before the base goes down.
If one area of soil feels much softer than the rest, placing more bricks on top will not solve the problem.
6. Add and Compact the Aggregate Base in Layers
Spread suitable paver-base aggregate evenly and compact it thoroughly.
For deeper bases, compact in manageable lifts rather than dumping the full depth at once and vibrating only the surface.
Check both level and drainage slope as you work.
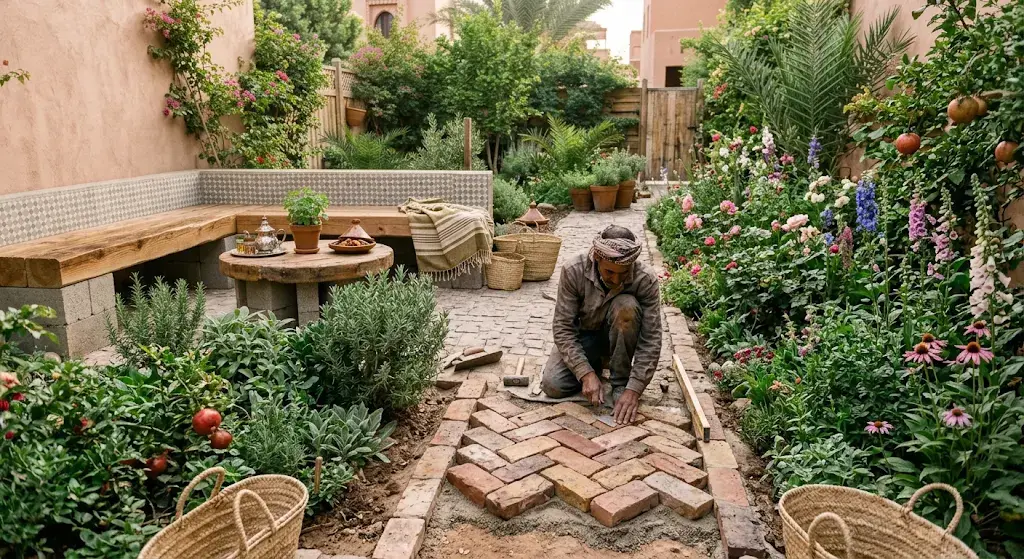
7. Plan Drainage Before the Bricks Go Down
A garden walkway should not become a shallow channel that directs water toward the house.
Build a slight cross-slope or longitudinal slope so surface water moves toward an appropriate landscape area.
Where drainage is difficult, the entire base and surrounding landscape may need additional planning rather than simply increasing the sand layer.
8. Screed a Thin Bedding-Sand Layer
Once the compacted base is correct, add the bedding sand.
CMHA construction guidance treats bedding sand as a carefully screeded layer placed over the structural base—not as several loose inches of fill.
Avoid walking excessively on freshly screeded sand before placing the brick.
9. Sort Reclaimed Bricks by Thickness
Reclaimed brick is often less uniform than new paving units.
Before installation, sort bricks into rough thickness groups.
This makes it easier to maintain a smooth walking surface without continually adding and removing large amounts of bedding sand under individual pieces.
10. Choose a Pattern That Fits Old Bricks
The inspiration image uses an intentionally irregular appearance.
Possible patterns include:
- Running bond
- Basket weave
- Herringbone
- Random reclaimed pattern
A more random pattern can accommodate mixed colors and slightly different lengths, but the joints still need to remain controlled enough that individual bricks do not move excessively.
11. Edge Restraints Are Not Optional Decoration
Without a stable edge, brick and pavers gradually migrate outward under foot traffic and seasonal movement.
CMHA calls edge restraints an essential component of interlocking paving systems because they provide lateral resistance and prevent spreading.
Possible residential options include:
- Purpose-made plastic paver edging
- Steel or aluminum edging
- Concrete restraint
- A properly built masonry border
Soil piled against the outside edge is not a substitute for a proper restraint. CMHA specifically notes that ordinary soil backfill is not a suitable edge restraint for interlocking pavers.
12. Fill the Joints
After the bricks are installed and the edge restraints are secure, sweep suitable jointing sand into the spaces between the units.
Joint material helps lock the paving field together and reduces individual movement.
Depending on the brick type, joint width, and product instructions, you may use conventional joint sand or an appropriate polymeric product.
Polymeric Sand: Useful, but Not Magic
Polymeric sand can reduce washout and help stabilize suitable joints when installed correctly.
It does not:
- Replace the aggregate base
- Repair poor drainage
- Stop all future weeds forever
- Fix loose edge restraints
- Make severely irregular gaps stable
Follow the specific product instructions for joint width, surface cleaning, watering, temperature, and curing.
Can You Put Landscape Fabric Under a Brick Path?
A separation geotextile can have a legitimate role in certain paving systems, especially where the goal is to keep weak soil from mixing into the aggregate base.
But ordinary landscape fabric is not what makes a walkway structurally sound.
The important elements remain:
- Suitable soil preparation
- Correct aggregate
- Compaction
- Drainage
- Stable edge restraints
How Wide Should a Garden Path Be?
Width depends on how the path will be used.
A narrow secondary path can be relatively compact, while a main route between a house, patio, shed, or garden gate should feel comfortable to walk without brushing plants on both sides.
If two people regularly walk side by side, make it wider from the beginning rather than expanding it later.
Keep Plants From Taking Over the Path
The lush planting in the image is part of what makes the walkway beautiful.
But mature hostas, ferns, coneflowers, roses, and other border plants can easily extend a foot or more farther than they did when planted.
Plant according to mature spread so leaves do not permanently narrow the usable walkway.
What the Pinterest Design Gets Right
- Uses reclaimed brick color variation beautifully.
- Creates a generous garden path rather than a narrow stepping strip.
- Pairs hardscape with dense soft planting.
- Uses an informal pattern appropriate to a cottage garden.
- Connects the path naturally to the home and deck.
What the Photo Does Not Show
| Visible | Hidden Detail That Matters |
|---|---|
| Sand under brick | Compacted aggregate base below the bedding layer |
| Old brick surface | Whether the brick is suitable for outdoor paving |
| Loose outer edge | Permanent edge restraint system |
| Flat appearance | Drainage slope |
| Irregular joints | Joint material and long-term stabilization |
7 Common Brick Walkway Mistakes
1. Putting brick directly on soil
Soft and wet soil allows individual units to settle unevenly.
2. Using sand as the entire base
Bedding sand is the leveling layer, not a replacement for compacted base aggregate.
3. Skipping edge restraints
The outside bricks can slowly spread and open the joints.
4. Ignoring reclaimed-brick thickness differences
Sort old bricks before installation to make leveling easier.
5. Building perfectly level with nowhere for water to go
Plan a gentle slope toward a safe drainage area.
6. Using badly deteriorated old brick
A beautiful weathered surface is different from brick that is actively crumbling.
7. Letting border plants close the walkway
Allow for mature plant width when sizing the path.
Reclaimed Brick Garden Path FAQ
Can you use old bricks for a garden path?
Yes, if they are sound enough for outdoor ground contact and pedestrian use. Avoid severely cracked, soft, or crumbling pieces.
Can I lay brick directly on sand?
The sand should normally be a thin bedding layer over a compacted aggregate base, not the entire foundation.
Do brick walkways need edging?
Yes. Edge restraints help prevent the paving units from spreading sideways and opening the joints.
Can I use polymeric sand between old bricks?
Possibly, if the product is suitable for your joint width and brick surface. Follow the manufacturer’s instructions carefully, especially with irregular reclaimed joints.
Do I need landscape fabric?
A separation geotextile may be useful with certain weak soils and paving designs, but it does not replace proper base preparation or edge restraints.
Why are my pathway bricks sinking?
Common causes include insufficient base depth, poor compaction, soft subgrade, drainage problems, bedding-sand loss, or missing edge restraints.
The Bottom Line
A reclaimed brick walkway can be one of the most attractive features in a garden because the surface becomes more interesting as the materials age.
The Pinterest image gets the visual idea right: mixed brick tones, an informal pattern, generous width, and dense planting on both sides.
The part you should not copy blindly is the apparently simple sand-set construction. A durable walkway depends on compacted soil, a proper aggregate base, bedding sand, drainage, edge restraints, and stable joints.
Build those hidden layers correctly and the old brick can keep its informal charm without becoming an uneven trip hazard after a few seasons.
Using brick elsewhere in the garden?
See FarmSolo’s Brick Garden Edging: 9 Tips for a Border That Lasts for lawn edges, curved flower beds, reclaimed brick borders, and jointing options.
Sources
- Concrete Masonry & Hardscapes Association — Construction of Interlocking Concrete Pavements
- Concrete Masonry & Hardscapes Association — Edge Restraints for Interlocking Concrete Pavements
- Concrete Masonry & Hardscapes Association — Pedestrian Paving Slab Construction Guidelines
- Penn State Extension — Porous and Permeable Paving Materials