FARMSOLO • BACKYARD FARMING
How to Grow Bell Peppers from Seeds: A Complete Guide from Seed to Harvest
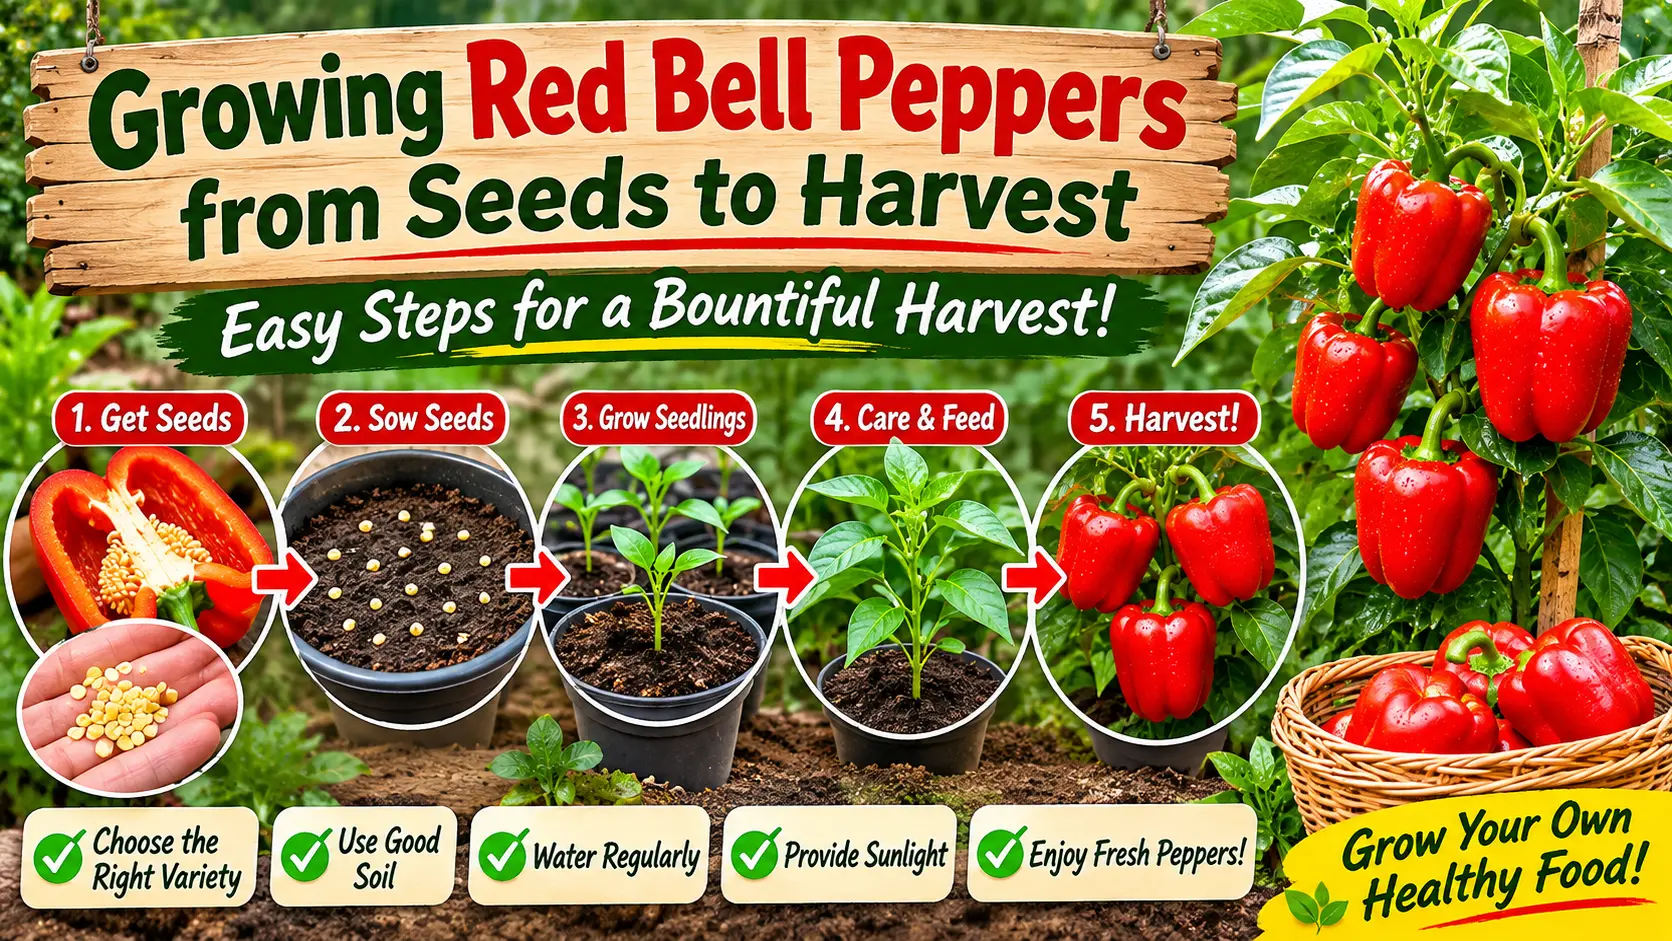
Growing bell peppers from seeds is one of those little gardening projects that makes you feel pretty good when it finally works. You start with a few tiny seeds, watch the first green leaves appear, and eventually get beautiful peppers growing on your own plants.
The process takes patience, warmth, sunlight, and consistent watering. But you don’t need a large backyard to grow sweet red, green, or yellow bell peppers. A sunny garden bed or a suitable container can be enough to get started.
Quick Answer
To grow bell peppers from seeds, start with fresh seeds and sow them about 1/4 inch deep in a clean seed-starting mix. Keep the growing medium warm and moist, provide bright light after germination, and transplant healthy seedlings outdoors after cold nights have passed.
Bell peppers need warm weather, plenty of sunlight, well-drained soil, and consistent moisture. You can harvest them green or leave them on the plant longer to develop their mature red, yellow, or orange color, depending on the variety.
Important seed-saving tip: If you’re collecting seeds from a store-bought pepper, choose a fully mature fruit and understand that seeds from hybrid peppers may not produce plants identical to the original fruit. For predictable results, buy seeds of a named bell pepper variety from a reputable supplier.
Can You Grow Bell Peppers From Seeds Inside a Fresh Pepper?
Yes, you can sometimes grow bell peppers from seeds collected from a fresh pepper. That’s probably the most interesting part of the whole project.
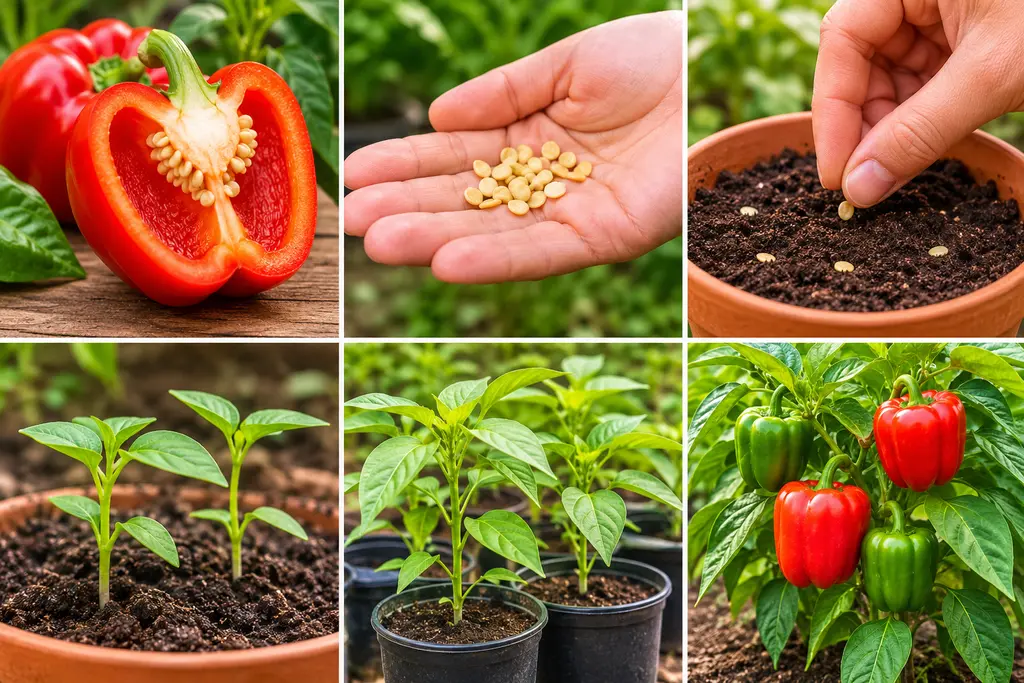
Cut open a ripe pepper and you’ll find dozens of seeds attached to the pale inner membrane. Some of those seeds may be viable and capable of germinating.
However, there is an important difference between a seed that can germinate and a seed that will produce the same pepper you bought.
Many commercial peppers are hybrids. Their saved seeds may produce plants with different fruit sizes, shapes, colors, or growing characteristics.
My recommendation: If you’re experimenting for fun, try seeds from a fully ripe pepper. If you want a predictable harvest, choose a named open-pollinated variety or a reliable commercial seed packet.
8 Steps to Grow Bell Peppers from Seeds
01 • SEED SELECTION
Choose Healthy, Mature Pepper Seeds
The first step is choosing the right seeds.
If you’re collecting them yourself, start with a fully mature pepper. Red, yellow, and orange peppers are generally more mature than green peppers of the same variety.
Remove the seeds carefully and spread them out on a clean surface. Discard seeds that look damaged, moldy, or unusually soft.
For the most reliable results, use fresh seeds from a reputable seed supplier. Label the variety so you know what you’re growing later.
02 • PREPARE THE CONTAINERS
Prepare a Good Seed-Starting Mix
You don’t need expensive gardening equipment to start bell pepper seeds.
A seed-starting tray, small pots, or individual growing cells can work. Make sure the containers have drainage holes at the bottom.
Use a clean, lightweight seed-starting mix rather than heavy garden soil. A suitable mix gives tiny roots room to develop while allowing excess water to drain.
Moisten the mix before planting. It should feel damp, not muddy or soaked.
03 • PLANTING DEPTH
Plant the Seeds at the Right Depth
Pepper seeds are small, so you don’t need to bury them deeply.
A common recommendation is to sow them about 1/4 inch deep in the seed-starting mix. Follow the instructions on your seed packet if they specify a different depth.
Cover the seeds lightly with growing mix and gently water the surface so the seeds stay in place.
If you’re planting several varieties, label each container. It’s surprisingly easy to forget which seeds went where.
04 • GERMINATION
Keep the Seeds Warm While They Germinate
Bell peppers are warm-season plants. Cold growing media can slow germination and make starting seeds more frustrating than it needs to be.
The University of Minnesota Extension recommends warm conditions for pepper seed starting, including using a seedling heat mat when needed. Its guidance gives a temperature range of approximately 80°F to 90°F for the seed-starting flat until seedlings emerge.
Keep the growing mix moist, but don’t leave the seeds sitting in water. A clear humidity cover can help retain moisture, but remove it once seedlings emerge.
Germination time varies with seed freshness, variety, and temperature. Be patient and check the containers regularly.
Don’t overwater: Constantly saturated growing mix can create problems for young seeds and seedlings. Keep the mix evenly moist, with good drainage and air circulation.
05 • SEEDLING CARE
Give Young Pepper Seedlings Plenty of Light
Once the first green shoots appear, light becomes extremely important.
Pepper seedlings need bright light to develop strong stems. A weak light source can cause them to stretch, become thin, and lean toward the window.
A suitable grow light placed above the seedlings can provide more consistent lighting than a dim windowsill. Keep the light at the distance recommended by its manufacturer.
As the seedlings grow, adjust the light position so they continue receiving enough illumination without overheating.
06 • POT TRANSPLANTING
Move Seedlings Into Larger Pots When Needed
As your pepper plants develop their first true leaves, they may need more room for their roots.
If several seedlings are growing close together, separate them carefully or thin them so the strongest plant has enough space.
Handle seedlings gently and avoid pulling them by their stems. Hold the leaves or support the root ball while moving them into a larger container.
Choose pots with drainage holes and fresh potting mix. Water gently after transplanting.
07 • HARDENING OFF
Prepare Your Plants Before Moving Them Outside
Indoor seedlings are not used to outdoor sunlight, wind, and changing temperatures.
Moving them directly from a protected indoor space into strong sunlight can stress or damage their leaves.
This is why gardeners use a process called hardening off. Gradually introduce the plants to outdoor conditions over about one to two weeks.
- Start with a few hours outside in a sheltered, shaded location.
- Protect young plants from strong wind.
- Gradually increase their exposure to sunlight.
- Bring them indoors if temperatures become too cold.
- Increase outdoor time as the plants become stronger.
After this gradual adjustment, your pepper plants will be better prepared for their permanent growing location.
Temperature matters: University of Minnesota Extension recommends transplanting peppers outdoors after nighttime temperatures are consistently above 50°F. Your local climate and the variety you’re growing should guide the final decision.
08 • FINAL PLANTING
Plant Your Bell Peppers in the Garden or Containers
Now comes the exciting part: moving your young pepper plants into their growing space.
Choose a sunny location with well-drained soil. Peppers generally perform best with plenty of direct sunlight and warm growing conditions.
For garden beds, follow the spacing recommended for your variety. University of Minnesota Extension gives approximately 18 inches between pepper plants as a general garden recommendation.
If you’re growing in containers, choose a pot large enough for the mature plant and make sure excess water can drain away.
How to Care for Bell Pepper Plants
Getting your seeds to germinate is only the beginning. Once the plants are established, good daily care helps them produce healthy leaves, flowers, and peppers.
Give Them Plenty of Sunlight
Bell peppers are warm-season vegetables that need plenty of light to grow and produce fruit.
Choose a location that receives good direct sunlight for much of the day. In very hot climates, however, extreme heat can stress plants and increase the risk of fruit sunburn.
Water Consistently
Pepper plants need consistent soil moisture, especially while flowering and developing fruit.
Check the soil before watering. If the upper layer is drying out, water thoroughly while allowing excess water to drain away.
Avoid constantly soaking the roots. Waterlogged soil can cause root problems, while repeated dry periods can stress the plants and affect fruit development.
Feed the Plants Carefully
Healthy soil provides a good foundation for pepper plants. Start with a suitable growing mix or garden soil improved according to its needs.
If you use fertilizer, follow the product label and avoid applying more than recommended. Too much nitrogen can encourage leafy growth at the expense of fruit production.
Watch for Pests and Plant Problems
Check the leaves regularly, especially underneath, where small pests can hide.
Aphids, spider mites, and other garden pests can affect pepper plants. Remove damaged leaves when appropriate, monitor the plants, and identify the pest before choosing a control method.
Small garden tip: Growing peppers in containers makes it easier to move plants when conditions change. Just remember that container soil can dry out faster than garden soil during hot weather.
When Are Bell Peppers Ready to Harvest?
This is the moment every pepper grower waits for.
You can usually harvest bell peppers when they have reached a suitable size and have firm, healthy-looking skin.
Many bell peppers can be harvested while still green. If you leave them on the plant longer, they may develop their mature color, such as red, yellow, or orange, depending on the variety.
A fully colored pepper is often sweeter than the same variety harvested green, although flavor varies between varieties.
Green vs. Fully Colored Bell Peppers
| Feature | Green Pepper | Ripe Pepper |
|---|---|---|
| Color | Green | Red, yellow, or orange |
| Flavor | Often more grassy | Often sweeter |
| Harvest stage | Can be harvested earlier | Left longer to mature |
Use clean garden scissors or pruning shears to cut peppers from the plant. Avoid pulling or twisting them forcefully because the branches can break.
Can You Grow Bell Peppers in Pots?
Absolutely. Bell peppers can be a great choice for container gardening, especially if you have a patio, balcony, or small backyard.
The main thing is giving the roots enough room and avoiding containers that dry out too quickly.
Choose a container suitable for the mature size of your pepper variety, with several drainage holes. Fill it with a good-quality potting mix designed for containers.
Place the pot somewhere sunny and check moisture regularly. During hot weather, container-grown peppers may need more frequent watering than plants growing in the ground.
Container Growing Checklist
- A container large enough for the mature plant.
- Drainage holes at the bottom.
- Good-quality potting mix.
- A sunny location.
- Consistent watering.
- Support if the plant becomes heavy with fruit.
Common Bell Pepper Growing Mistakes
- Starting seeds in cold soil. Pepper seeds need warm conditions for reliable germination.
- Using too much water. Constantly wet growing mix can damage young roots.
- Not providing enough light. Seedlings may become tall, thin, and weak.
- Moving plants outdoors too quickly. Indoor seedlings need gradual hardening off.
- Planting outside during cold nights. Peppers are warm-season plants and can struggle in cold conditions.
- Using tiny containers. Restricted root space can make watering and plant care harder.
- Expecting every saved seed to grow the same pepper. Hybrid varieties may not reproduce true to type.
- Letting container soil dry out repeatedly. Pots can lose moisture quickly during hot weather.
Bell Pepper Growing Timeline
The exact timeline depends on the variety, growing conditions, and whether you’re starting from seed or buying young plants.
| Seed starting | Start indoors roughly 8 weeks before outdoor planting, adjusting to your local climate. |
| Germination | Varies with temperature, seed quality, and variety. |
| Seedling growth | Develop true leaves and a healthy root system. |
| Outdoor planting | After hardening off and when nighttime temperatures are suitable. |
| Harvest | Depends on variety and whether you harvest green or fully ripe peppers. |
Bell Pepper Growing FAQ
Can I plant seeds directly from a store-bought bell pepper?
Yes, seeds from a fully mature pepper may germinate. However, if the original pepper was a hybrid, the new plants may not produce identical fruit.
How deep should bell pepper seeds be planted?
A common starting depth is about 1/4 inch. Always check the instructions supplied with your seed variety.
Do bell pepper seeds need heat to germinate?
Yes. Warm growing conditions help pepper seeds germinate. A seed-starting heat mat can be useful when indoor conditions are too cool.
Can bell peppers grow in small pots?
They can grow in containers, but choose a pot appropriate for the mature plant. A larger container generally makes it easier to maintain stable moisture and provide enough root space.
Can I harvest bell peppers while they are green?
Yes. Many bell pepper varieties can be harvested green. Leaving the fruit on the plant longer allows it to develop its mature color, depending on the variety.
How much sunlight do bell pepper plants need?
Bell peppers generally grow best in a sunny location with plenty of direct light. In extremely hot conditions, protect plants from excessive heat stress and fruit sunburn.
Sources Used for This Guide
- University of Minnesota Extension — Growing Peppers
- University of Minnesota Extension — Starting Seeds Indoors
- University of Minnesota Extension — Saving Vegetable Seeds
THE FARMSOLO TAKEAWAY
From One Little Seed to a Basket of Bell Peppers
Growing bell peppers from seeds doesn’t happen overnight. First you prepare the seeds, then wait for germination, care for the little seedlings, and gradually move them into their permanent growing space.
Give your plants warmth, sunlight, suitable soil, and consistent moisture. Whether you’re growing in a backyard garden or a few containers on your patio, the process can be a rewarding way to produce fresh food at home.
Start with a few healthy seeds, take care of your seedlings, and give the plants time to grow. Before long, those little green plants may reward you with beautiful homegrown bell peppers.