
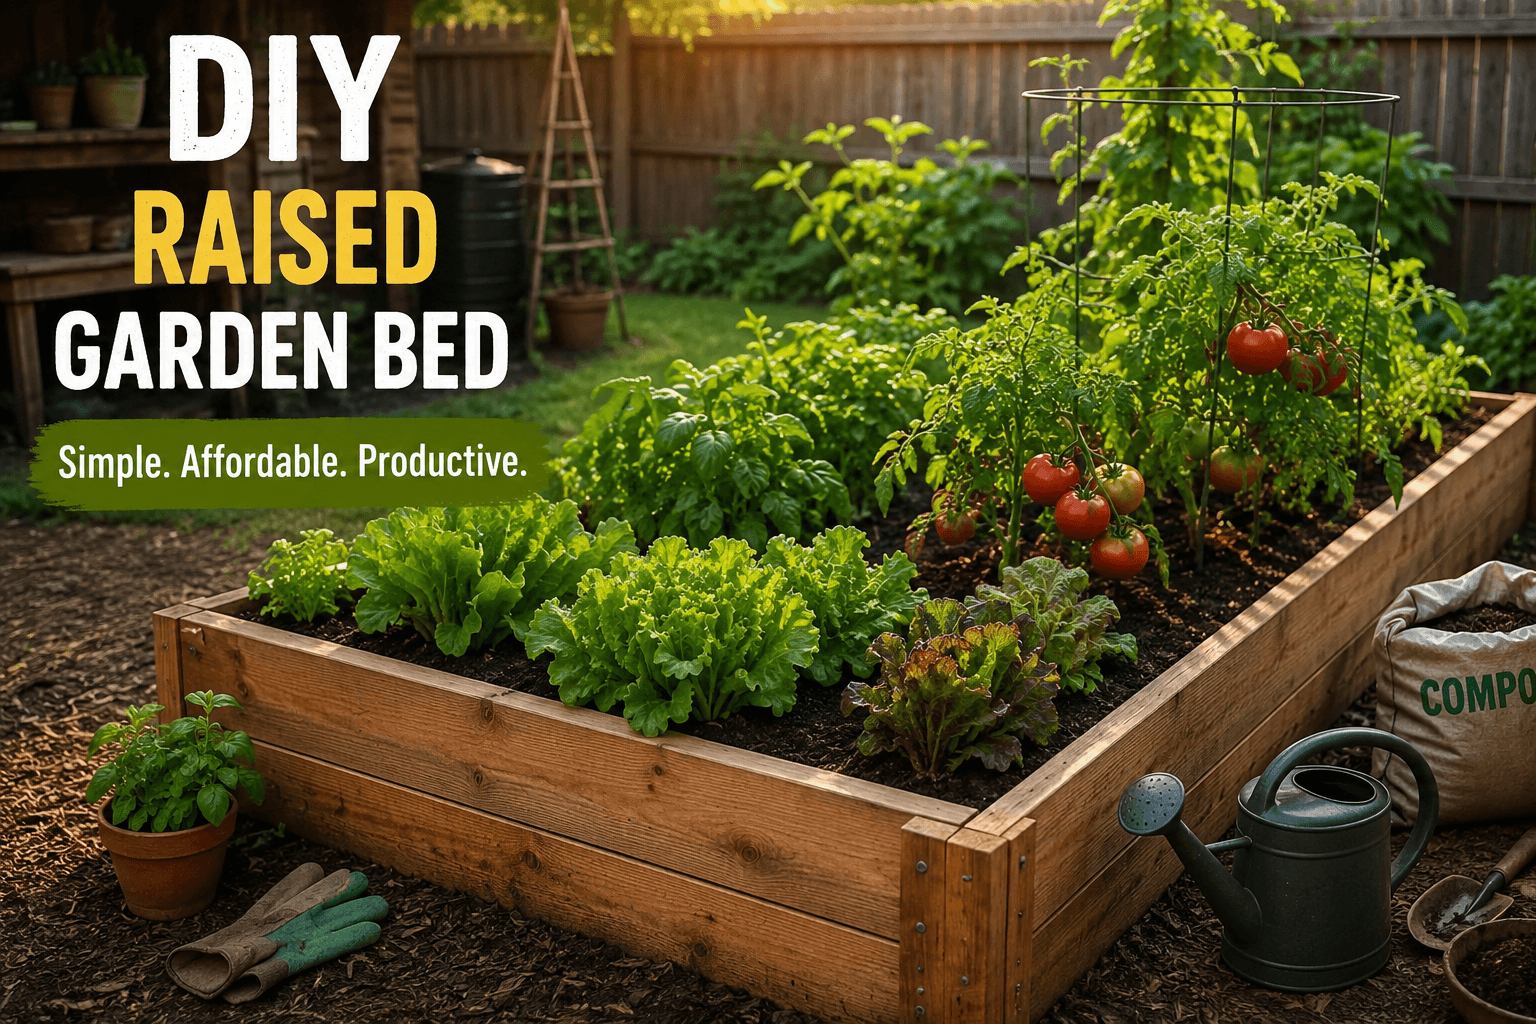
I’ll be honest, my first DIY raised garden bed was ugly. Real ugly. I used some leftover boards, guessed at the measurements, and filled it with whatever soil I had sitting around. It worked for a while, but the boards started leaning and the soil dried out way too fast.
Still, that first bed taught me a lot.
After more than 10 years of growing vegetables in backyards, small urban spaces, and whatever patch of ground I could find, I’ve built enough raised beds to know where it’s worth spending money and where you can save it. You don’t need fancy tools or a huge backyard either.
A raised garden bed can be one of the easiest ways to grow tomatoes, peppers, lettuce, carrots, herbs, beans and other vegetables, especially if your native soil is terrible.
So lemme show you how I do it now, including a few things I learned the hard way.
Why I Like Raised Garden Beds So Much
The biggest reason I use raised beds is simple: I control the soil.
That matters more than people think.
My backyard soil is heavy and compacted in some areas. When it rains, water sits there. When it gets hot, the ground turns hard as a rock. Trying to grow carrots in that stuff was basically asking the carrots to fight for their lives.
With a raised bed, I can make a nice loose growing mix right where I need it.
I also like that the beds give me clear growing areas. There’s less walking on the soil, fewer weeds to deal with, and it’s easier to add compost every season.
And if you’re doing urban homesteading, raised beds can make a small backyard feel much more productive.
You can build one against a fence, beside a patio, or even make a smaller version for a narrow space.
What Size Should a DIY Raised Garden Bed Be?
This is where I made one of my dumb mistakes.
I built my first bed way too wide.
It looked great until I needed to reach the plants in the middle.
I ended up stepping inside the bed, which is exactly what you don’t want to do. Walking on your growing soil packs it down and makes life harder for roots.
These days, I usually keep my beds around 3 to 4 feet wide.
The length can be whatever fits your backyard.
A 4-by-8-foot bed is popular because it gives you plenty of growing room, but you absolutely don’t need to build something that big.
For a small urban garden, even a 2-by-4-foot bed can grow a surprising amount of food.
The important thing is being able to reach the middle without climbing inside.
What Materials Do You Need?
You really don’t need much.
For a basic wooden raised bed, you’ll need:
- Untreated lumber
- Exterior screws
- A drill
- Measuring tape
- A saw
- Level
- Shovel
- Compost
- Good garden soil
That’s about it.
For the wood, I normally look for untreated boards that are made for outdoor use. Avoid old painted or chemically treated wood when you don’t know what was used on it.
I’ve used cedar when I had the budget for it. It lasts a long time, but it can get expensive.
If money is tight, look around for untreated lumber on sale or leftover construction boards. Just make sure you know what you’re getting before putting it around food crops.
How I Build a DIY Raised Garden Bed
Here’s the simple method I use now.
1. Pick the Right Spot
Before you cut anything, watch the sun.
Seriously.
I once put a beautiful little bed beside a shed because it looked like the perfect location. Six weeks later, half the bed was shaded most of the day.
The plants were not impressed.
Most vegetables want plenty of sunlight, so choose a location that gets good direct sun.
Also think about water. You don’t want to drag a hose across your whole yard every morning just to water lettuce.
If you have chickens, keep them in mind too.
My chickens have destroyed a garden faster than almost any insect I’ve dealt with. A fence or simple chicken wire around your beds can save you a lot of frustration.
2. Cut Your Boards
For a simple 4-by-8-foot bed, cut two boards for the long sides and two for the short sides.
I like beds that are around 10–12 inches tall for general vegetables.
You can go taller if you have mobility problems or simply don’t want to bend over as much.
Tall beds use more soil, though, so keep that in mind.
3. Screw Everything Together
Put the boards together into a rectangle and use exterior-rated screws.
Don’t rely on tiny screws. Once you add hundreds of pounds of wet soil, those boards are under some pressure.
I’ve had a corner pull apart before.
Not fun.
A couple of sturdy screws at each corner makes a big difference.
For longer beds, you can add a center support to help keep the sides from bowing outward.
4. Level the Ground
You don’t need to make the ground perfectly flat, but take a little time here.
Put the bed where you want it and check the corners.
If one side is sitting higher, remove a little soil underneath it.
I used to think leveling wasn’t important.
Then I watered one of my beds and watched the water slowly collect in one corner like a tiny swimming pool.
Yep. Lesson learned.
Should You Put Cardboard Under a Raised Bed?
Sometimes, yes.
If I’m building over grass, I usually put down a layer of plain cardboard underneath.
It helps smother grass and can break down over time.
Remove tape, plastic and anything glossy first.
I don’t bother with complicated layers of materials unless there’s a specific problem I’m trying to solve.
If you’re building on a hard surface like concrete, though, things are different. You’ll need to think about drainage and the depth of soil your plants need.
What Soil Should You Put in a Raised Garden Bed?
This is probably the part that matters most.
Don’t fill the whole thing with cheap topsoil and call it done.
I’ve done that.
The plants survived, but they weren’t exactly celebrating.
For my vegetable beds, I like a mixture of quality garden soil and plenty of mature compost. The compost adds organic matter and helps the soil hold moisture while still draining.
You don’t need some magic recipe.
A simple mix that drains well, holds moisture and contains plenty of organic matter is what I’m after.
And here’s another money-saving trick: don’t buy all your soil in little bags if you’re building a large bed.
That gets expensive fast.
If you have access to good bulk soil and compost locally, compare the price. Sometimes it’s dramatically cheaper.
Don’t Fill the Bed With Compost Alone
This one comes up a lot.
Compost is great, but I wouldn’t fill a raised bed entirely with compost.
It can settle, dry differently, and behave differently from a balanced growing medium.
I think of compost as an important ingredient, not the entire meal.
Your plants need a good growing environment for their roots, not just a pile of rich organic material.
What Can You Grow in a Raised Bed?
This is where raised beds get fun.
I’ve grown all kinds of things in mine:
- Tomatoes
- Peppers
- Cucumbers
- Lettuce
- Spinach
- Radishes
- Carrots
- Bush beans
- Beets
- Basil
- Parsley
- Green onions
For small gardens, I like growing vegetables that give you a lot of food from a small amount of space.
Lettuce is especially easy.
Herbs are great too because you can step outside, cut what you need, and go right back inside.
That’s the kind of convenience I love about backyard gardening.
My Biggest Raised Bed Mistakes
I’ve made plenty.
Mistake #1: Making the bed too wide
Already mentioned this one.
If you can’t comfortably reach the middle, make it narrower.
Mistake #2: Forgetting about water
Plants don’t care how pretty your raised bed looks.
They need water.
Make sure your hose can reach the garden, or consider drip irrigation if you’re building several beds.
Mistake #3: Cheap soil
I tried saving money here and regretted it.
Good soil is one of the few things I wouldn’t cheap out on completely.
You don’t need the most expensive soil in the store, but buy decent material and add compost.
Mistake #4: Planting too much
Oh boy.
Every spring I get excited and plant way too many things.
Then everything grows at once and suddenly I have more zucchini than I know what to do with.
Neighbors don’t complain, though.
Especially when the zucchini starts appearing on their porch.
A Simple Raised Bed Maintenance Routine
The nice thing about raised beds is that maintenance doesn’t have to become another full-time job.
Here’s what I normally do:
Spring: Add compost and check the boards.
Growing season: Water, weed, watch for pests and harvest often.
After harvest: Pull dead plants and add another light layer of compost.
Winter: Leave some healthy organic material on the soil or use a mulch/cover approach suitable for your climate.
Don’t obsess over keeping the soil looking perfect.
Healthy soil is alive.
Worms, fungi, insects and microorganisms are all part of the system.
That’s one reason I like the permaculture approach. Instead of constantly fighting nature, I try to work with it.
Can You Build a Raised Bed on a Budget?
Absolutely.
This is actually one of my favorite things about DIY gardening.
You can start small.
Don’t build six beds because somebody online has six beautiful beds.
Build one.
Learn how your yard works.
See how much sunlight you get. Figure out watering. Learn which vegetables actually grow well for you.
Then build another one if you need it.
You can also use reclaimed materials when they’re safe and appropriate for food gardening.
Just don’t use mystery wood that has been painted, chemically treated, or contaminated.
Saving money is good.
Growing vegetables in questionable materials isn’t worth it.
What About Pests?
Raised beds don’t magically stop pests.
I wish they did.
You’ll still have caterpillars, aphids, beetles, slugs and other little garden criminals.
But raised beds make it easier to protect plants.
You can cover a bed with insect netting, add simple hoops, or use a physical barrier around young plants.
I prefer prevention first whenever I can.
Healthy soil, good airflow, proper watering and regular inspection can prevent a lot of headaches.
And check the underside of leaves.
That’s where the trouble likes to hide.
3 Things I’d Do Differently If I Started Again
If I was starting my first garden tomorrow, I’d keep it really simple.
First, I’d build one small raised bed instead of trying to create a whole farm overnight.
Second, I’d spend more time preparing good soil.
Third, I’d leave room around the bed.
That last one sounds silly, but you need space to walk, push a wheelbarrow, pull weeds and harvest.
A garden that’s impossible to move around in gets annoying pretty quick.
DIY Raised Garden Bed FAQ
How deep should a raised garden bed be?
For many vegetables, around 10–12 inches can work well. Deeper beds are useful for crops with deeper roots and can also make gardening easier on your back.
Is a raised garden bed worth it?
For me, absolutely. It gives me better control over soil, drainage and planting space. But if your native soil is already excellent, you may not need raised beds everywhere.
Can I build a raised bed in a small backyard?
Yep. Start with a small 2-by-4-foot or similar bed. Even a tiny garden can produce herbs, salad greens, radishes and other fresh food.
My Final Advice
Don’t get stuck thinking you need the perfect lumber, perfect soil, perfect garden layout or a giant backyard before you can start.
You don’t.
Grab some basic materials, build a DIY raised garden bed, fill it with decent soil and compost, and plant something you actually like eating.
Your first garden probably won’t be perfect.
Mine sure wasn’t.
You’ll overwater something. You’ll forget to harvest the beans. You’ll probably plant too many zucchini plants. That’s gardening.
But every season you learn a little more, and before long you’re walking outside with your morning coffee, checking the tomatoes, pulling a few weeds and thinking, Hey, I actually grew this.
And honestly, that’s the part that keeps me doing it.
If you get stuck building your DIY raised garden bed, leave a comment and tell me what you’re working with. Small backyard, urban garden, bad soil, whatever it is. I’ll do my best to help.







1 thought on “DIY Raised Garden Bed: How I Built Mine on a Budget”