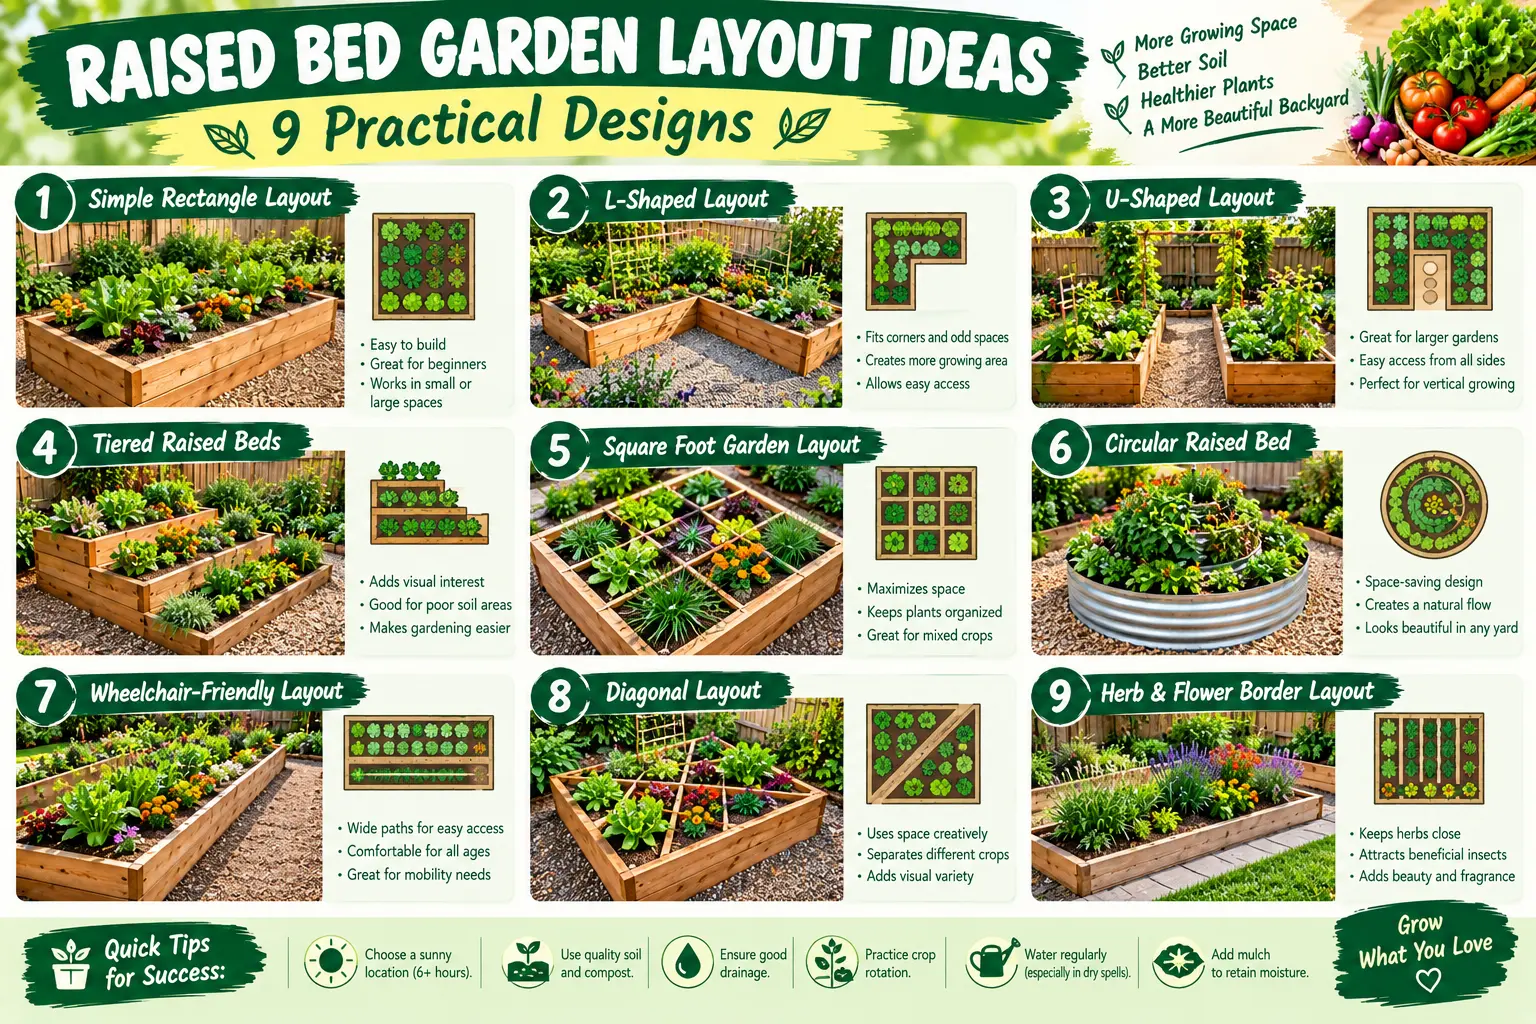
A good raised bed garden layout makes the garden easier to reach, water, harvest, and maintain. Start with sunlight and paths, keep beds narrow enough to reach from the edges, then add trellises, fruit plants, storage, and decorative features only where they make the garden easier to use.
Plan these five things first
- Choose a sunny, well-drained part of the yard.
- Keep most beds about 3 to 4 feet wide when you can reach them from both sides.
- Leave useful paths before adding more growing space.
- Plan trellises before planting climbing vegetables.
- Keep water, tools, compost, and frequently harvested crops easy to reach.
What Makes a Good Raised Bed Garden Layout?
The best layout is not necessarily the one that looks the most impressive from above. It is the one you can work without stepping into beds, squeezing through narrow gaps, dragging a hose across plants, or walking around unnecessary obstacles.
Raised beds are especially useful because they separate growing soil from walking areas. University extension guidance generally recommends keeping beds around 3 to 4 feet wide when they can be reached from both sides. That lets you work toward the center without compacting the soil.
If a bed sits against a fence or wall and you can reach it from only one side, make it narrower. Iowa State Extension suggests about 1½ to 2 feet for a one-sided bed.
Before building several beds, mark the proposed layout with stakes, string, buckets, or cardboard. Walk through it with a garden cart or wheelbarrow. A plan that looks spacious on paper can feel completely different when you are carrying compost or harvesting vegetables.
9 Raised Bed Garden Layout Ideas
1. Simple Grid Layout
A grid is one of the easiest layouts for a medium-size vegetable garden. Arrange rectangular beds in two or more straight rows with permanent paths between them.
This makes watering, crop rotation, harvesting, and maintenance straightforward because every bed has a clear place and every side remains accessible.
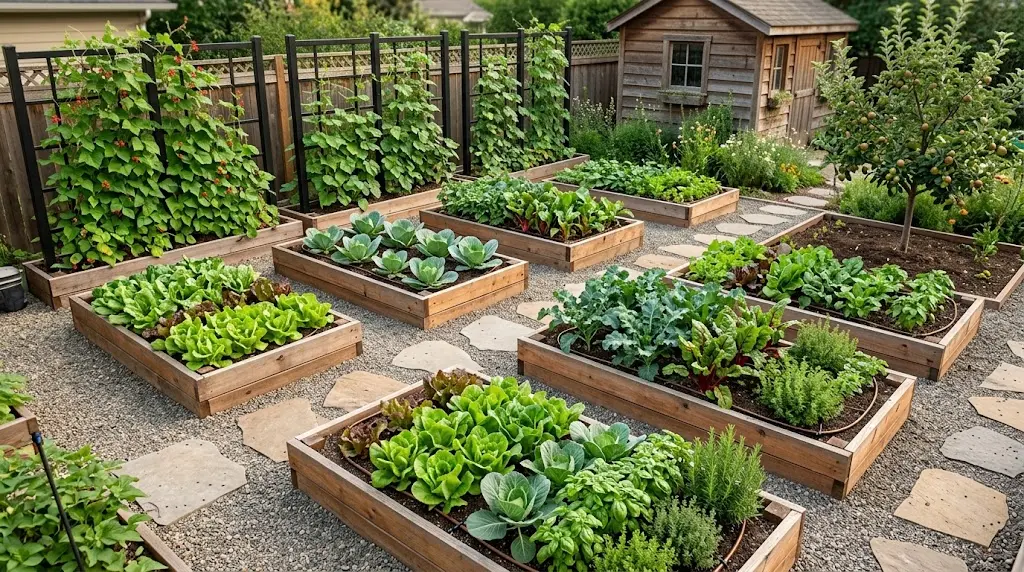
The Pinterest-inspired garden uses this idea well. The individual beds are separated rather than forming one huge growing area, so the gardener can work from the paths without walking on the soil.
2. Central Path With Beds on Both Sides
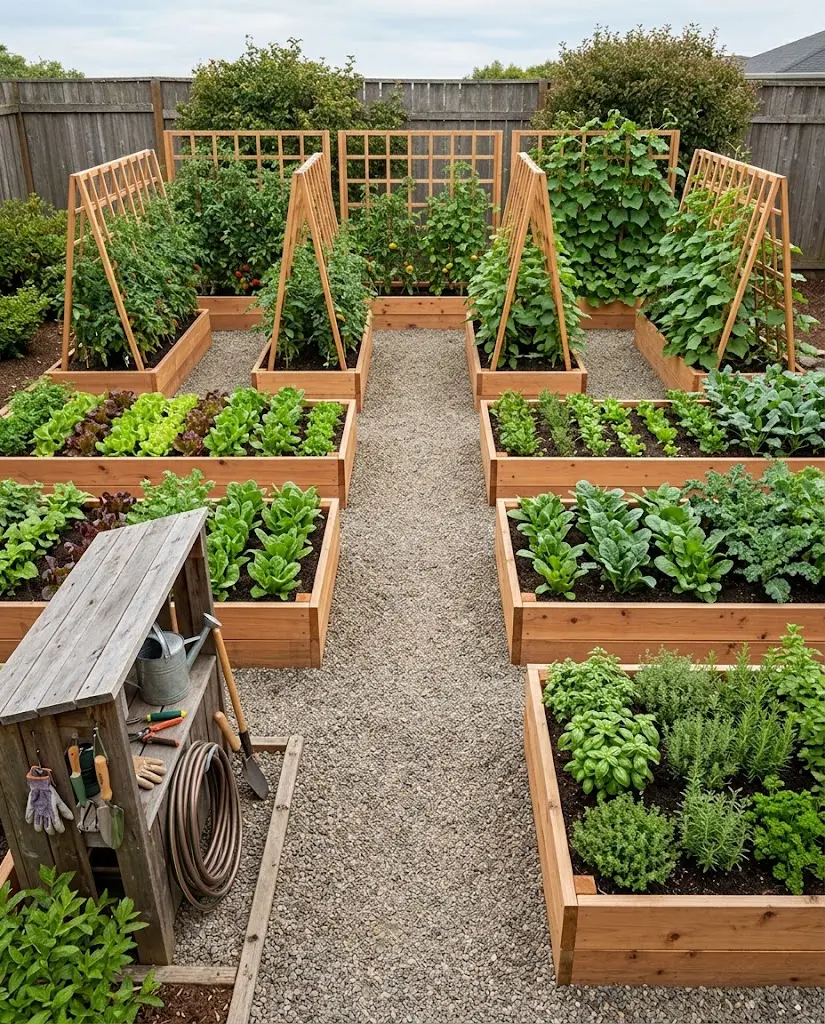
For a long backyard, create one useful main path from the entrance to the far end of the garden and arrange beds on both sides.
The central path should be wide enough for the equipment you actually use. If you regularly move a wheelbarrow or garden cart, plan for that before construction rather than discovering later that it barely fits.
Smaller side paths can provide access between individual beds while the wider central path handles most garden traffic.
3. Four-Bed Garden for Easy Crop Rotation
Four similarly sized beds can make seasonal planning easier. Instead of treating the entire vegetable garden as one large planting area, each bed becomes a separate growing zone.
You can move crop families between beds from year to year when rotation is useful for your crops and disease management.
Multiple smaller beds are also easier to change. If one section needs new soil, a cover crop, irrigation repair, or temporary protection, the rest of the garden can stay in production.
4. Add Trellises to the Back of Selected Beds
The vertical structures in the inspiration image are one of its most useful features. Cucumbers, pole beans, peas, and other suitable climbing crops can use the space above a bed instead of spreading across paths and neighboring vegetables.
Plan the trellis position before planting. In the Northern Hemisphere, placing tall crops and trellises toward the north side of the garden can help reduce unwanted shading of shorter vegetables.
Do not put a tall trellis in every bed simply because vertical gardening looks efficient. Use it where you actually intend to grow climbing plants.
For a more detailed setup, see FarmSolo’s vertical cucumber trellis guide.
5. Use Perimeter Beds in a Small Backyard
If the center of the yard needs to stay open, place narrow beds around fences or boundaries instead of filling the entire space with boxes.
Remember that a bed against a fence can usually be worked from only one side, so it should be narrow enough for you to reach the back comfortably.
This layout can work particularly well for herbs, compact vegetables, flowers, and trellised crops while keeping a larger central path or activity area free.
6. Put a Fruit Tree Outside the Main Vegetable Beds
The inspiration image includes a papaya beside the raised beds. The broader idea can be useful: a suitable fruit tree or perennial food plant can become part of the garden without taking over valuable annual vegetable beds.
But choose the plant for your climate. Papaya is a tropical crop and is not a realistic choice for every garden.
Also think about future size. A young fruit tree may cast very little shade today but much more as it grows. Keep permanent plants where their mature canopy and roots will not create a new problem for the beds.
7. Keep a Utility Zone Near the Garden Entrance
A productive garden also needs somewhere for tools, harvest baskets, irrigation parts, compost, soil amendments, stakes, and other supplies.
If you have a shed or storage box, place it where you can reach it without walking through every vegetable bed.
Keep the water connection practical too. A beautiful layout becomes frustrating when the hose has to cross three paths and several beds every time you water.
8. Use Taller Beds Where They Improve Access
Every raised bed does not need to be the same height.
A taller bed can reduce bending and may improve access for some gardeners. Standard lower beds can still be used elsewhere when extra height is unnecessary.
If accessibility is an important goal, design bed height, width, and path width around the person who will actually use the garden rather than copying standard dimensions from a photo.
9. Add a Small Garden Retreat Only After the Work Zones
The small garden building in the inspiration image makes the space look inviting, but productive areas should come first.
Once beds, paths, water, storage, and trellises are working well, a bench, covered sitting area, or small garden retreat can make the space more enjoyable without interfering with the daily gardening route.
Keep seating slightly away from muddy work areas and compost, but close enough that the garden still feels connected to the space.
How Wide Should Raised Garden Beds Be?
For beds that you can reach from both sides, about 3 to 4 feet wide is a useful starting point. Clemson, Iowa State, North Carolina State, and other university extension programs give similar guidance.
The reason is simple: you should be able to reach the center while standing in the path.
Do not make a bed wider just to gain a little more planting space if that forces you to step into the soil every time you weed or harvest.
If you are still at the building stage, FarmSolo’s DIY raised garden bed guide covers the bed itself in more detail.
Easy test: Mark the future bed on the ground and stand outside the edge. If you cannot comfortably reach the center without leaning into the bed, make it narrower.
How Much Space Should You Leave Between Raised Beds?
Path width depends on how you work.
A simple walking path can be narrower than a main route used by a wheelbarrow, garden cart, or mobility equipment. Iowa State recommends planning around roughly 3 feet where garden equipment needs to pass between adjacent beds.
Do not measure paths while every bed is empty and assume that space will stay open. Mature cabbage, squash leaves, tomatoes, and other plants can extend over the bed edge and make the usable path narrower.
Permanent paths can be covered with materials such as wood chips, gravel, bricks, or pavers depending on drainage, budget, and how permanent you want the garden to be.
Start With Sun Before You Build the Beds
Raised beds cannot fix a location that is too dark for the crops you want to grow.
Clemson Extension recommends placing raised vegetable beds in a well-drained site receiving at least six hours of direct sunlight each day.
Watch your yard through the day before choosing the final layout. Houses, fences, sheds, trees, and even tall garden structures can change where shade falls.
Then think ahead. A trellis that is empty in spring may become a solid wall of cucumber or pole bean leaves in summer.
Where Should Vertical Gardening Go?
Vertical gardening works best when it is part of the original layout rather than something added after vines start spreading into the paths.
Strong trellises can support suitable climbing beans, peas, and cucumbers while leaving more bed surface available for shorter crops.
In the Northern Hemisphere, tall structures are often placed toward the north side of a garden to reduce shading on lower-growing crops. Your actual sun direction, slope, buildings, and latitude still matter, so observe the site rather than applying the rule blindly.
FarmSolo’s guide to growing cucumbers vertically explains how to use that space with a climbing crop.
Do Raised Beds Automatically Drain Better?
Raised beds can improve control over the growing medium and can help in locations with difficult native soil, but the entire garden still needs somewhere for excess water to go.
Do not place a beautiful set of wooden beds in the lowest part of a yard without checking what happens after heavy rain.
Water can still collect in surrounding paths, wash soil away, or create a constantly wet work area.
Check drainage before construction and keep runoff from roofs or paved areas in mind.
Common Raised Bed Layout Mistakes
- Making beds too wide. Extra planting space is not useful if you have to step into the soil to reach it.
- Making every path too narrow. Leave at least one practical route for tools, harvest baskets, and a wheelbarrow.
- Building before checking sunlight. Observe the site before installing permanent frames.
- Adding trellises after planting. Plan tall structures before crops begin growing.
- Ignoring mature plant size. Vegetables can extend well beyond the wooden edge of a bed.
- Putting storage too far away. Repeated daily walking becomes annoying quickly.
- Copying a Pinterest garden exactly. Your sun, climate, soil, water, yard dimensions, and crops are different.
- Using every empty space for another bed. Working room is part of a productive garden.
A Simple Raised Bed Layout for a Small Backyard
If you want a simple starting point, use four main ideas rather than trying to copy every feature in the inspiration photo.
- Place several narrow raised beds in the sunniest usable part of the yard.
- Create one main path wide enough for your normal garden equipment.
- Put trellises on selected beds where tall plants will cause the least unwanted shade.
- Keep tools, water, compost, and harvest access close to the main entrance.
After those parts work, add fruit plants, flowers, a bench, decorative gravel, or a small garden retreat if you still have useful space.
For planning the whole property rather than only the raised-bed section, use FarmSolo’s homestead garden layout guide.
Raised Bed Garden Layout FAQ
What is the best width for a raised garden bed?
For a bed accessible from both sides, about 3 to 4 feet is a common university extension recommendation because most gardeners can reach the center without stepping on the soil. A bed accessible from only one side should usually be narrower.
How much space should I leave between raised beds?
Leave enough room for the way you actually work. Main paths used by a wheelbarrow or garden cart may need around 3 feet, while simple walking paths can sometimes be narrower.
Which direction should raised beds face?
A north-to-south arrangement can provide good light distribution in many gardens, but the best direction depends on the site. Existing shade, slope, latitude, fences, and buildings can be more important than following one orientation rule.
Where should I put a trellis in a raised bed?
Put a trellis where climbing plants can grow without unnecessarily shading shorter vegetables. In many Northern Hemisphere gardens, the north side of the bed is a useful starting point.
Should every vegetable garden use raised beds?
No. Raised beds can be useful for organization, accessibility, difficult soil, and intensive growing, but an in-ground garden may be simpler and less expensive when the existing soil and drainage are already good.
Plan the Paths Before You Fill the Garden
The strongest idea in a well-designed raised bed garden is not the wooden boxes, the gravel, or even the vegetables. It is the way everything connects.
You should be able to enter the garden, reach every bed, carry a harvest basket, move compost, water plants, and work around trellises without fighting the layout.
Start with sunlight, drainage, bed width, and paths. Then add vertical growing, fruit plants, storage, and a place to sit if the space allows.
That approach creates a raised bed garden that can still look organized and attractive, but its beauty comes from being easy to use rather than from copying a perfect garden photo.