FARMSOLO • BACKYARD LANDSCAPING
Brick garden edging can turn a soft, messy line between lawn and mulch into a clean border that looks intentional. The bricks are the part you see, but the quality of the finished edge depends much more on what is underneath them: a well-planned line, firm ground, a level base, good drainage, stable support, and joints that match the way the border will be used.
Best for: flower beds • lawn borders • curved garden beds • brick paths • cottage gardens • reclaimed-brick landscaping
For the Cleanest Look
Set every brick on a consistent base and check the border frequently with a level instead of fixing uneven sections at the end.
About Polymeric Sand
It can stabilize suitable joints and reduce weed growth, but it does not replace a good base and it does not make the border permanently weed-proof.
Quick Answer
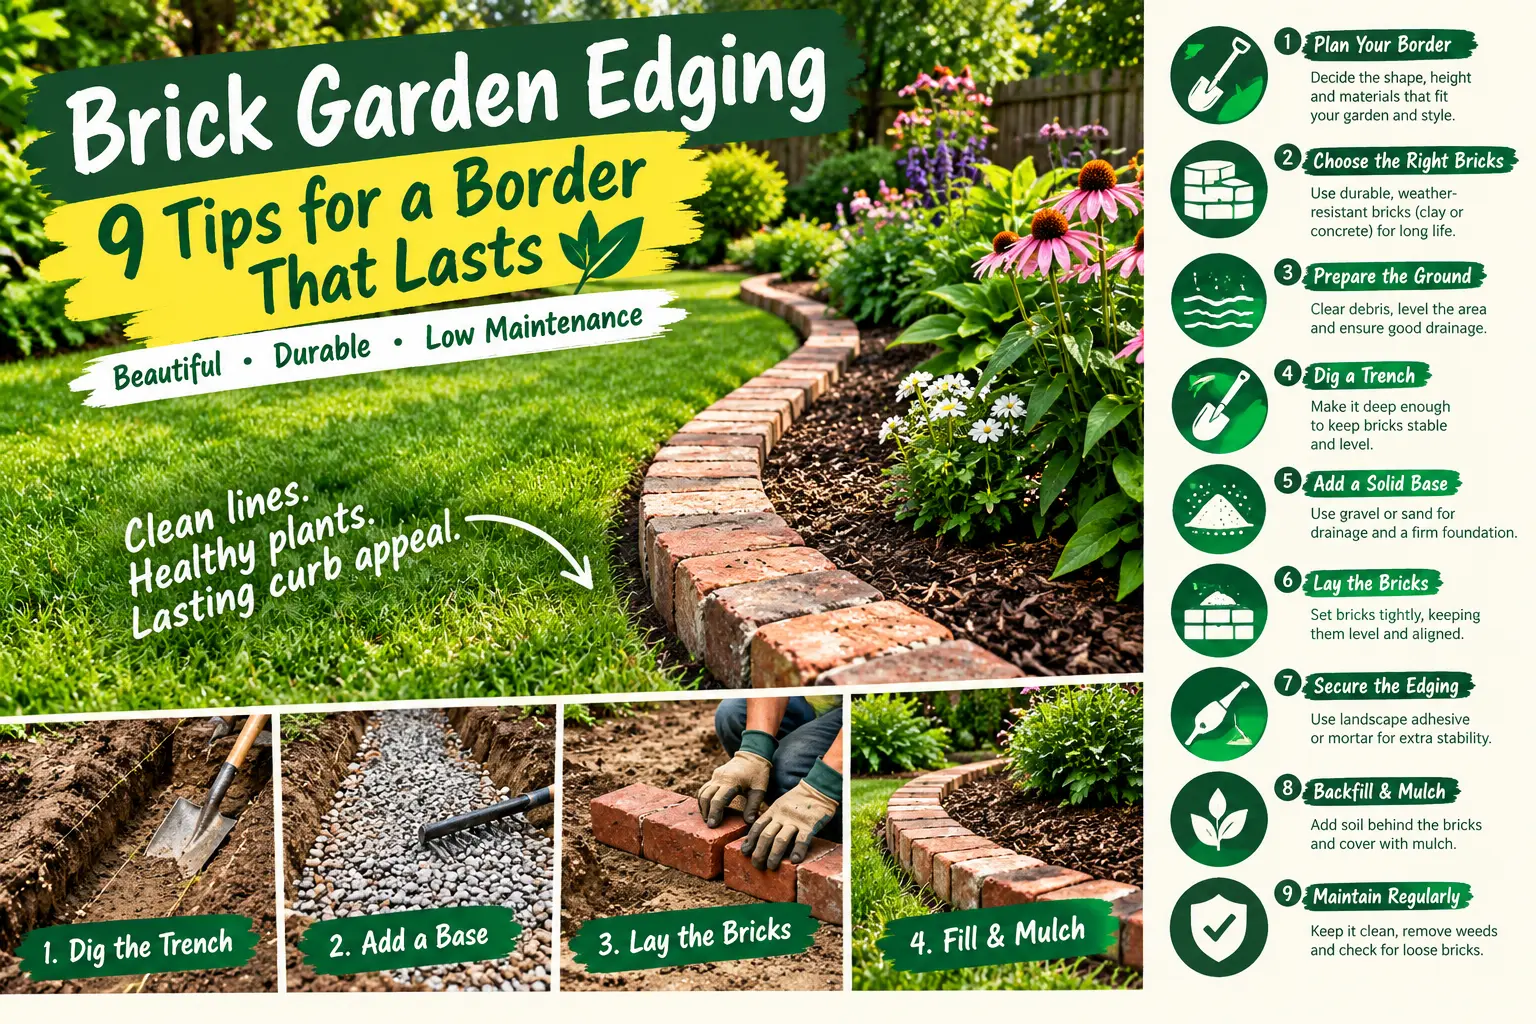
For durable brick garden edging, mark the border first, excavate a consistent trench, compact the ground, add an appropriate leveling or paver base, and set the bricks evenly with a rubber mallet. Stabilize the sides so the bricks cannot spread. If the bricks have suitable joints, polymeric jointing sand can be used according to the exact product instructions, but it should be treated as joint material—not as the foundation of the edging.
Why Brick Works So Well as Garden Edging
Brick has a quality that many thin plastic borders do not: it looks like part of the landscape.
Red and weathered clay tones work naturally beside green lawn, dark mulch, gravel, cottage flowers, herbs and shrubs. A low brick edge also gives the eye a clear line between two different parts of the yard.
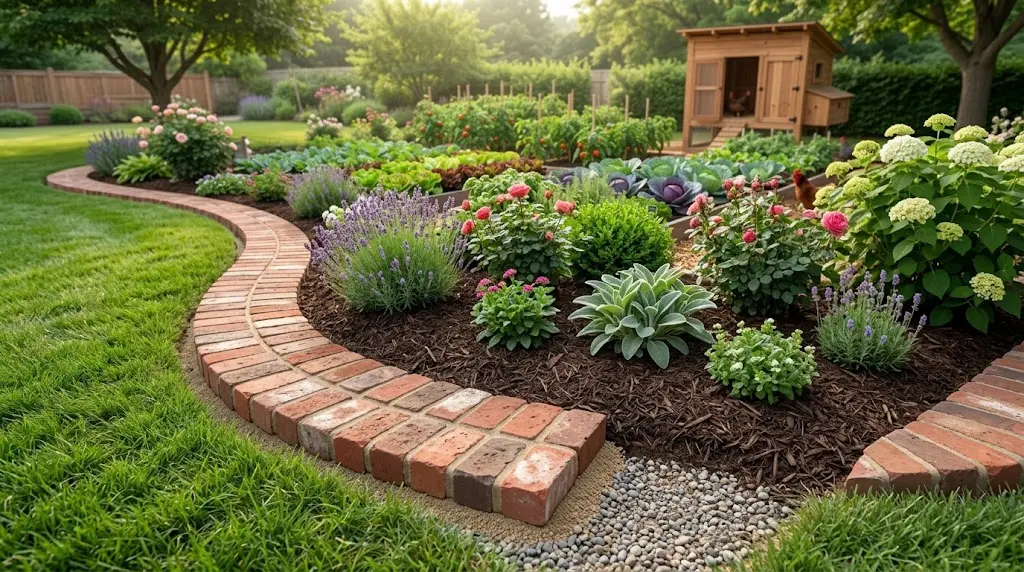
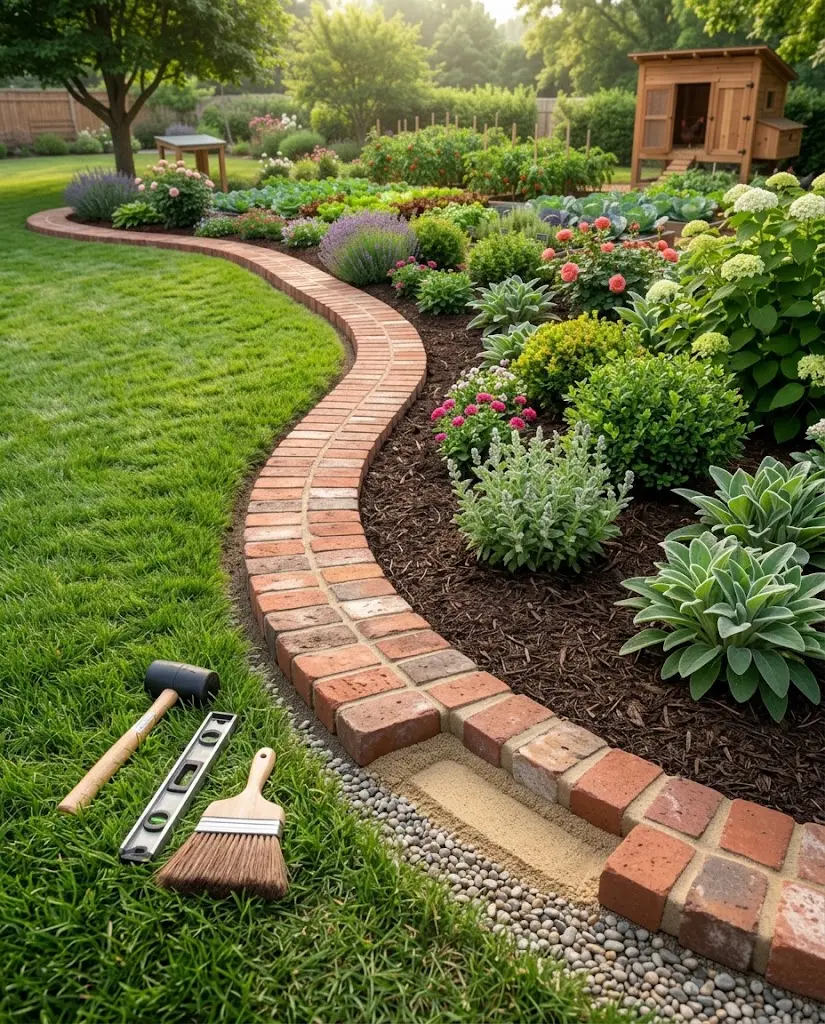
Installed flat, bricks can create a low mowing edge. Installed on edge, they create a more visible raised border. Two rows can create a wider decorative band like the inspiration photo.
The key is deciding what job the brick needs to do before you start digging.
FarmSolo Reality Check: Polymeric sand is useful, but the viral claim that it creates an impenetrable barrier against all weeds, grass and ants goes too far. Good joint sand reduces these problems. It does not make a poorly prepared border maintenance-free forever.
9 Tips for Brick Garden Edging That Stays Neat
01 • CHOOSE THE BRICK
Use Brick or Pavers Suitable for Outdoor Ground Contact
Reclaimed bricks can make a garden look established from day one, but not every old brick is ideal for use at ground level.
Check for severe cracking, crumbling faces and damage before installing reused material. In freeze-thaw climates, use clay pavers or bricks appropriate for the local weather instead of soft interior masonry that may deteriorate when repeatedly wet and frozen.
02 • LAYOUT
Lay Out the Entire Border Before Digging
For a straight edge, stakes and a mason’s line make it much easier to keep the border from slowly drifting sideways.
For a curve, a garden hose or rope lets you experiment before removing soil.
Lay several bricks along the proposed line before digging. This helps you see whether the curve works with full bricks or will require awkward cuts and oversized wedge-shaped joints.
03 • TRENCH
Dig for the Finished Height You Want
Do not choose trench depth from a Pinterest image. Add together the depth of your base, leveling layer and the amount of brick you want below ground.
A mowing edge may finish close to lawn height. A flower-bed border can stand higher if you want it to hold mulch back.
Keep the trench slightly wider than the finished brick band so you have enough room to adjust, compact and stabilize the edges.
04 • BASE
Do Not Let Loose Soil Be the Only Foundation
Loose or freshly disturbed soil settles. When one part settles more than another, the brick line begins to wave up and down.
Compact the bottom of the trench first. For a more durable paver-style installation, use a suitable compacted aggregate base with a thin leveling layer of bedding sand above it.
A small decorative border may not require the same base depth as a driveway or full patio, but a firm, consistent foundation still matters.
05 • SETTING THE BRICKS
Level a Few Bricks at a Time
Place each brick gently onto the prepared bed instead of twisting it deeply into the sand.
Use a rubber mallet for small adjustments and check several neighboring bricks with a level or straightedge.
It is much easier to correct one brick immediately than to discover ten feet later that the entire border has slowly climbed an inch.
06 • SIDE SUPPORT
Stop the Border From Slowly Spreading Apart
Joint sand is not the only thing holding the bricks in position.
Backfill firmly along the outside edges or use a suitable paver edge restraint when the installation needs stronger lateral support.
This is especially important when a wider band of bricks sits between lawn and a garden bed, because repeated mower wheels, feet, soil pressure and seasonal movement can gradually push an unsupported border out of alignment.
07 • JOINT MATERIAL
Decide Whether Polymeric Sand Actually Fits the Project
Polymeric sand is made for joints between suitable pavers and bricks. After correct wetting, its additives bind the sand and help it resist erosion, weed growth and insect activity.
But every product has its own minimum joint width, maximum width, minimum depth, temperature range and water-activation instructions.
If your old bricks touch almost completely with no usable joint depth, or the area regularly holds standing water, polymeric sand may not be the right solution.
08 • APPLYING POLYMERIC SAND
Clean the Brick Faces Before Adding Water
This step is easy to rush and expensive to regret.
Sweep the jointing material into the full usable depth of the joints, compact or settle it as required by the product, top up the joints, and remove loose sand and polymer dust from the brick faces before activation.
When water is added, leftover polymer dust can create haze or staining on the surface. Follow the bag instructions rather than using one generic watering rule for every product.
Do not blast the joints with a hard hose stream. Too much water can wash material out or move the polymers where you do not want them.
09 • MAINTENANCE
Expect a Good Border to Need Occasional Attention
Even properly installed brick edging lives outdoors.
Soil moves. Roots grow. Organic debris collects in joints. Water freezes in cold climates. Mower wheels repeatedly pass over the same edge.
Inspect the border each season. Reset loose bricks early, remove weeds before they develop large root systems, clear soil and mulch that build up over the brick surface, and repair failed joints before several bricks begin to move.
Does Polymeric Sand Really Stop Weeds?
It can reduce weed growth substantially when the joints are properly prepared and filled, but I would not describe it as weed-proof.
There are two common ways weeds appear around pavers.
- Roots already exist below the bricks. Aggressive grasses and established weeds can find their way back through weak joints.
- New seeds arrive from above. Dust, soil and organic material gradually collect on the surface, giving windblown seeds somewhere to germinate.
Polymeric sand makes the joint less welcoming than loose dirt, but it cannot permanently prevent every seed, root or maintenance issue.
What Actually Keeps Brick Edging Neat?
Good excavation → compacted support → level bedding → stable brick placement → supported edges → suitable joint material → drainage → occasional maintenance.
Polymeric sand can improve a good installation. It cannot rescue a border that is already sinking, spreading or holding water.
Polymeric Sand vs. Regular Sand for Brick Edging
| Feature | Polymeric jointing sand | Loose jointing sand |
|---|---|---|
| Joint stability | Binds after proper activation | Remains loose |
| Weed resistance | Usually better when correctly installed | Seeds and roots can colonize loose joints more easily |
| Insect resistance | Can deter insects from disturbing the joints | Loose material is easier to move |
| Erosion resistance | Generally resists washout better | May need topping up after rain or cleaning |
| Installation sensitivity | Requires careful cleaning, wetting and suitable weather | Simpler to place |
| Standing water | Many products should not be used where water remains standing | Still does not fix poor drainage |
| Repairs | Old material may need to be removed before refilling | Usually easier to rake or sweep out |
Should You Put Landscape Fabric Under Brick Edging?
The inspiration image appears to use landscape fabric below the brick border.
Fabric can help separate soil from certain base materials and may temporarily reduce vegetation coming from below, but it is not what makes the bricks structurally stable.
If the base is soft or uneven, putting fabric underneath will not stop the bricks from settling.
And because many weeds eventually grow from seeds that land from above, fabric should not be treated as a permanent weed guarantee either.
Can You Use Old Bricks for Garden Edging?
Yes, and weathered brick can give a new garden border much more character than perfectly uniform new pavers.
Sort reclaimed bricks before installation. Put badly cracked or soft pieces aside and group bricks of similar thickness together so the finished border is easier to level.
Old mortar stuck to the bottom can also change the height of individual bricks. Remove unstable material before setting them.
If your garden already uses decorative brickwork, repeating the material can make the landscape feel connected. FarmSolo’s Basket Weave Brick Wall guide shows another way brick can be used as a garden feature.
Flat Brick Border or Upright Brick Border?
| Layout | Best for | Things to consider |
|---|---|---|
| Bricks laid flat | Low lawn edges and wider mowing strips | Requires more border width |
| Bricks on edge | A more visible raised garden boundary | Needs a deeper trench and strong side support |
| Two flat rows | Wide decorative border like the inspiration image | More base preparation and more joints |
| Soldier-course bricks | Traditional vertical edging | Consistent height is important |
| Curved brick border | Cottage and naturalistic planting beds | Tighter curves may require cuts or wider joints |
Common Brick Garden Edging Mistakes
- Setting bricks directly on loose soil. Uneven settlement eventually shows in the finished border.
- Following the lawn edge without marking it first. Small errors gradually turn into an uneven curve.
- Using sand to compensate for a badly excavated trench. Prepare the subgrade first instead of building thick piles of leveling sand.
- Forgetting lateral support. Even level bricks can slowly spread apart when their sides are unsupported.
- Assuming landscape fabric replaces a base. It does not provide structural support.
- Using polymeric sand in unsuitable joints. Check the joint width and depth required by your product.
- Leaving polymer dust on the bricks before wetting. This can create haze or staining.
- Overwatering polymeric sand. Follow the manufacturer’s activation instructions carefully.
- Expecting polymeric sand to stop every weed forever. It reduces growth; it does not eliminate maintenance.
- Ignoring drainage. Water that consistently sits around the border can undermine even attractive masonry work.
Brick Garden Edging FAQ
What should you put under brick garden edging?
Start with firm, compacted ground. For a more durable paver-style installation, add a compacted aggregate base and a thin, level bedding-sand layer suited to the project.
Should I use polymeric sand between garden edging bricks?
It can be a good choice when the joints meet the sand manufacturer’s width and depth requirements and the installation drains properly. It is not necessary for every simple brick border.
Does polymeric sand permanently stop weeds?
No. It can reduce weed growth by creating a more stable joint, but existing roots beneath the bricks and new seeds growing in organic material above the joints can still create weeds over time.
Can you use regular bricks for landscape edging?
Many bricks can work decoratively, but outdoor-rated clay pavers or weather-suitable bricks are the safer choice when the border will remain exposed to moisture and freeze-thaw cycles.
Can you make curved brick garden edging?
Yes. Gentle curves are easy to form by slightly fanning the bricks. Tight curves usually require selected cuts or carefully planned wedge-shaped joints.
Will polymeric sand hold loose bricks in place?
It can stabilize properly installed paver joints, but loose or rocking bricks usually indicate a base or edge-support problem. Fix the movement before relying on joint sand.
Is brick edging good beside a lawn?
Yes. A low flat brick edge can create a clean transition between lawn and planting beds and may provide a firm edge for mower wheels when it is installed securely and near the correct lawn height.
More FarmSolo masonry ideas: If you want to repeat the same brick elsewhere in the landscape, see the Basket Weave Brick Wall guide. For a more structural entrance feature, FarmSolo’s Stone Column planning guide explains foundations, structural cores, drainage and gate considerations.
The Base Matters More Than the Sand on Top
A beautiful brick border is not created by one bag of special sand.
Start with a good line, stable soil, an appropriate base and carefully leveled bricks. Then choose the joint material that actually fits your brick spacing and drainage conditions.
Get those basics right and the border will look cleaner, stay straighter and be much easier to maintain year after year.