FARMSOLO • BACKYARD LANDSCAPING
A stone column can turn an ordinary garden gate, fence, or driveway entrance into a permanent landscape feature. But the finished stone is only the part you see. A durable column starts below ground with the right footing, then depends on a stable structural core, straight layout, good water management, suitable veneer, and correctly planned fence or gate connections.
Best for: garden entrances • metal fences • driveway pillars • stone veneer projects • decorative masonry
Start With the Structure
Choose the fence or gate first. The footing, core, reinforcement, and connections should be designed around what the column actually needs to support.
Do Not Copy the Numbers
The viral diagram’s 24-inch footing depth, 24-inch square base, and 10–14-foot spacing are examples—not universal construction rules.
Quick Answer
A durable stone column normally starts with a footing suited to the local soil, climate, column weight, and attached loads. A masonry or concrete core provides the structure, while natural or manufactured stone creates the finished appearance. If a fence or gate will attach to the column, plan those structural connections before the stone goes on.

Why This Stone Column Idea Works
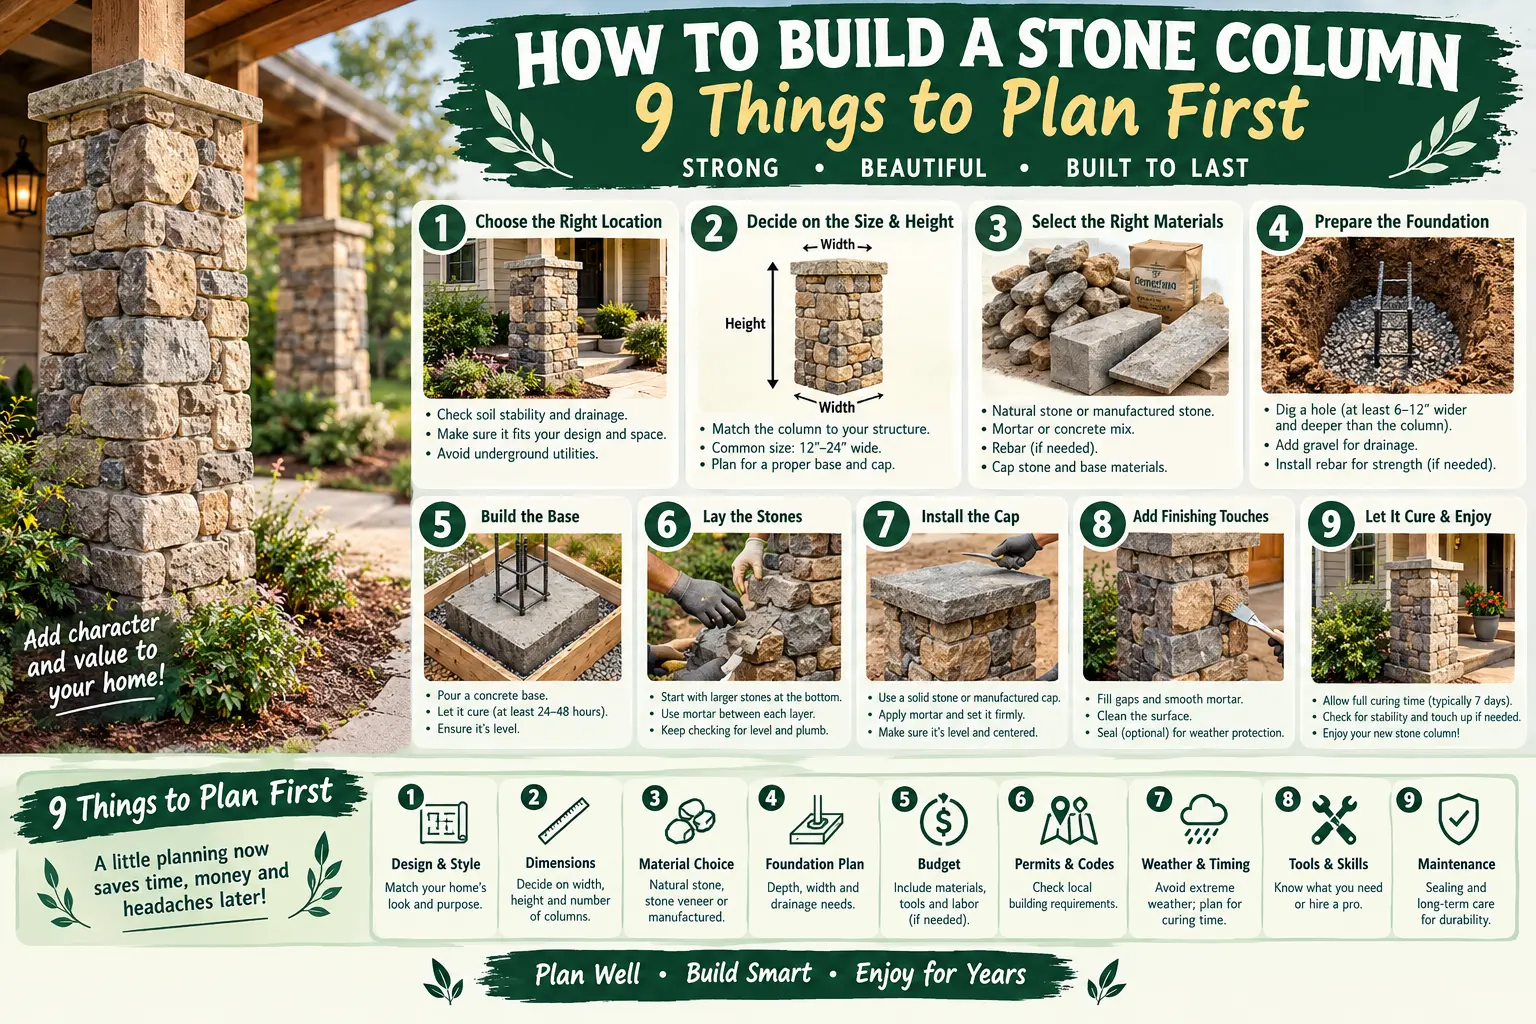
The Pinterest illustration gets the basic visual sequence right: create a straight structural core, keep the work plumb and square, then use stone to turn a plain masonry pier into a finished landscape feature.
That approach can work for garden gates, decorative fence panels, mailbox columns, driveway entrances, or other masonry features.
The problem is that the drawing makes several project-specific measurements look universal. Footing depth, footing width, reinforcement, column spacing, veneer attachment, and gate loads all change from one project to another.
FarmSolo Tip: Use the photo for proportions and landscaping inspiration. Use the actual site conditions, local requirements, fence system, and masonry design for the construction details.
9 Things to Plan Before Building a Stone Column
01 • STRUCTURE
Decide What the Column Needs to Support
Start with the job, not the stone style. A decorative garden pillar has different structural demands from a column supporting a metal fence panel.
A driveway gate can be more demanding because the hinge column must resist the weight of the gate as well as movement and wind forces. Choose the gate or fence system before finalizing the masonry so reinforcement, hinge anchors, conduit, and other hidden connections can be planned while the core is still accessible.
02 • FOOTING DEPTH
Do Not Use 24 Inches as a Universal Depth
The inspiration drawing says to dig 24 inches down to undisturbed soil. Reaching suitable stable soil is important, but 24 inches is not a universal footing depth.
Depth can change with frost conditions, soil type, local code, column size, attached loads, and the rest of the foundation design. In freezing climates, a permanent exterior footing may need frost protection that extends deeper than the measurement shown in the image.
03 • FOUNDATION
Size the Footing for the Soil and Load
The footing spreads the column load into the ground. A small decorative pier and a tall gate-support column should not automatically use the same footing.
The Pinterest drawing also shows a 24-by-24-inch form. Treat that as an illustration only. The correct size depends on the column weight, loads, soil-bearing capacity, and foundation design.
04 • MASONRY CORE
Build a Stable Core Before Adding Stone
Concrete masonry units can create a straight, predictable core behind a stone finish. But simply stacking hollow blocks to the desired height does not tell us whether the finished column is structurally adequate.
Depending on the project, reinforcement and grouted cells may be part of the design. Wind, seismic conditions, column height, gate forces, and attached fence panels can all influence what the core needs.
05 • ALIGNMENT
Keep Every Face Square, Level, and Plumb
This is one lesson from the infographic worth keeping. Check the column repeatedly as it rises.
A small error in the first few courses becomes much easier to see near the top. Use a level, square, straight reference line, or plumb reference and check all four faces instead of looking at only one side.
06 • COLUMN SPACING
Do Not Treat 10–14 Feet as a Universal Rule
The drawing suggests placing fence columns 10 to 14 feet apart. That may suit one particular fence, but column spacing should follow the actual panel, rails, gate opening, support method, and wind exposure.
A lightweight open metal fence behaves differently from a tall solid privacy panel. Design the spacing around the fence instead of forcing the fence to match a social-media number.
07 • STONE FINISH
Choose the Stone System Before Mixing Mortar
Natural full-depth stone, natural thin stone, and manufactured stone veneer are not installed exactly the same way.
Thin adhered veneer depends on the correct substrate preparation, mortar, clearances, movement details, and moisture management. Full-depth masonry can require different support and anchorage.
Follow the installation instructions for the exact stone product instead of combining details from unrelated projects.
08 • CONNECTIONS
Install Gate and Fence Connections Before the Veneer
Once the stone finish is complete, reaching the structural core becomes much harder.
Plan hinge anchors, fence brackets, conduit, lighting wires, intercom wiring, address signs, and other attachments while the core remains accessible. Heavy gate loads should transfer into suitable structural material—not just into decorative veneer or mortar joints.
09 • WEATHER PROTECTION
Finish the Column With a Proper Cap
A cap gives the column a finished appearance, but it also has an important practical job: moving rainwater away from the top of the masonry.
A useful exterior cap normally projects beyond the faces of the column and is made from material suitable for the local weather. In freeze-thaw climates, water management becomes especially important.
Pinterest Diagram vs. a Real Stone Column
| Pinterest idea | What to do in a real project |
|---|---|
| Dig 24 inches | Determine footing depth from soil, frost conditions, loads, and local requirements. |
| Use a 24 × 24-inch base | Size the footing for the column weight and allowable soil pressure. |
| Stack concrete blocks | Use a properly designed core, including reinforcement or grout where required. |
| Space columns 10–14 feet | Match spacing to the actual fence, gate, rails, and wind exposure. |
| Add rubble stone in mortar | Use the installation system appropriate for the exact natural or manufactured stone. |
| Add a top slab | Use a durable cap detailed to shed water away from the masonry. |
A Better Order for the Project
Fence or gate → site conditions → foundation → structural core → hidden connections → stone veneer → cap → landscaping.
Following that order is much easier than finishing the stone first and later discovering that a hinge, conduit, footing, or anchor needs to be changed.
Natural Stone vs. Manufactured Stone Veneer
| Material | Why people choose it | What to plan for |
|---|---|---|
| Full-depth natural stone | Authentic depth, texture, and substantial appearance | Weight, support, masonry skill, and anchorage |
| Natural thin stone | Real stone with less weight | Correct adhered veneer substrate and mortar system |
| Manufactured stone veneer | Consistent shapes, corners, and lighter weight | Manufacturer instructions, mortar, clearances, and moisture details |
| Brick finish | Traditional and orderly appearance | Different bond and masonry detailing from thin stone |
Can Stone Veneer Go Directly Over Concrete Block?
Some adhered stone systems can be installed directly over suitable concrete masonry, but the condition of the block surface matters.
The substrate should be suitable for the specified installation system and free from materials that prevent a reliable bond, such as dirt, incompatible coatings, release agents, or other contaminants.
If the block surface does not meet the stone manufacturer’s requirements, another approved preparation method may be necessary. The fact that mortar temporarily sticks to a surface does not prove the complete exterior installation is correct.
Design note: If you like decorative masonry, FarmSolo’s Basket Weave Brick Wall guide shows another way to combine masonry, garden boundaries, and visual interest. The stone-column project is different structurally, but both benefit from planning the foundation before focusing on the visible pattern.
Stone Columns for Driveway Gates Need Extra Planning
A driveway gate creates a more demanding project than a decorative fence panel.
The hinge side may have to resist the gate’s weight, repeated movement, wind, and forces created as the gate opens and closes. Automated gates can add electrical conduit, equipment, safety devices, and additional connection details.
Plan the foundation, reinforcement, hinge support, gate operator, wiring, and final column size together. Do not expect thin stone veneer or short fasteners in mortar joints to carry a heavy gate.
What About Frost Heave?
In freezing climates, moisture in the soil can freeze and contribute to ground movement. A rigid masonry column does not tolerate uneven movement very well.
Possible results include leaning, cracks in mortar or veneer, displaced caps, and gate openings that no longer line up properly.
That is another reason not to copy one footing depth from a diagram used in an unknown climate.
Keep Water Away From the Base
Water management matters above and below the column.
Grade nearby soil or paving so water does not constantly collect against the masonry. Avoid directing irrigation spray at the stone every day, and follow the veneer manufacturer’s required clearance from soil or paved surfaces.
Do not bury the bottom of thin adhered stone veneer in damp garden soil simply to hide the edge.
Common Stone Column Mistakes
- Copying the 24-inch footing depth. Foundation depth depends on the real site.
- Using the same footing size everywhere. Loads and soil conditions matter.
- Stacking hollow blocks without structural planning. Decorative stone does not strengthen an inadequate core.
- Choosing the gate after the column is finished. Anchors and hinge locations should be planned first.
- Using 10–14 feet as automatic fence spacing. Follow the actual fence or gate system.
- Using the wrong mortar or substrate. Match the installation to the exact stone product.
- Ignoring alignment during construction. Check plumb and square continuously.
- Leaving the top exposed. A suitable cap helps manage rainwater.
- Allowing irrigation and soil moisture to soak the base. Good drainage helps protect the finished assembly.
Stone Column FAQ
How deep should a stone column footing be?
There is no universal depth. Soil, frost conditions, column size, attached loads, and local requirements all affect the foundation design.
Can you build a stone column with concrete blocks?
Yes, a properly designed concrete masonry core can be used behind a stone finish. Reinforcement, grout, footing, height, and connections should match the actual loads.
Can stone veneer go directly over concrete block?
Some adhered stone systems can be installed over suitable concrete masonry. The block surface and mortar system still need to meet the requirements for the specific veneer.
Do stone columns need rebar?
Many structural masonry columns use reinforcement, but the amount and arrangement depend on height, loads, wind, seismic conditions, core design, and local requirements.
How far apart should stone fence columns be?
Match spacing to the actual fence panels, rails, gate opening, wind exposure, and support system. The 10–14-foot spacing in the inspiration diagram is not a general rule.
Can a stone column support a driveway gate?
Yes, when the footing, structural core, reinforcement, hinge anchorage, and gate system are designed for the loads involved. The decorative veneer itself should not carry the gate.
Why does the top need a cap?
A projecting exterior cap helps move rainwater away from the top and faces of the masonry while also giving the column a more finished appearance.
Build the Structure First. Make It Beautiful Second.
The Pinterest idea is useful because it shows how a plain masonry core can become an attractive stone entrance. The measurements are the part that should not be copied blindly.
Choose the fence or gate first. Understand the soil and frost conditions. Build the correct foundation and structural core. Plan the hidden connections. Then add the stone, cap, and landscaping that give the finished column its character.
That order creates a column that does more than look good in a photo—it gives the masonry a much better chance of staying straight, dry, and useful for years.