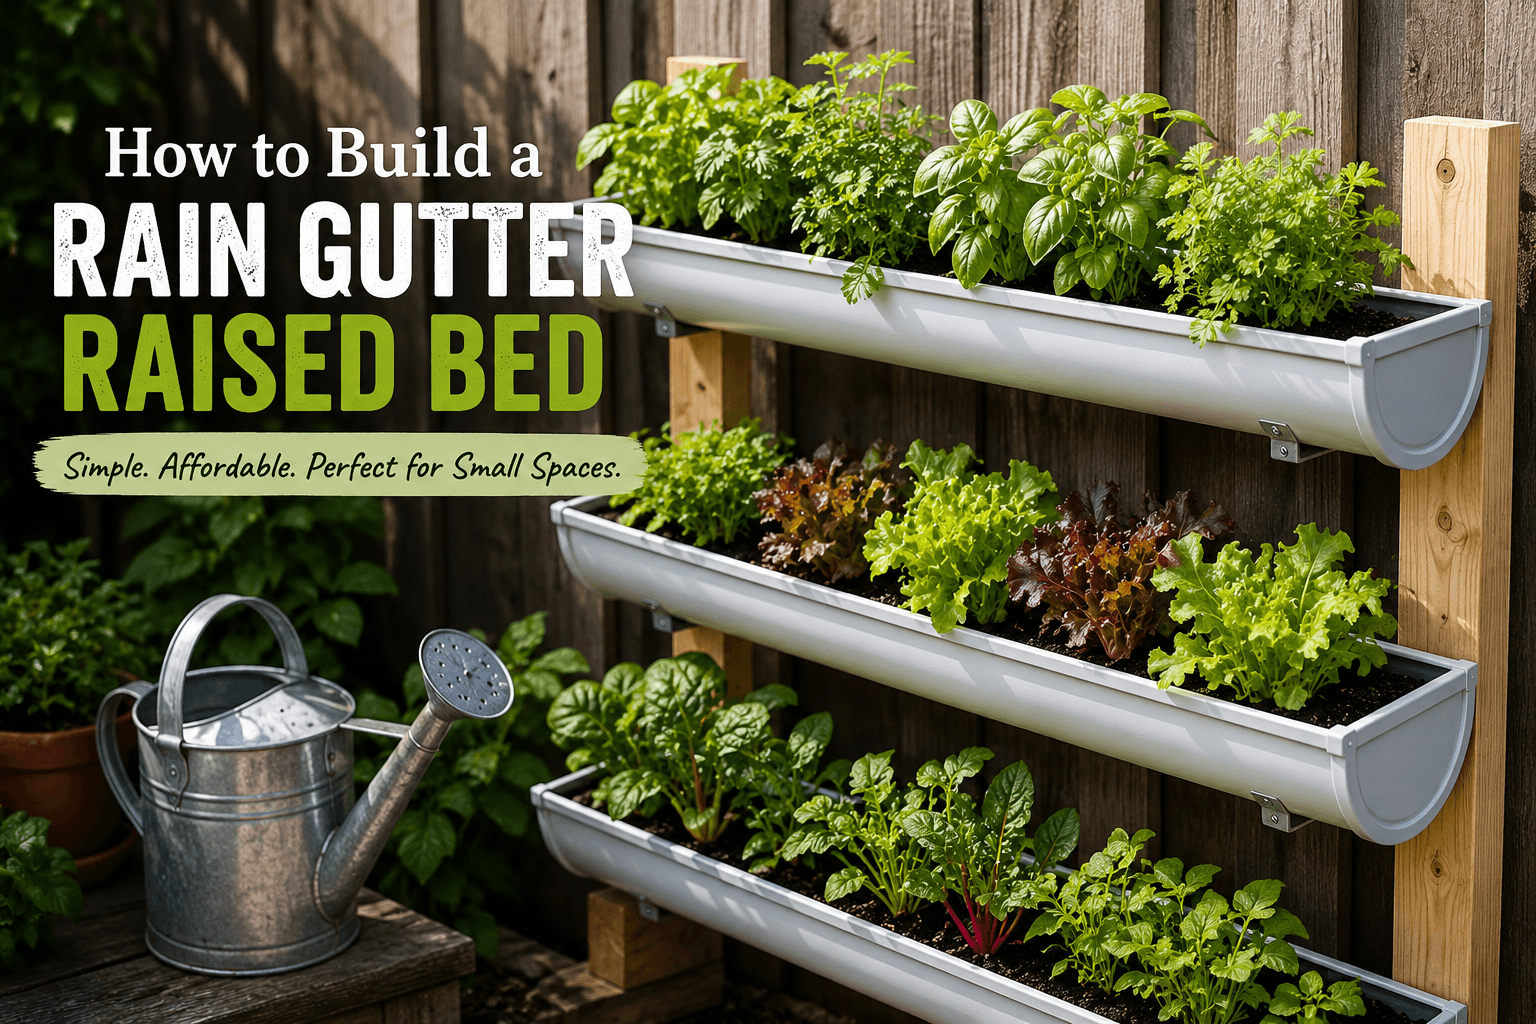
r Rais
Rain Gutter Raised Bed .The first time I saw someone growing vegetables in an old rain gutter, I honestly thought, “Well, that’s either a brilliant idea or a terrible one.”
I wasn’t sure which.
So, of course, I had to try it.
I had a spare section of rain gutter sitting around after replacing part of the guttering on the house. Instead of throwing it away, I started thinking about using it as a little garden bed.
My first attempt wasn’t pretty.
I put the gutter too low, forgot about drainage, and planted way too many things in it. A few weeks later, I had a crowded mess of plants fighting over the same little bit of soil.
You’re gonna laugh, but I actually thought adding more water would fix it.
It didn’t.
After a few more tries, I finally figured out what makes a rain gutter raised bed useful and what mistakes can make it more trouble than it’s worth.
If you have a small backyard, patio, balcony, fence, or even just a sunny wall, this can be a really handy way to grow certain vegetables without needing a big garden.
So lemme show you how I build mine now.
What Is a Rain Gutter Raised Bed?
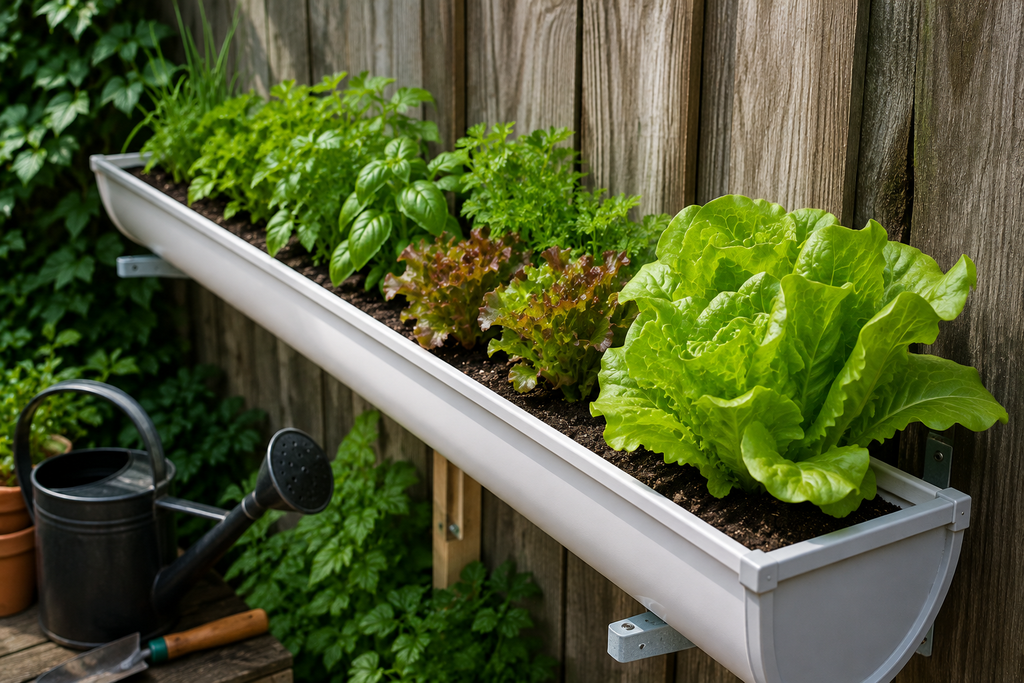
A rain gutter raised bed is basically a section of guttering turned into a long, narrow planter.
Instead of letting rainwater run through the gutter, you fill the gutter with a suitable growing medium and use it to grow plants.
They’re especially useful when you don’t have much ground space.
Think of it as a very long container garden.
You can attach one to a sturdy fence, mount it on brackets, or build a simple freestanding frame.
I’ve seen people make entire rows of them.
But I recommend starting with one.
Trust me on this.
It’s much easier to figure out what works when you’re only dealing with one gutter.
Why I Like Growing in Rain Gutters
The biggest reason is space.
Not everybody has a huge backyard.
When I was doing more urban gardening, every square foot mattered.
I had containers on the patio, pots beside the shed, herbs near the kitchen, and vegetables squeezed into whatever sunny spot I could find.
A rain gutter gave me another growing area without taking up much ground space.
They’re also convenient because you can raise them off the ground.
That means less bending over.
And if you have problems with certain ground pests, lifting plants away from the soil can sometimes make things easier to manage.
It isn’t a magic pest solution, but I’ll take any little advantage I can get.
What You’ll Need
You don’t need a fancy workshop for this project.
Here’s what I’d gather:
- A suitable rain gutter
- End caps
- Sturdy brackets or a support frame
- Screws appropriate for your mounting surface
- Drill
- Drill bit
- Potting mix or another suitable growing medium
- Compost
- Drainage holes
- Plants or seeds
- Optional: mulch or a thin layer of suitable material
If you’re using an old gutter, inspect it carefully first.
I wouldn’t use something that’s cracked, brittle, badly corroded, or contaminated with unknown chemicals.
And don’t assume every old gutter is automatically suitable for growing food.
For edible crops, I prefer materials intended for gardening or food-growing applications.
Step 1: Choose the Right Location
This is probably more important than the gutter itself.
Most vegetables need plenty of sunlight.
So before you drill anything into a fence, watch the area for a day.
Where does the sun hit?
Does the fence shade the gutter in the afternoon?
Does a nearby tree block the light?
I made this mistake once.
The spot looked sunny in the morning, so I thought it was perfect.
By lunchtime, the gutter was sitting in shade.
The plants survived, but they certainly weren’t impressed.
If possible, choose a location with good light for the vegetables you want to grow.
Step 2: Decide How You’ll Support the Gutter
A gutter full of wet growing medium gets surprisingly heavy.
This is where I don’t recommend improvising too much.
You need a strong support system.
You can mount the gutter to a sturdy wall or fence using appropriate brackets, or build a freestanding wooden frame.
Personally, I like a freestanding frame when I have the space.
Why?
Because I don’t have to drill a bunch of holes into the fence.
It also makes it easier to move the garden later.
If you’re attaching it to a fence, make sure the fence itself is strong enough to handle the weight.
Don’t hang a heavy planter from a flimsy panel and hope for the best.
Step 3: Cut the Gutter to Length
You can use one long section or several shorter sections.
For a first project, I’d actually recommend a shorter section.
Something manageable.
You don’t need to build a 20-foot monster on your first try.
Measure the space and cut the gutter accordingly.
Clean the cut edges carefully.
You don’t want sharp edges sticking out where you or the kids can catch a hand on them.
Step 4: Install the End Caps
The ends need to be closed so your growing medium doesn’t fall out.
Most gutter systems have matching end caps that make this pretty easy.
Attach them securely.
Check for gaps.
You don’t want your potting mix slowly escaping every time you water.
I learned this one when I found a pile of soil underneath the gutter.
At first I thought something had dug into it.
Nope.
It was my terrible end-cap job.
Step 5: Drill Drainage Holes
Don’t skip this step.
Your plants need drainage.
A rain gutter is designed to move water, but once you’ve turned it into a planter, you’re changing its job completely.
Drill several drainage holes along the bottom.
You don’t want water sitting in the gutter after every rainstorm.
That’s how you end up with soggy roots, root problems, and a very unhappy garden.
I used to think plants loved water.
They do.
But they don’t love sitting in a bathtub of water with nowhere to go.
Good drainage is one of the most important parts of a successful rain gutter raised bed.
Step 6: Choose the Right Growing Mix
Don’t fill the gutter with heavy garden soil from the backyard.
I’ve tried it.
It’s heavy, drains differently, and makes the whole structure much harder to support.
Instead, use a quality container-growing mix.
I like mixing a good potting mix with finished compost.
Something along the lines of:
- Quality potting mix
- Finished compost
- A suitable drainage amendment if needed
The exact mix depends on what you’re growing and your local conditions.
The main thing is that it should hold enough moisture for the plants while still draining well.
And please use finished compost.
Fresh compost can cause problems for young plants.
Step 7: Fill the Gutter
Fill the gutter almost to the top, leaving a little space below the rim.
Don’t pack the growing medium down like you’re building a road.
Keep it reasonably loose.
Water it lightly after filling.
You’ll probably notice the level drops as the mix settles.
That’s normal.
Add a little more if needed.
What Vegetables Grow Well in a Rain Gutter?
This is where you need to choose wisely.
A gutter is narrow and relatively shallow compared with a normal raised bed.
So I don’t use it for big root crops or giant plants.
Some of my favorites are:
Lettuce
Probably one of the easiest choices.
Lettuce has relatively shallow roots and works nicely in a narrow container.
You can plant several varieties along the gutter and harvest leaves as needed.
Spinach
Spinach can also work well, especially during cooler weather.
It’s another crop that doesn’t need a huge amount of root space.
Radishes
Small radishes are fun because they grow quickly.
Just choose varieties appropriate for shallow containers.
Green Onions
These are almost made for this kind of setup.
They’re compact, useful in the kitchen, and don’t take over the whole garden.
Herbs
This is one of my favorite uses.
Try herbs such as:
- Chives
- Parsley
- Cilantro
- Basil
- Thyme
Just pay attention to how large each plant gets.
Mint, for example, can become a little garden bully.
What I Wouldn’t Plant in a Rain Gutter
This is where I made some dumb choices.
I once planted a large vegetable in a narrow container because I figured, “Well, it’ll probably be fine.”
It wasn’t.
Big plants need more root space, support, and water.
I generally avoid using narrow rain gutters for:
- Large tomatoes
- Pumpkins
- Watermelons
- Large squash
- Large root vegetables
- Anything that needs deep soil
Could you experiment?
Sure.
That’s half the fun of gardening.
But if you’re trying to get reliable results, stick with smaller crops.
How Far Apart Should You Plant?
Don’t get too excited and plant everything close together.
I’ve done that more times than I’d like to admit.
Young seedlings always look tiny.
Then two weeks later they’re fighting each other.
Give plants the space recommended for the specific variety you’re growing.
In a gutter, I like to think about the mature size of the plant rather than how small it looks today.
That’s a little trick that saved me a lot of wasted seeds.
Watering a Rain Gutter Raised Bed
This is one area where container gardening can surprise you.
A narrow planter can dry out faster than a traditional garden bed, especially during hot weather.
Check the soil regularly.
Stick your finger into the growing medium.
If the top feels dry, check deeper before deciding whether it needs water.
Don’t water automatically just because it’s Tuesday.
That’s another mistake I made.
Weather matters.
Temperature matters.
Plant size matters.
Rain matters.
A small gutter sitting in full afternoon sun may need much more water than one sitting in partial shade.
Don’t Let the Gutter Overheat
This is something people sometimes forget.
A narrow container can heat up quickly during hot weather.
If you’re using a dark-colored gutter in direct summer sun, the growing medium may become very warm.
That can stress roots.
If you’re in a very hot climate, consider the location carefully.
Some afternoon shade can actually be helpful, depending on the vegetables you’re growing.
Gardening isn’t always about giving plants maximum sun.
Sometimes it’s about giving them the right amount of sun.
Add Mulch to Help With Moisture
A thin layer of suitable organic mulch can help slow evaporation.
I’ve used things like finely shredded leaves and other appropriate garden mulch.
Don’t pile it against delicate stems.
And don’t use moldy or contaminated material.
The goal is simply to keep the growing medium from drying out quite so quickly.
This can make a big difference during hot summer days.
My Biggest Rain Gutter Raised Bed Mistakes
I’ve learned most of this by messing things up.
Mistake #1: Not Enough Drainage
The first gutter I built held water way too long.
The plants looked terrible.
More drainage holes fixed most of the problem.
Mistake #2: Too Many Plants
I wanted a full-looking garden immediately.
Bad idea.
Give plants room to grow.
Mistake #3: Using Heavy Garden Soil
The gutter became ridiculously heavy.
Container mix was much easier to work with.
Mistake #4: Weak Supports
Don’t underestimate the weight.
Wet soil is heavy.
Make the support stronger than you think you need.
Mistake #5: Choosing the Wrong Plants
I tried growing things that simply needed more root space.
The plants didn’t care about my plans.
They just struggled.
Now I choose crops that naturally fit the container.
Can You Use a Rain Gutter Raised Bed on a Balcony?
Potentially, but be careful.
A balcony has weight limits.
Remember that a planter full of wet growing medium and water can become very heavy.
If you’re gardening on a balcony, check the building’s rules and structural limitations before installing anything substantial.
For renters, lightweight freestanding containers may also be easier than permanently attaching a gutter.
Urban homesteading is great.
Falling through your neighbor’s ceiling is not.
Can You Make a Vertical Rain Gutter Garden?
Absolutely.
This is where things get really interesting.
You can install several gutters at different heights on a strong frame.
For example:
Top gutter: herbs
Middle gutter: lettuce
Lower gutter: green onions and radishes
This gives you a kind of vertical garden without needing a traditional raised bed.
Just make sure the upper gutters don’t dump excess water directly into the lower ones unless you’ve designed the drainage that way.
You still want to control where the water goes.
How I Would Build One Today
If I were starting from scratch, I’d keep it simple.
I’d choose a sunny location.
I’d use a suitable gutter in good condition.
I’d install secure end caps.
I’d drill enough drainage holes.
I’d build a strong support frame.
I’d use quality container mix and finished compost.
Then I’d plant lettuce, green onions, herbs, and maybe some radishes.
Nothing crazy.
I’d watch it for a few weeks.
Then I’d adjust the watering, spacing, and location based on what the plants told me.
That’s something I’ve learned after more than a decade of growing things.
The garden usually tells you what’s wrong.
You just have to pay attention.
FAQ About Rain Gutter Raised Beds
Can I grow vegetables in a rain gutter?
Yes. Rain gutters can work well for shallow-rooted vegetables and herbs such as lettuce, spinach, green onions, radishes, chives, parsley, and basil.
Do rain gutter planters need drainage holes?
Yes. Proper drainage is essential. Without drainage holes, water can collect around the roots and cause problems.
Can I attach a rain gutter to a fence?
You can, provided the fence and mounting system are strong enough to support the weight of the filled planter. A gutter full of wet growing medium can be surprisingly heavy.
How often should I water a rain gutter raised bed?
There’s no single schedule. Check the growing medium regularly and adjust watering based on temperature, sunlight, rainfall, and the plants you’re growing. Narrow containers can dry out faster than larger garden beds.
Final Thoughts
I didn’t expect an old piece of rain gutter to become one of my favorite little gardening experiments.
But that’s homesteading for you.
Sometimes you start with something that was going to be thrown away and end up finding a useful new purpose for it.
A rain gutter raised bed won’t replace a big backyard garden.
It isn’t designed for giant crops.
But if you’re short on space, it can give you another place to grow fresh greens, herbs, onions, and small vegetables.
And for an urban homestead, patio garden, balcony, or small backyard, that can be pretty valuable.
Start with one gutter.
Don’t overcrowd it.
Give it good drainage.
Build strong supports.
Choose the right vegetables.
And don’t make my mistake of assuming a tiny gutter can handle a giant pumpkin.
It can’t.
Trust me, I tried.
If you’re building a rain gutter raised bed for the first time, keep it simple and let the garden teach you. That’s usually how I learn best anyway.